Create SAM pipeline
Preparation
In this step, we will create IAM roles for CodePipeline - Deploy stage and CodeBuild.
Warning The role is configured with minimal security, suitable only for a workshop environment.
-
Create CodePipeline - Deploy stage role.
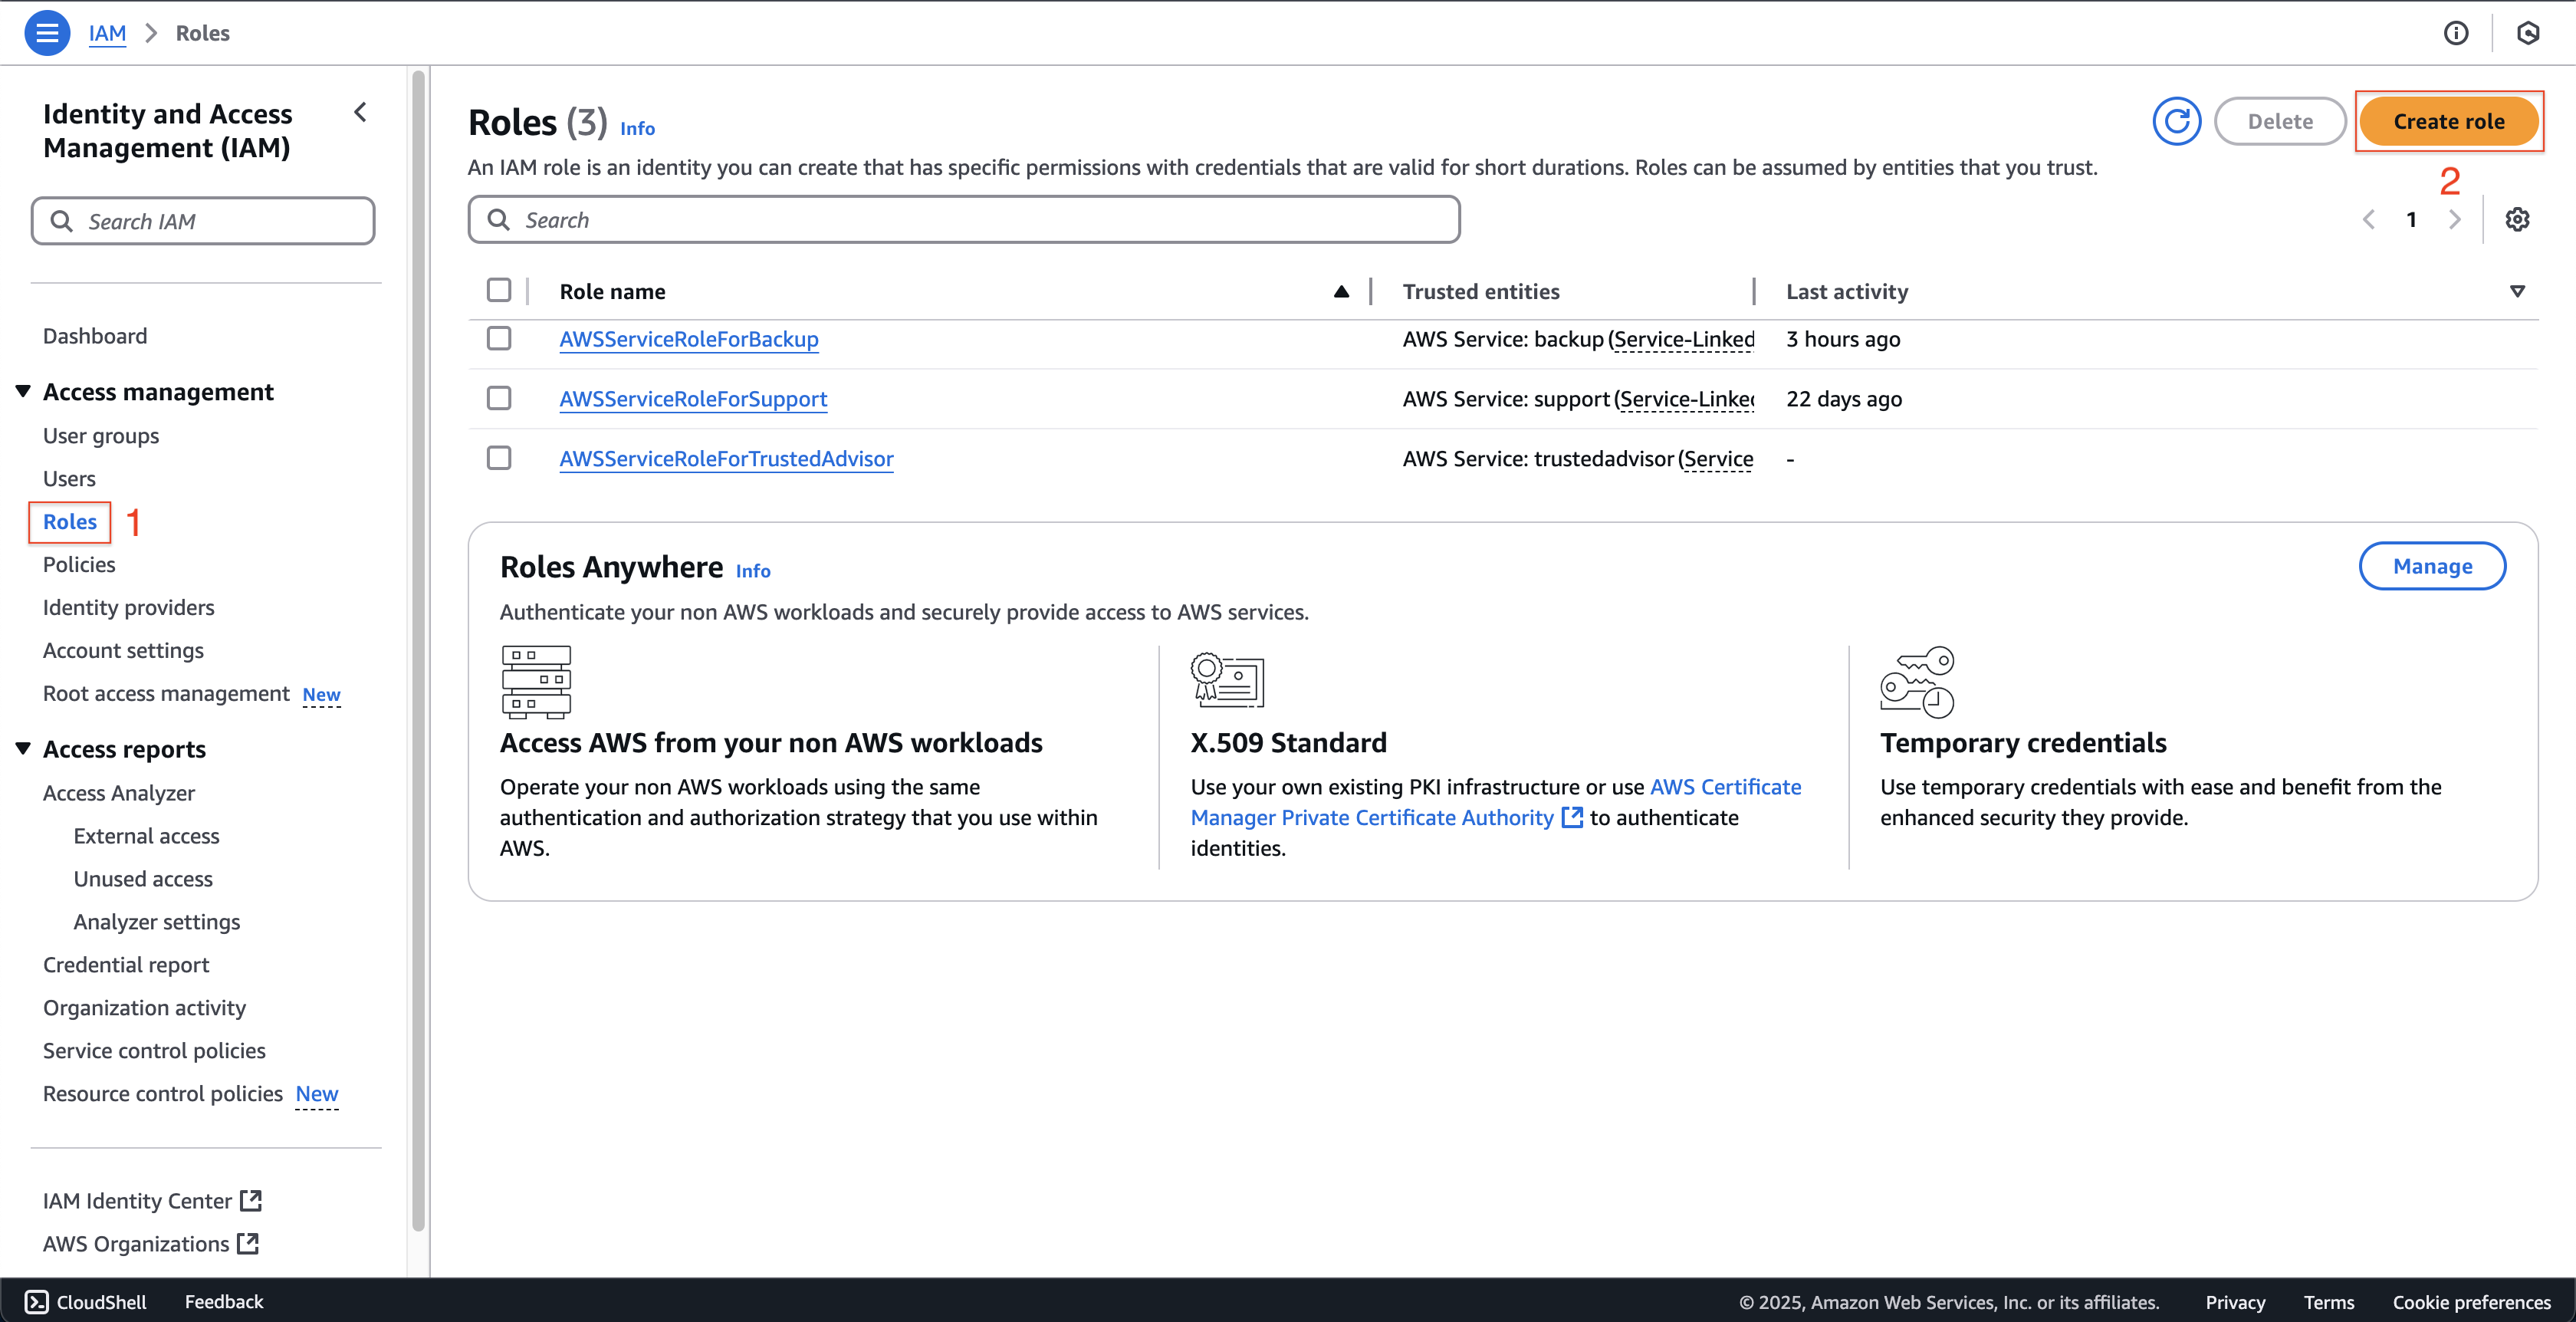
- Open AWS IAM console, then click Roles on the left menu.
- Click Create role button.
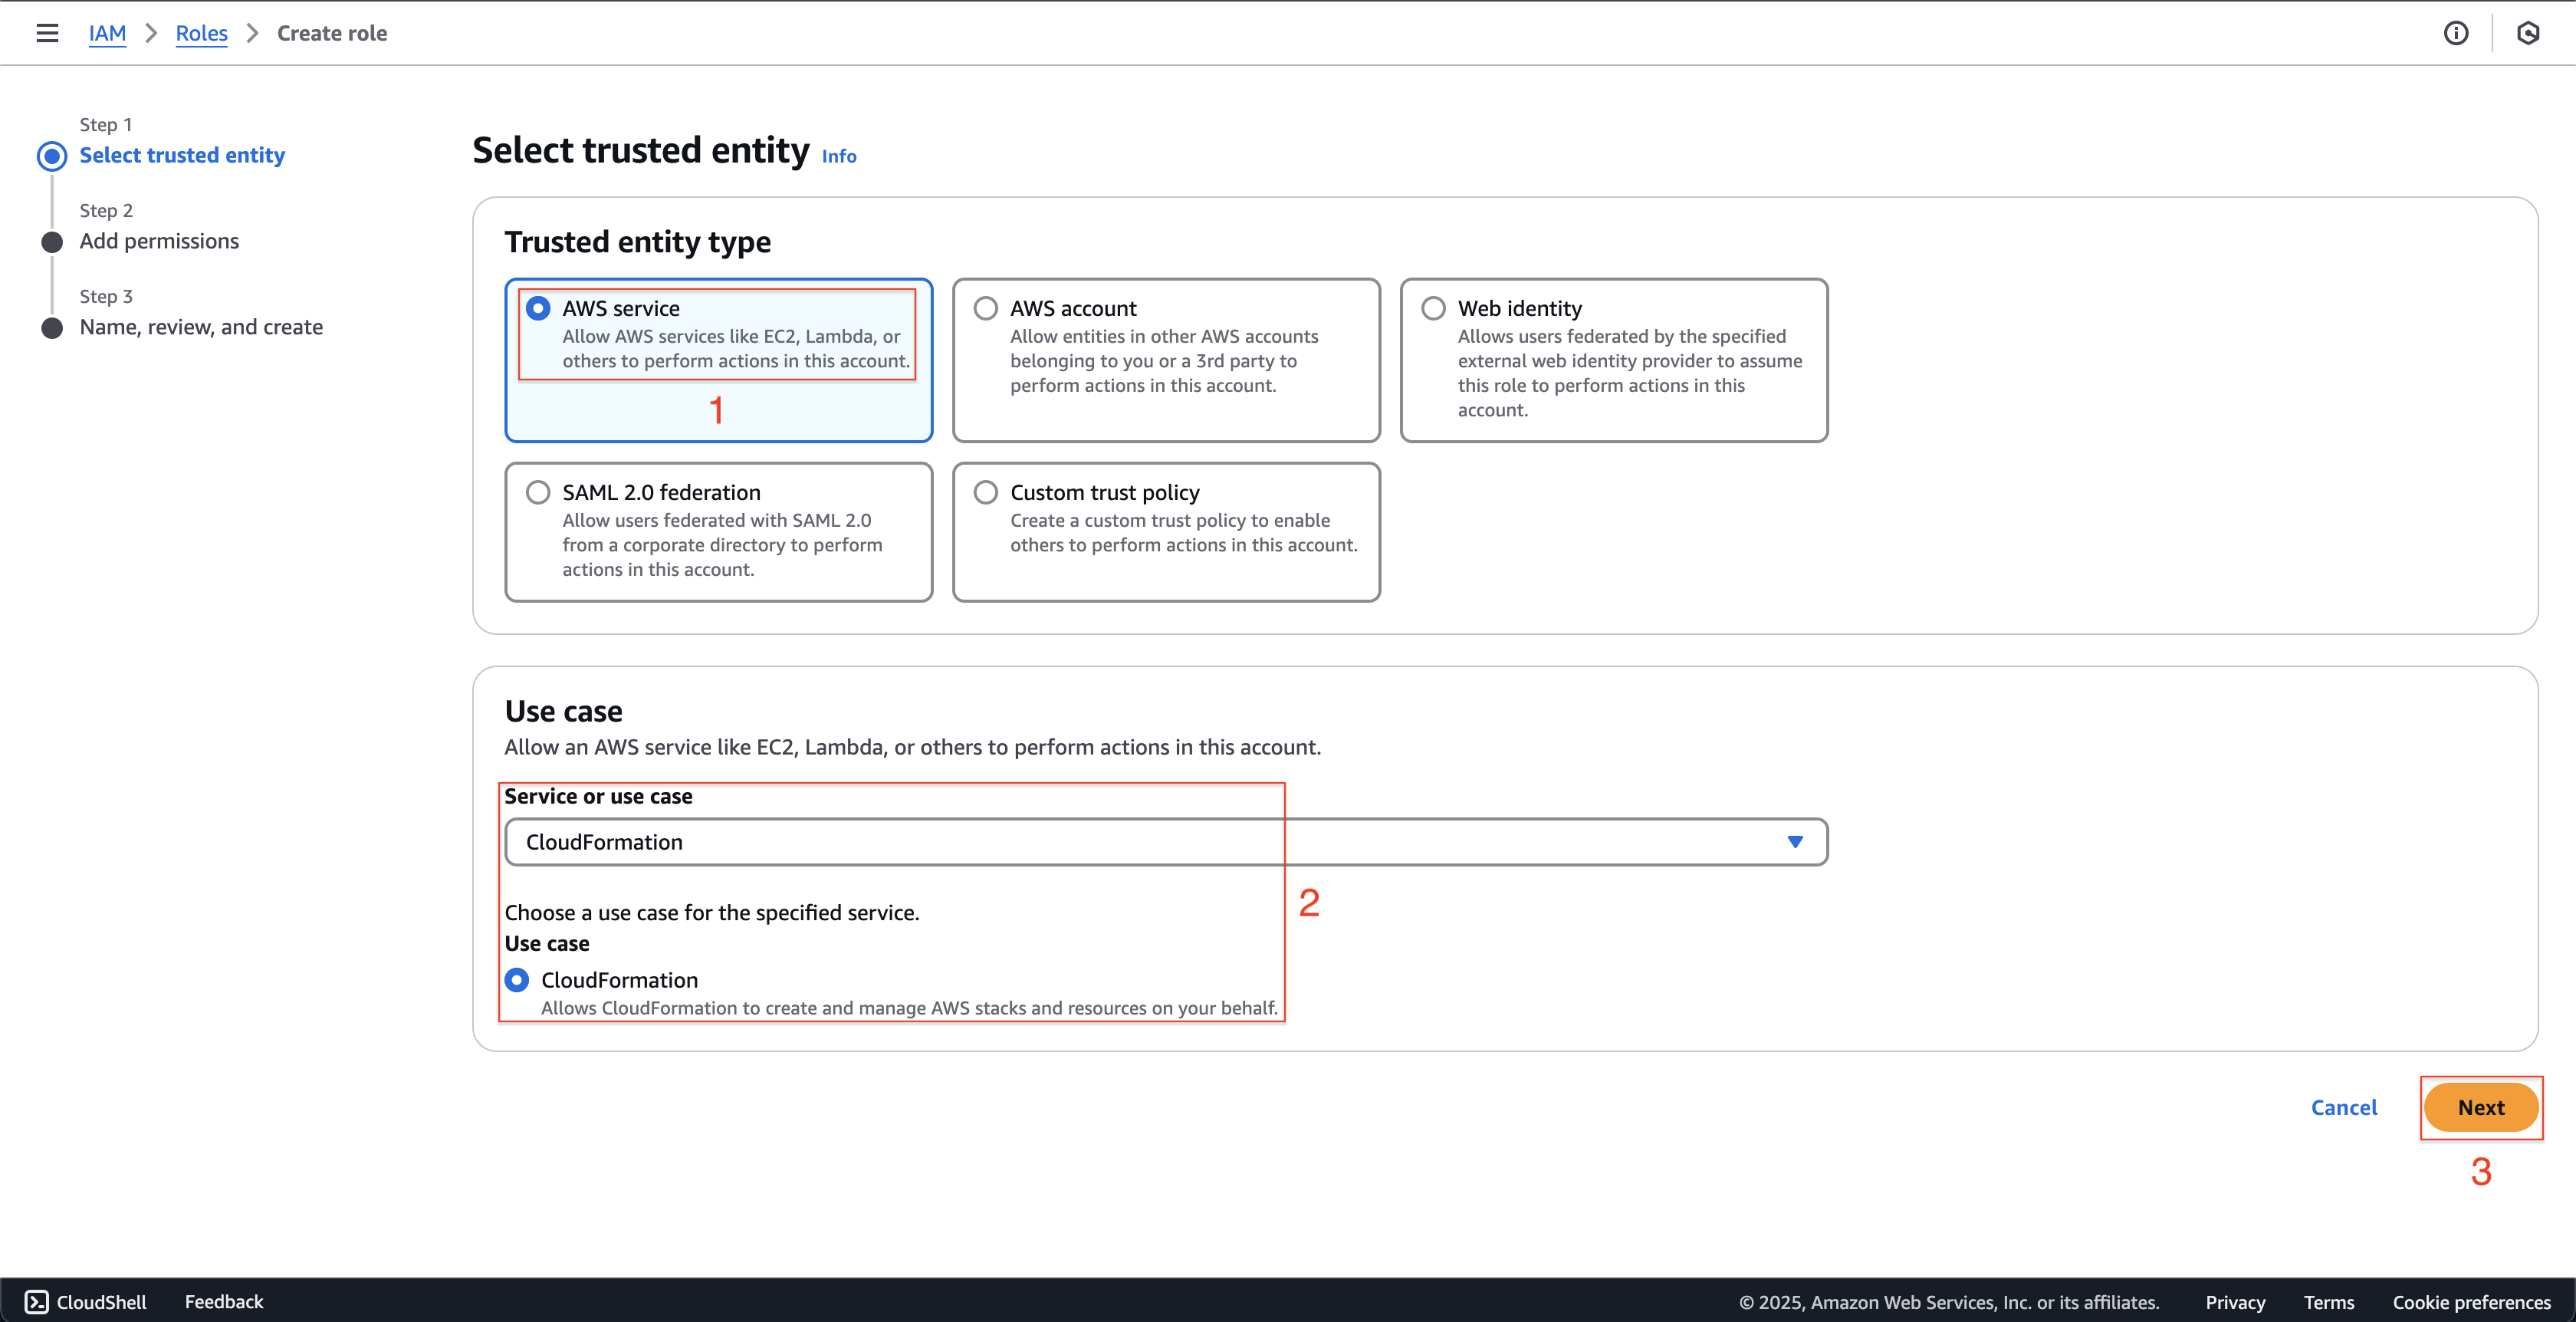
- At Step 1: Select trusted entity page.
- Choose AWS service at Trusted entity type.
- Enter
CloudFormationat Service or use case and choose CloudFormation at Use case. - Then click Next button.
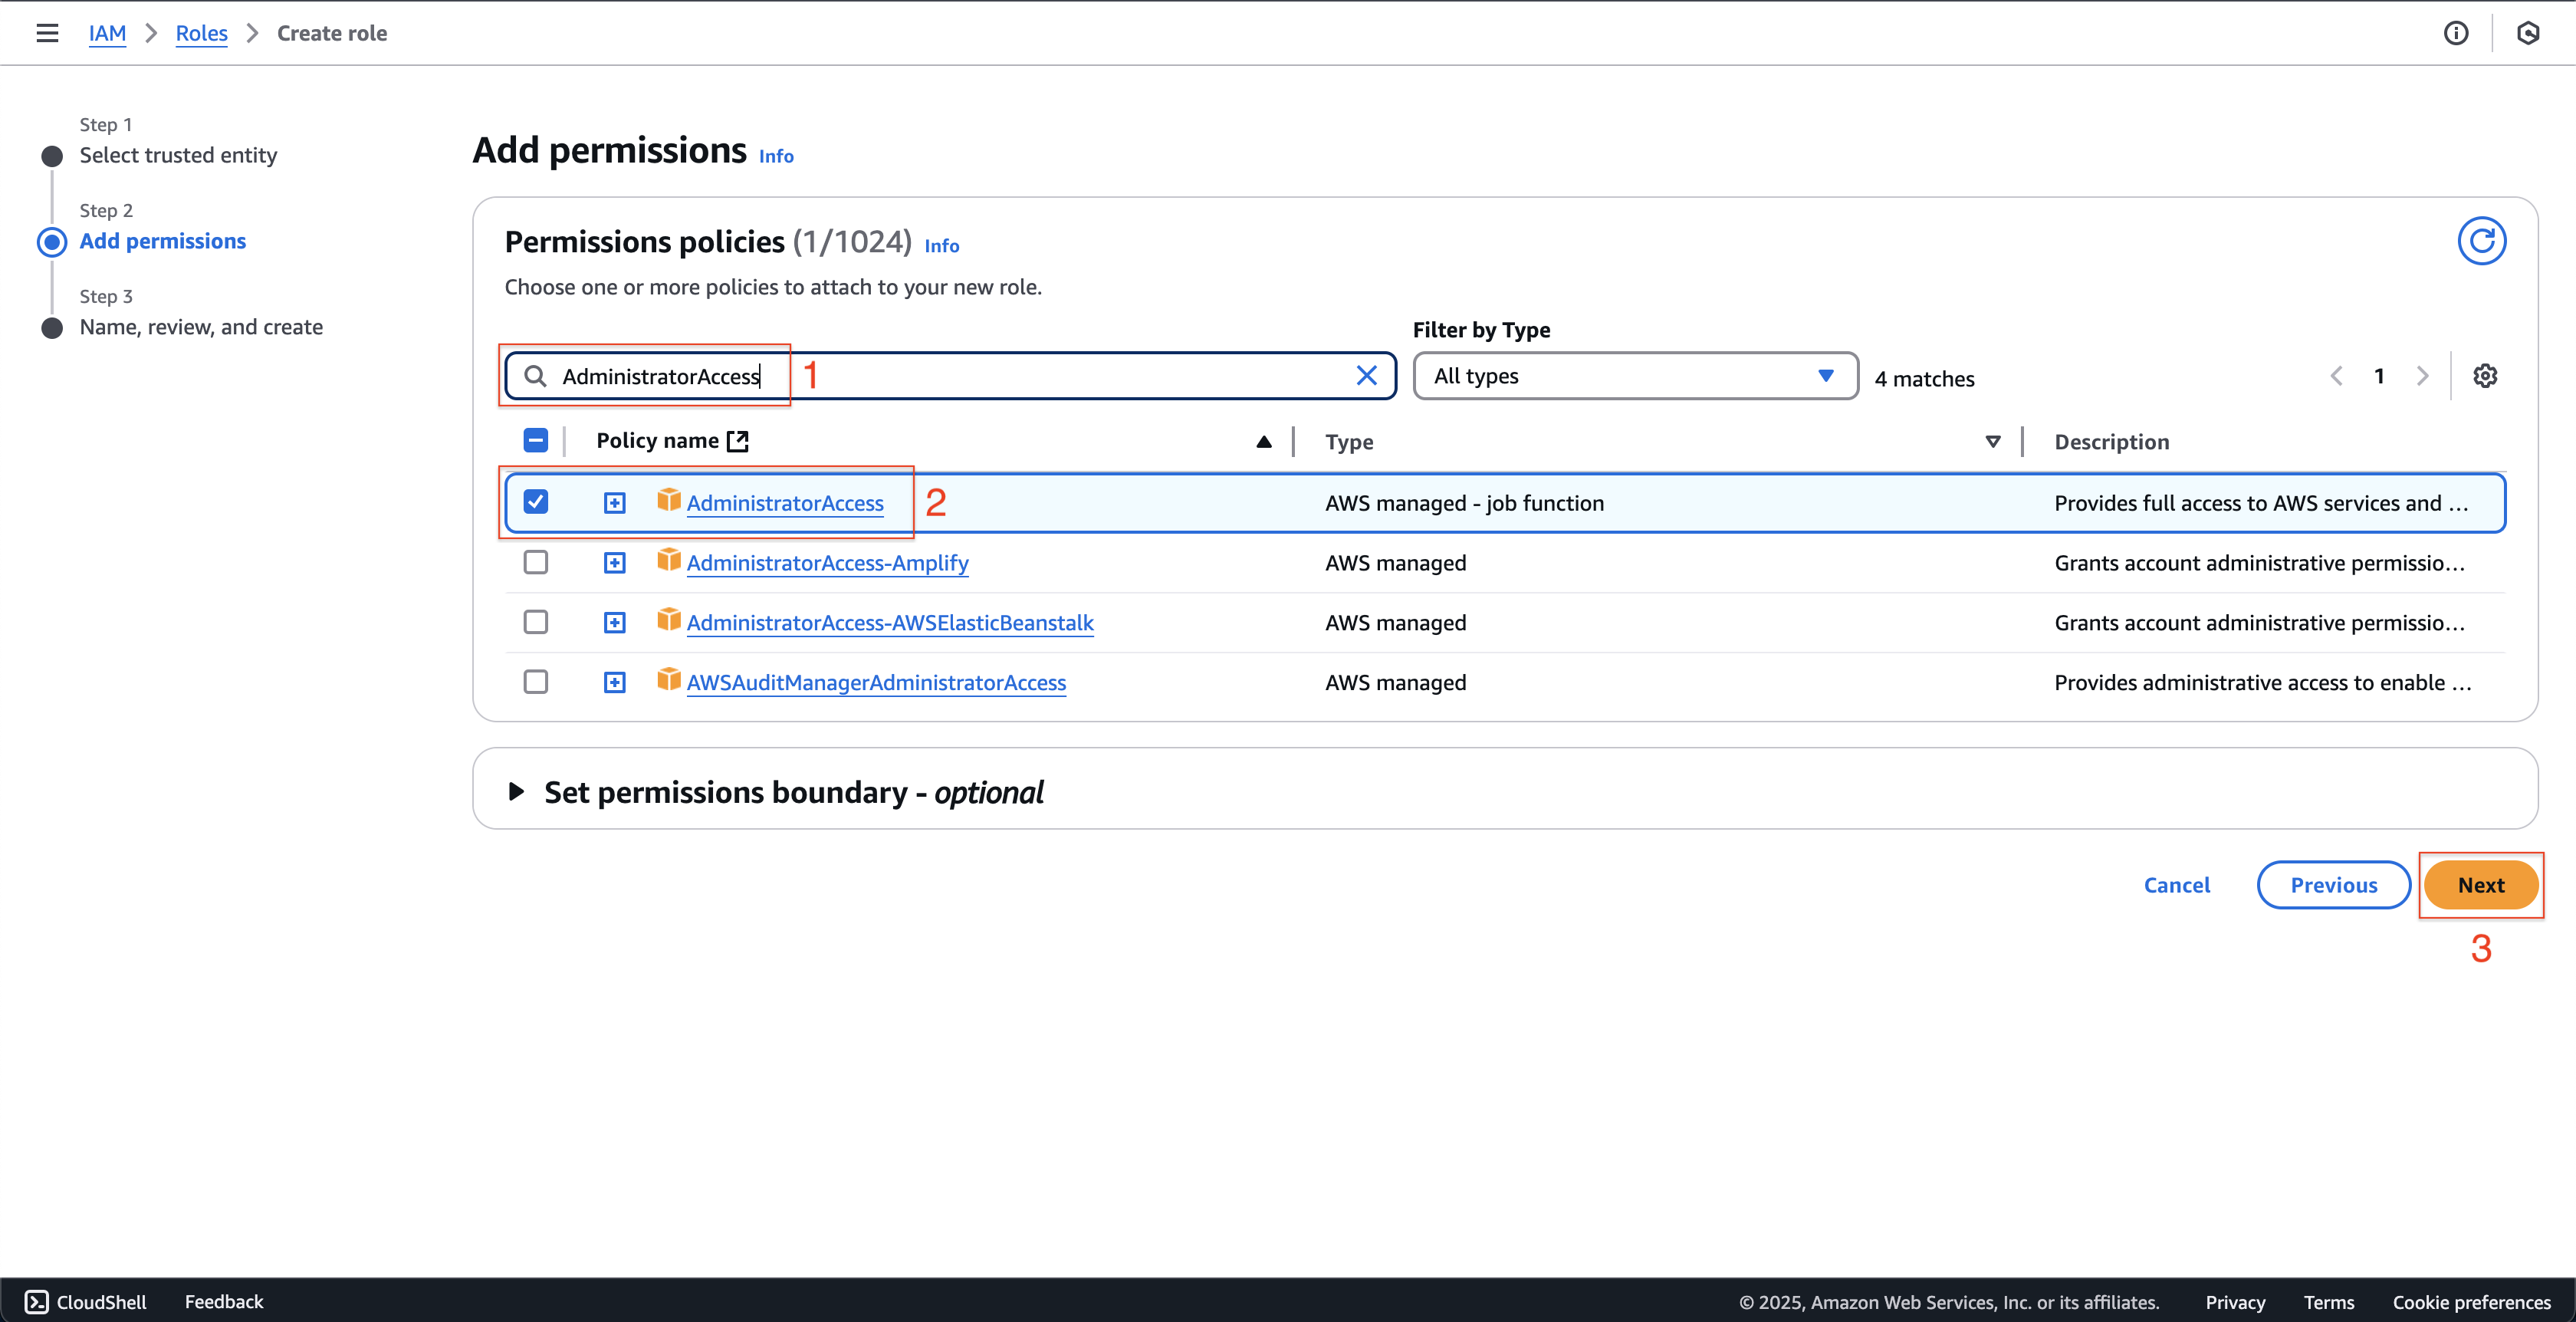
- At Step 2: Add permissions page.
- Enter
AdministratorAccessat Search box. - Choose AdministratorAccess policy.
- Then click Next button.
- Enter
- At Step 3: Name, review, and create page.
- Enter
fcjCodePipelineDeployStageRoleat Role name.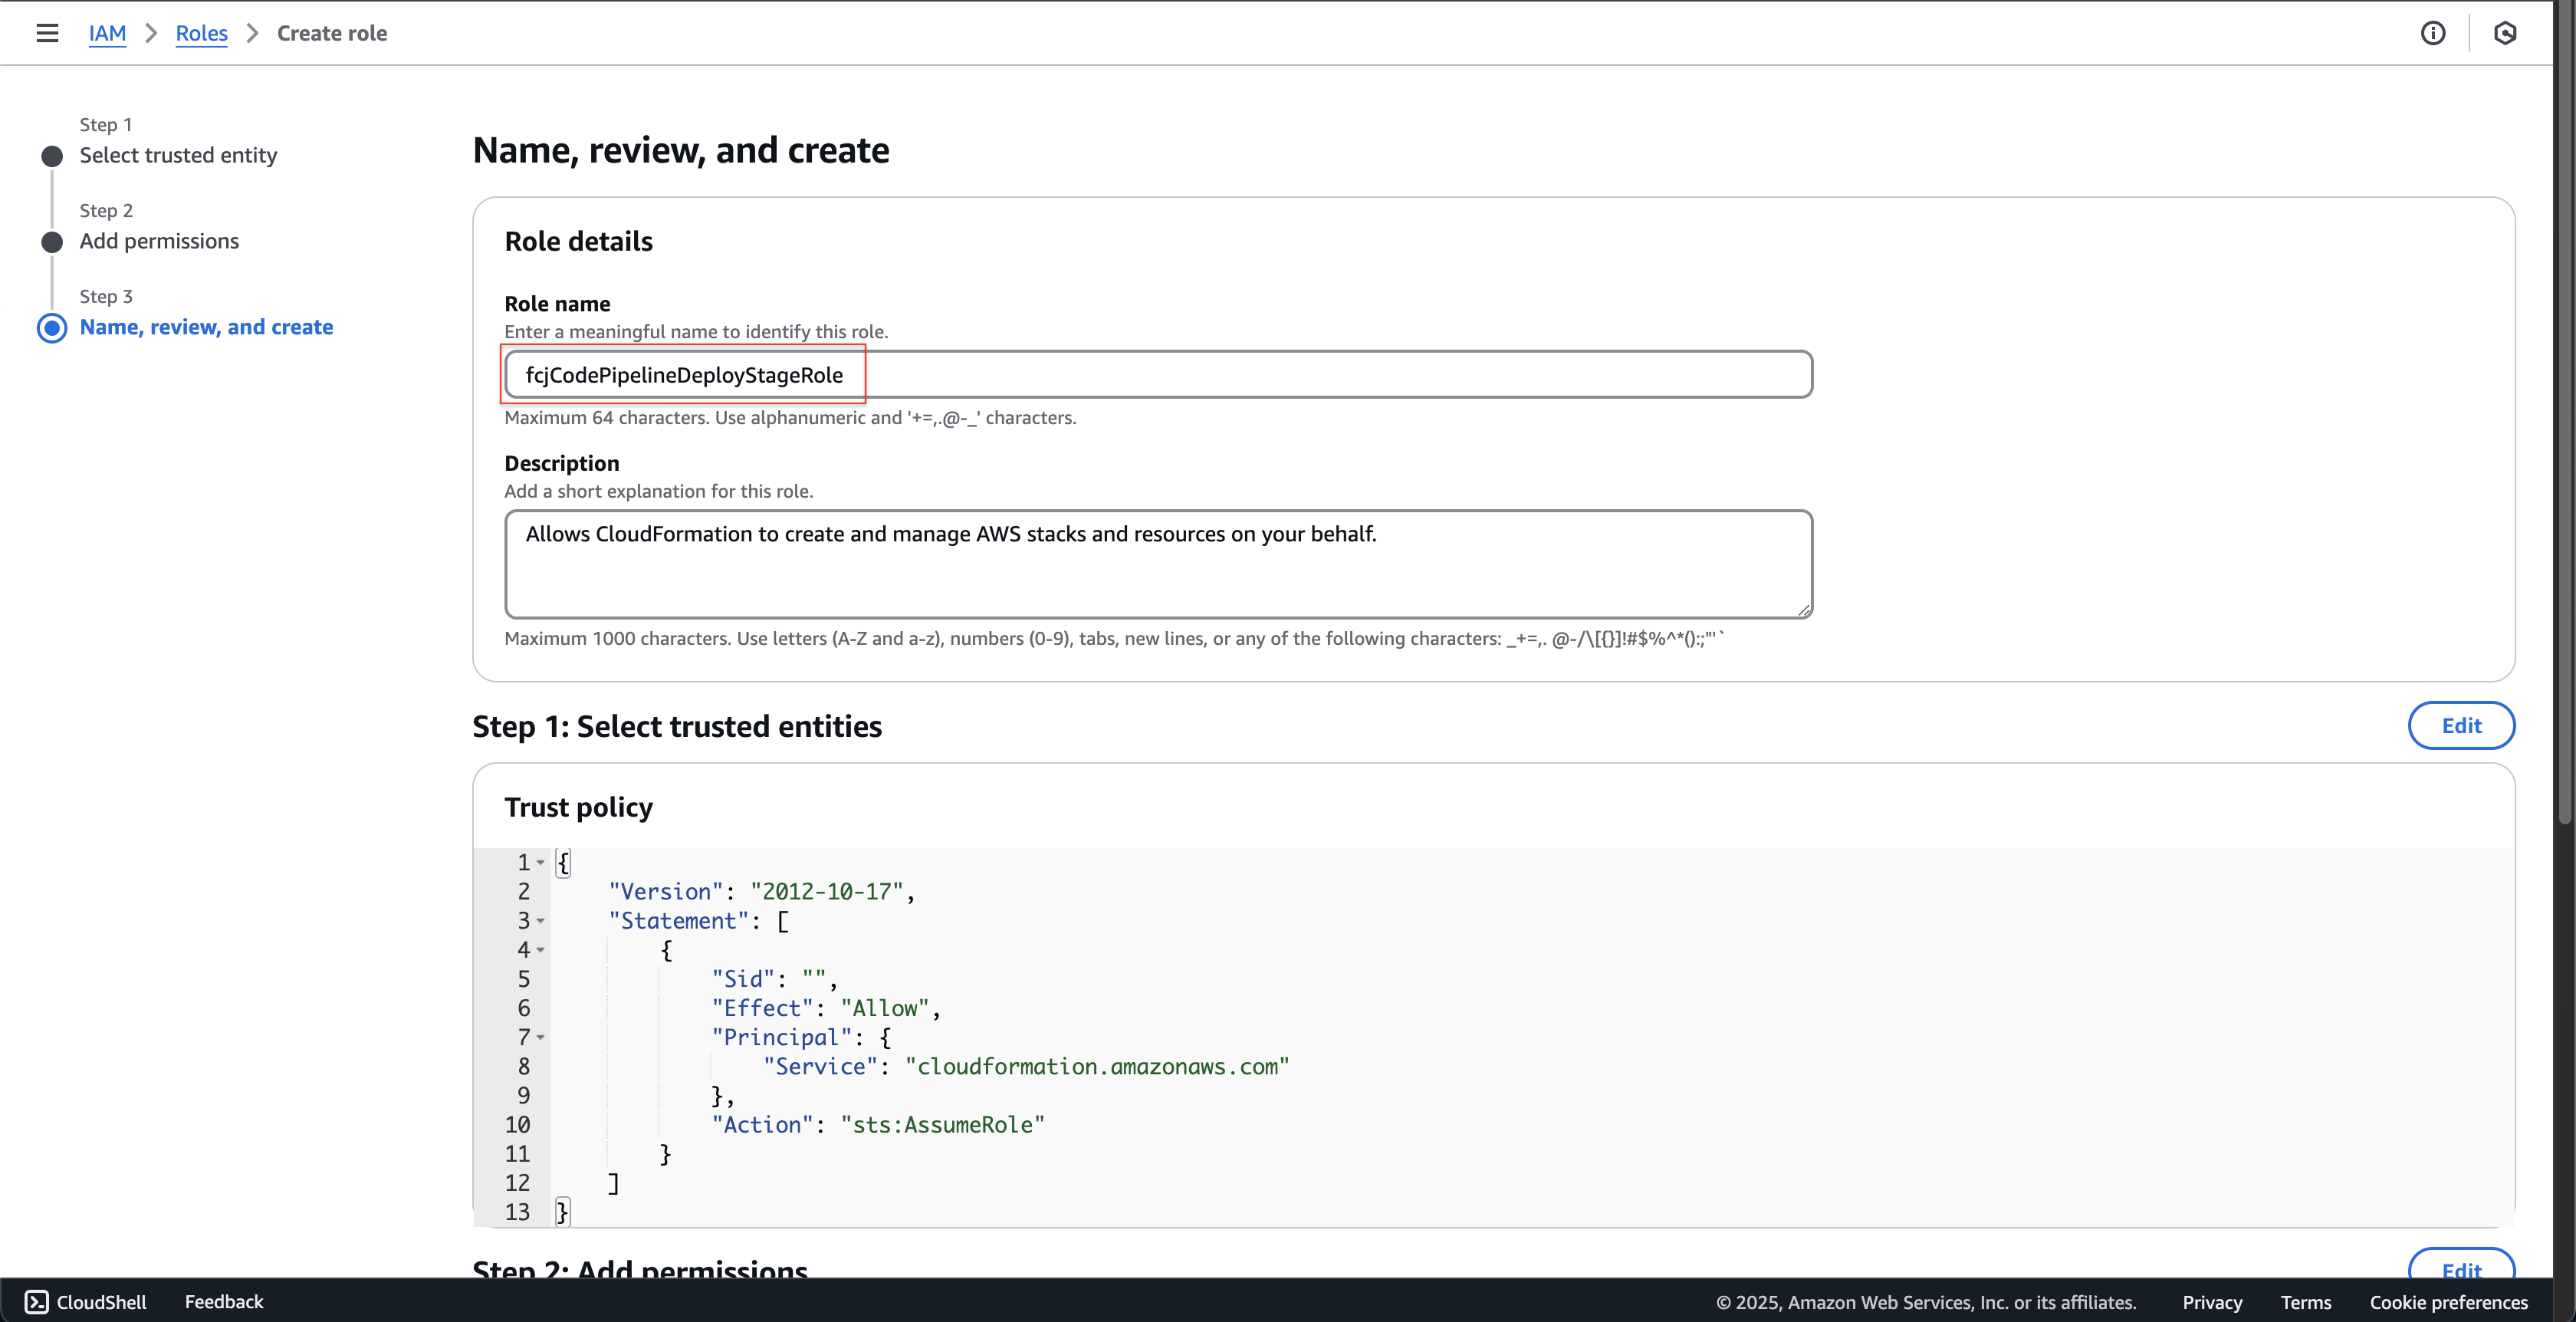
- Scroll down and click Create role button.

- Enter
-
Create CodeBuild role.
- Open AWS IAM console, then click Roles on the left menu.
- Click Create role button.
- At Step 1: Select trusted entity page.
- Choose AWS service at Trusted entity type.
- Enter
CodeBuildat Service or use case and choose CodeBuild at Use case. - Then click Next button.
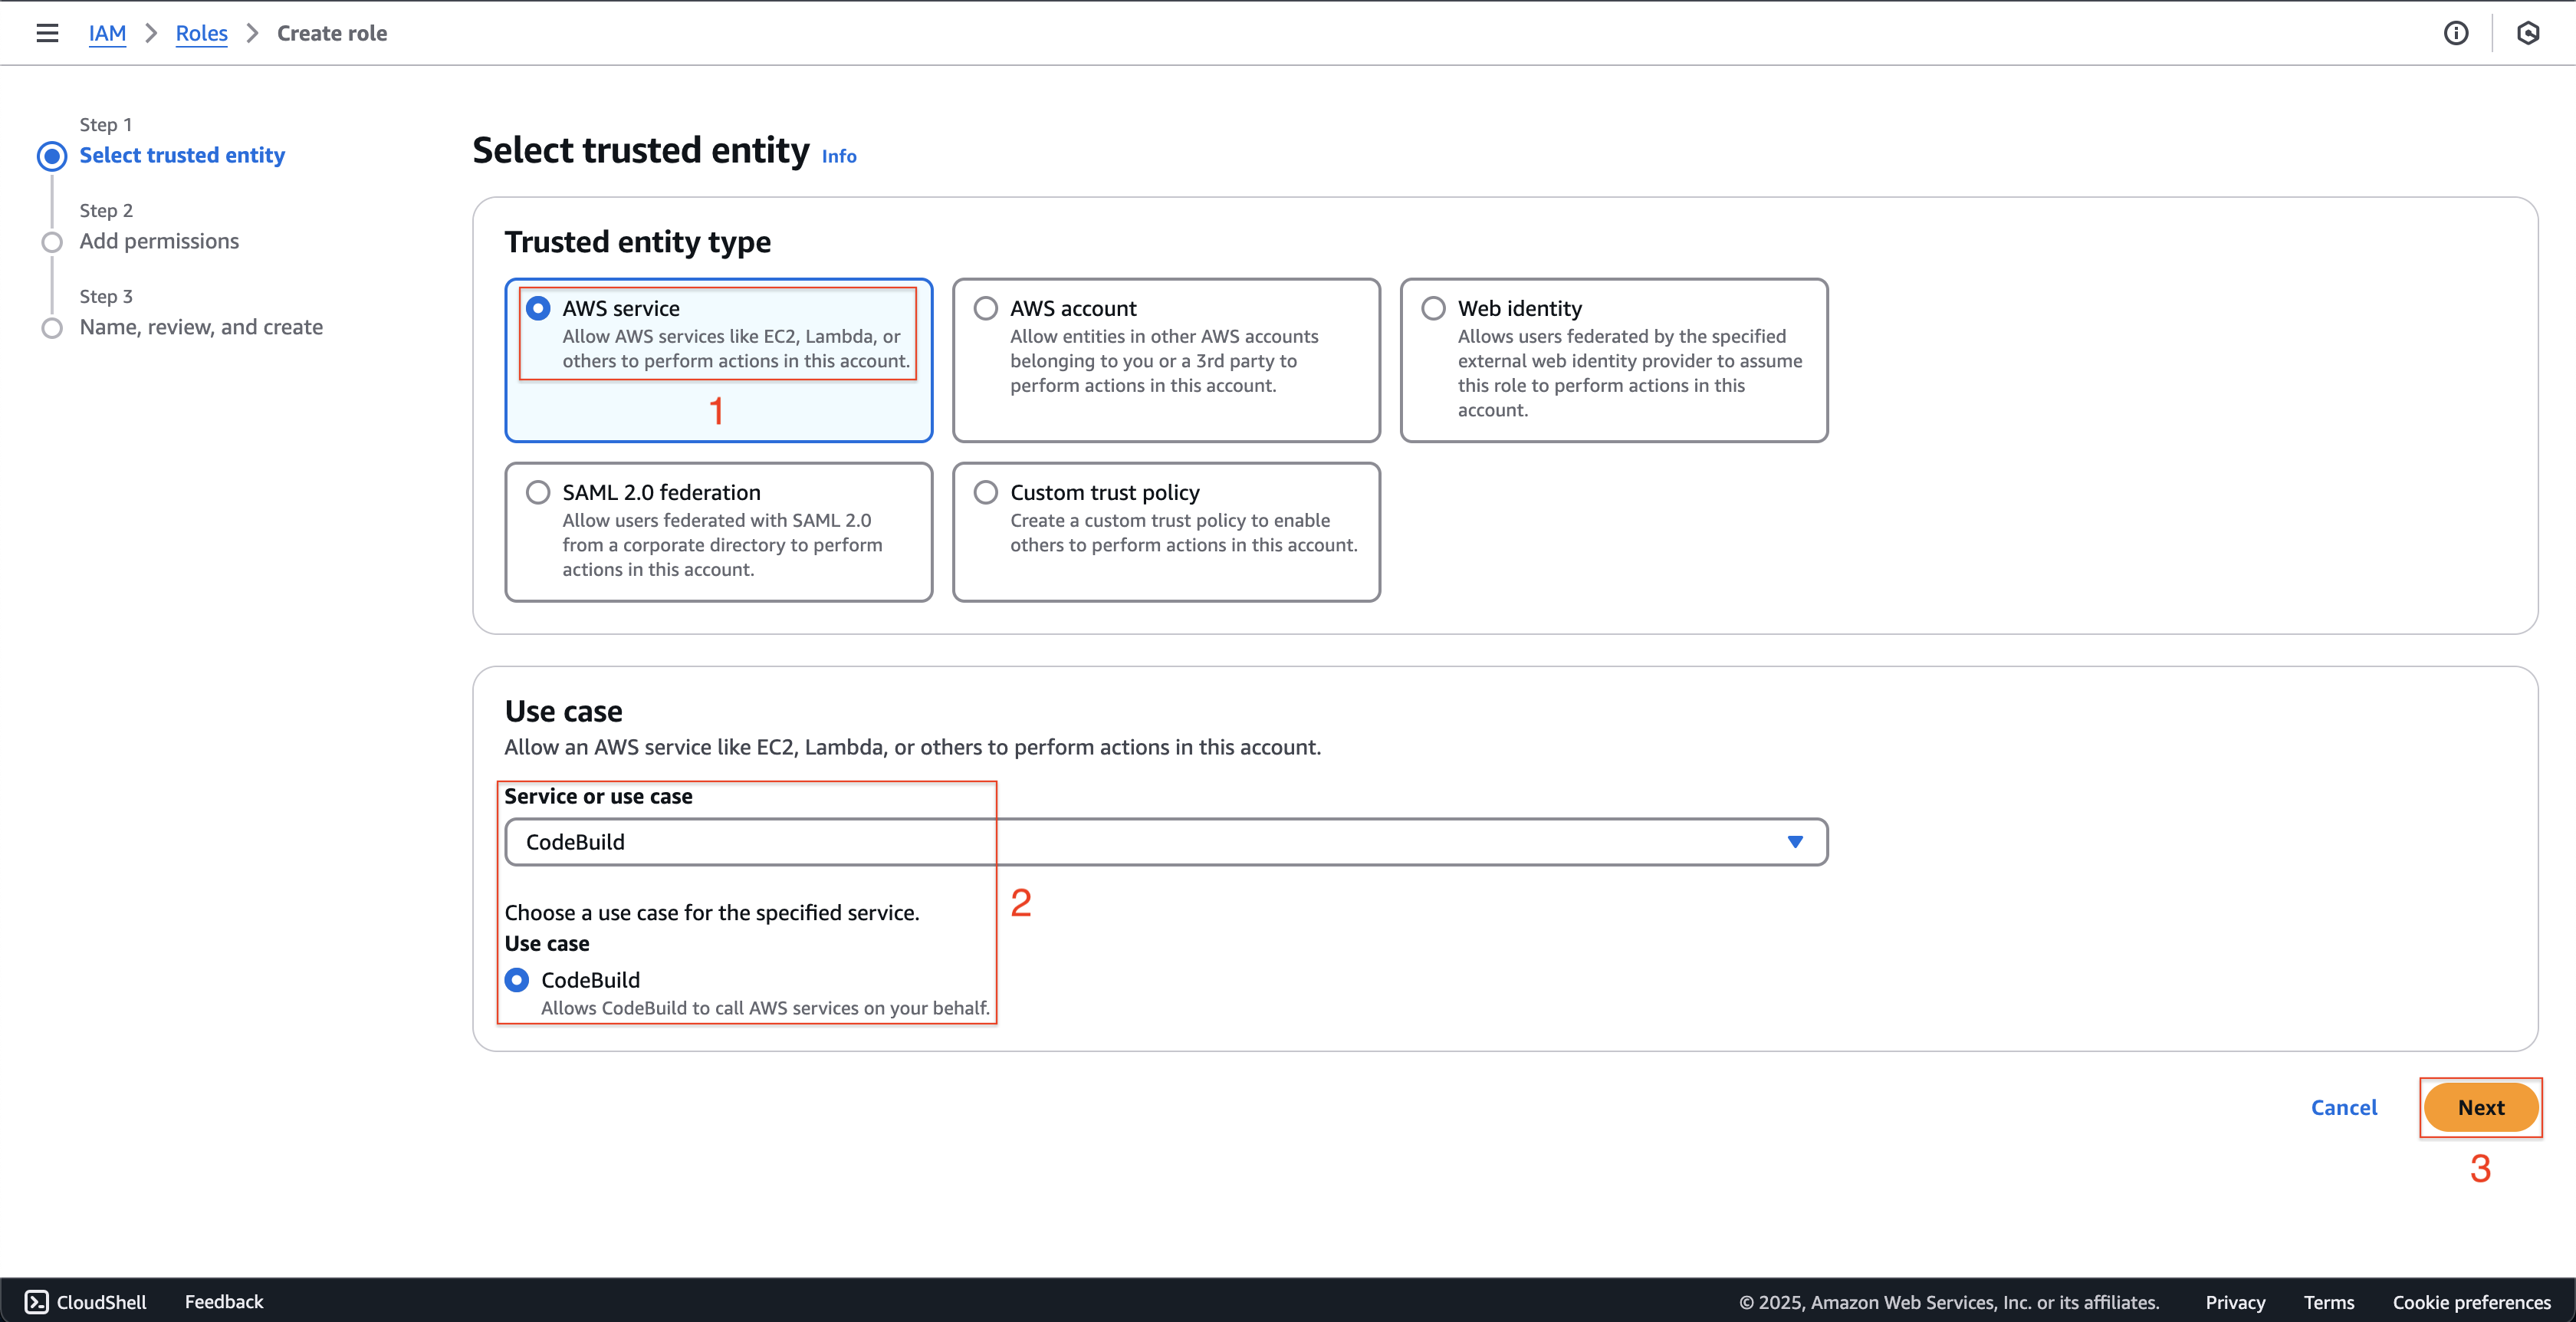
- At Step 2: Add permissions page.
- Enter
AdministratorAccessat Search box. - Choose AdministratorAccess policy.
- Then click Next button.
- Enter
- At Step 3: Name, review, and create page.
- Enter
fcjCodeBuildRoleat Role name.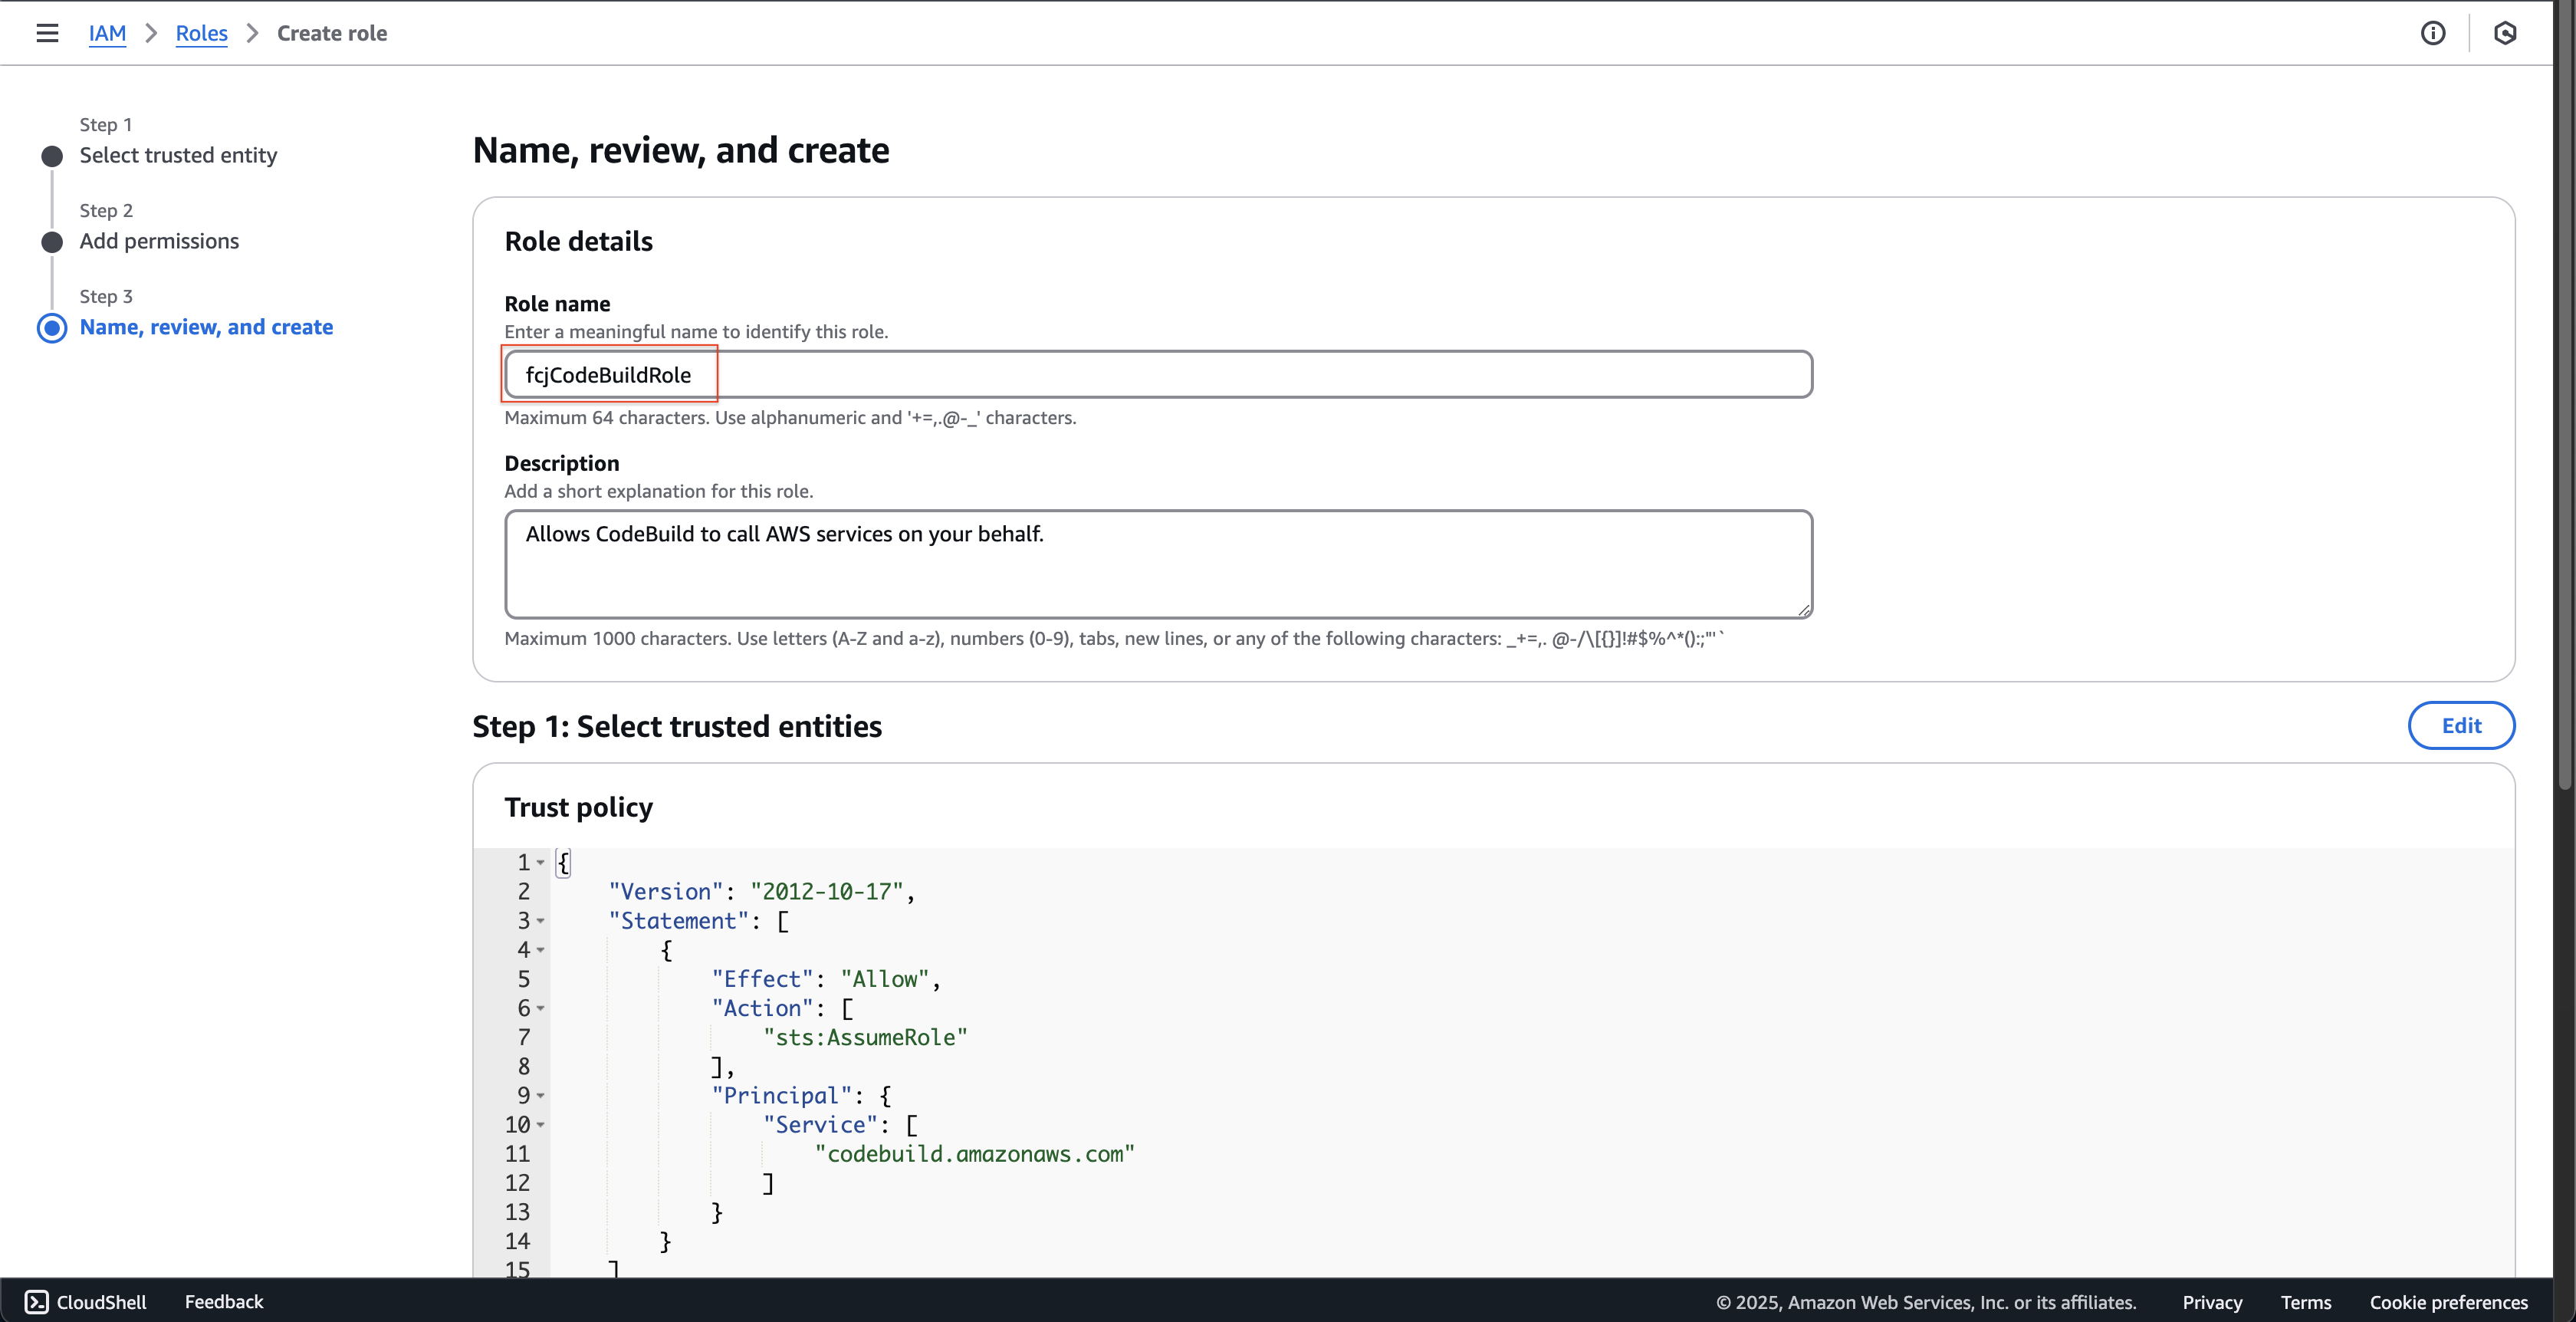
- Scroll down and click Create role button.
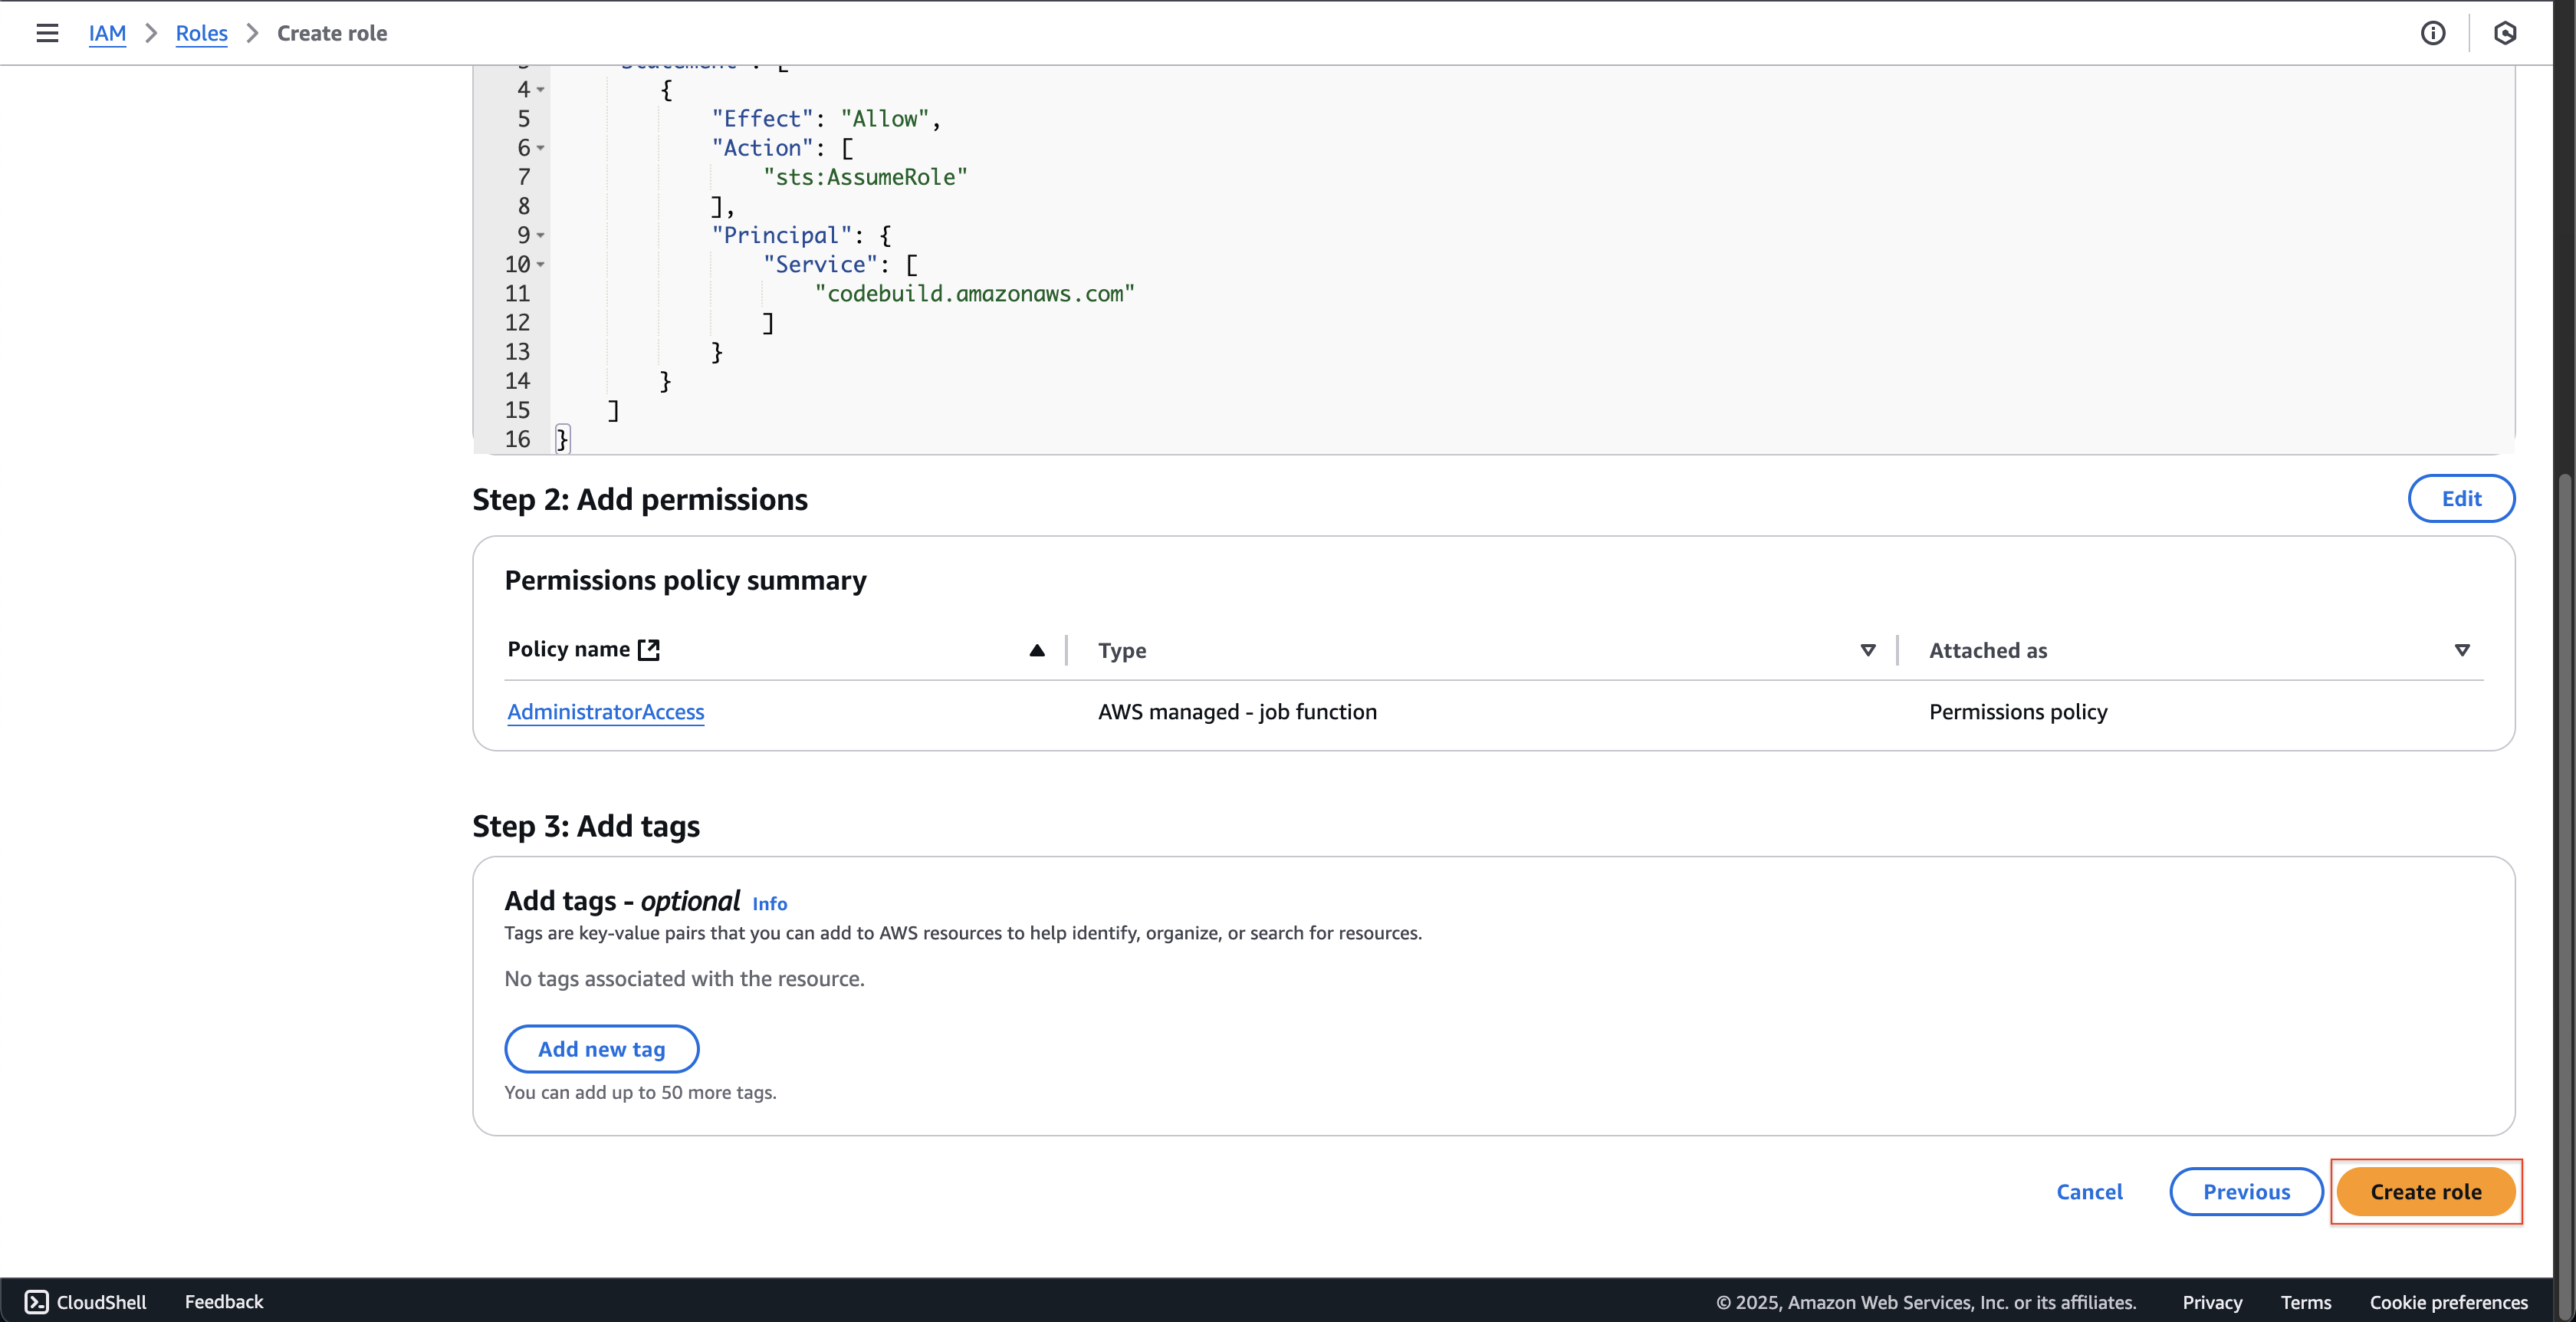
- Enter
Create the pipeline
-
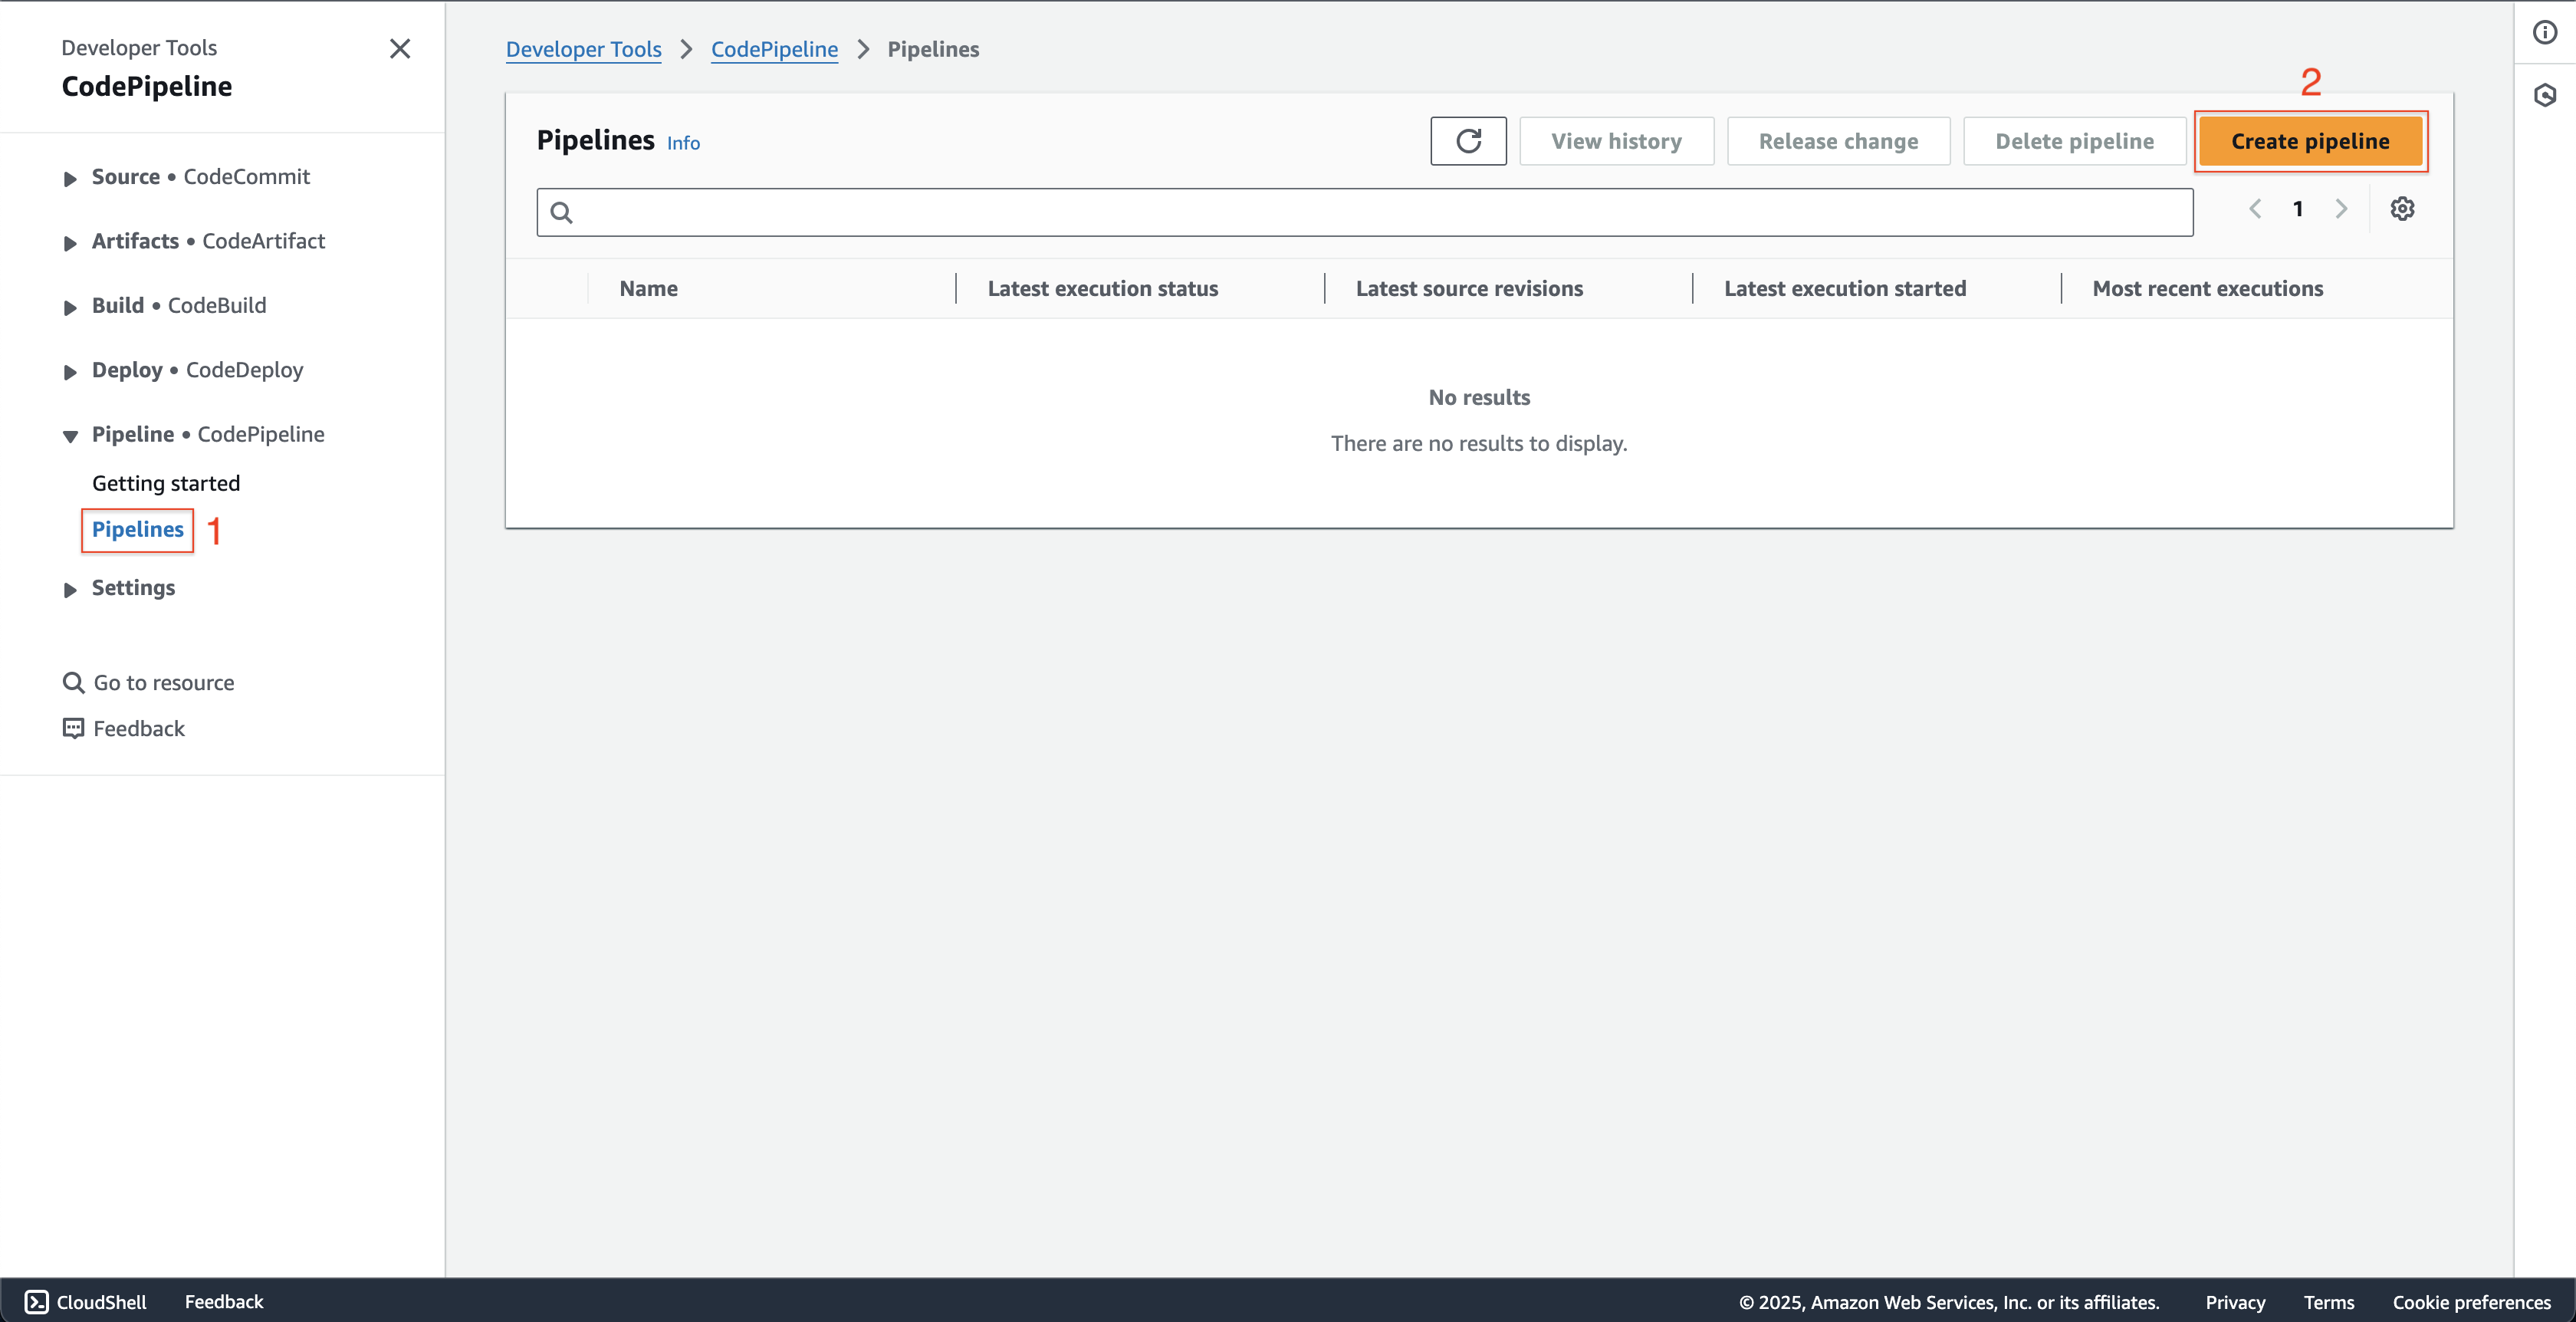
Open AWS CodePipeline console.
- Click Pipelines on the left menu.
- Click Create pipeline button.
-
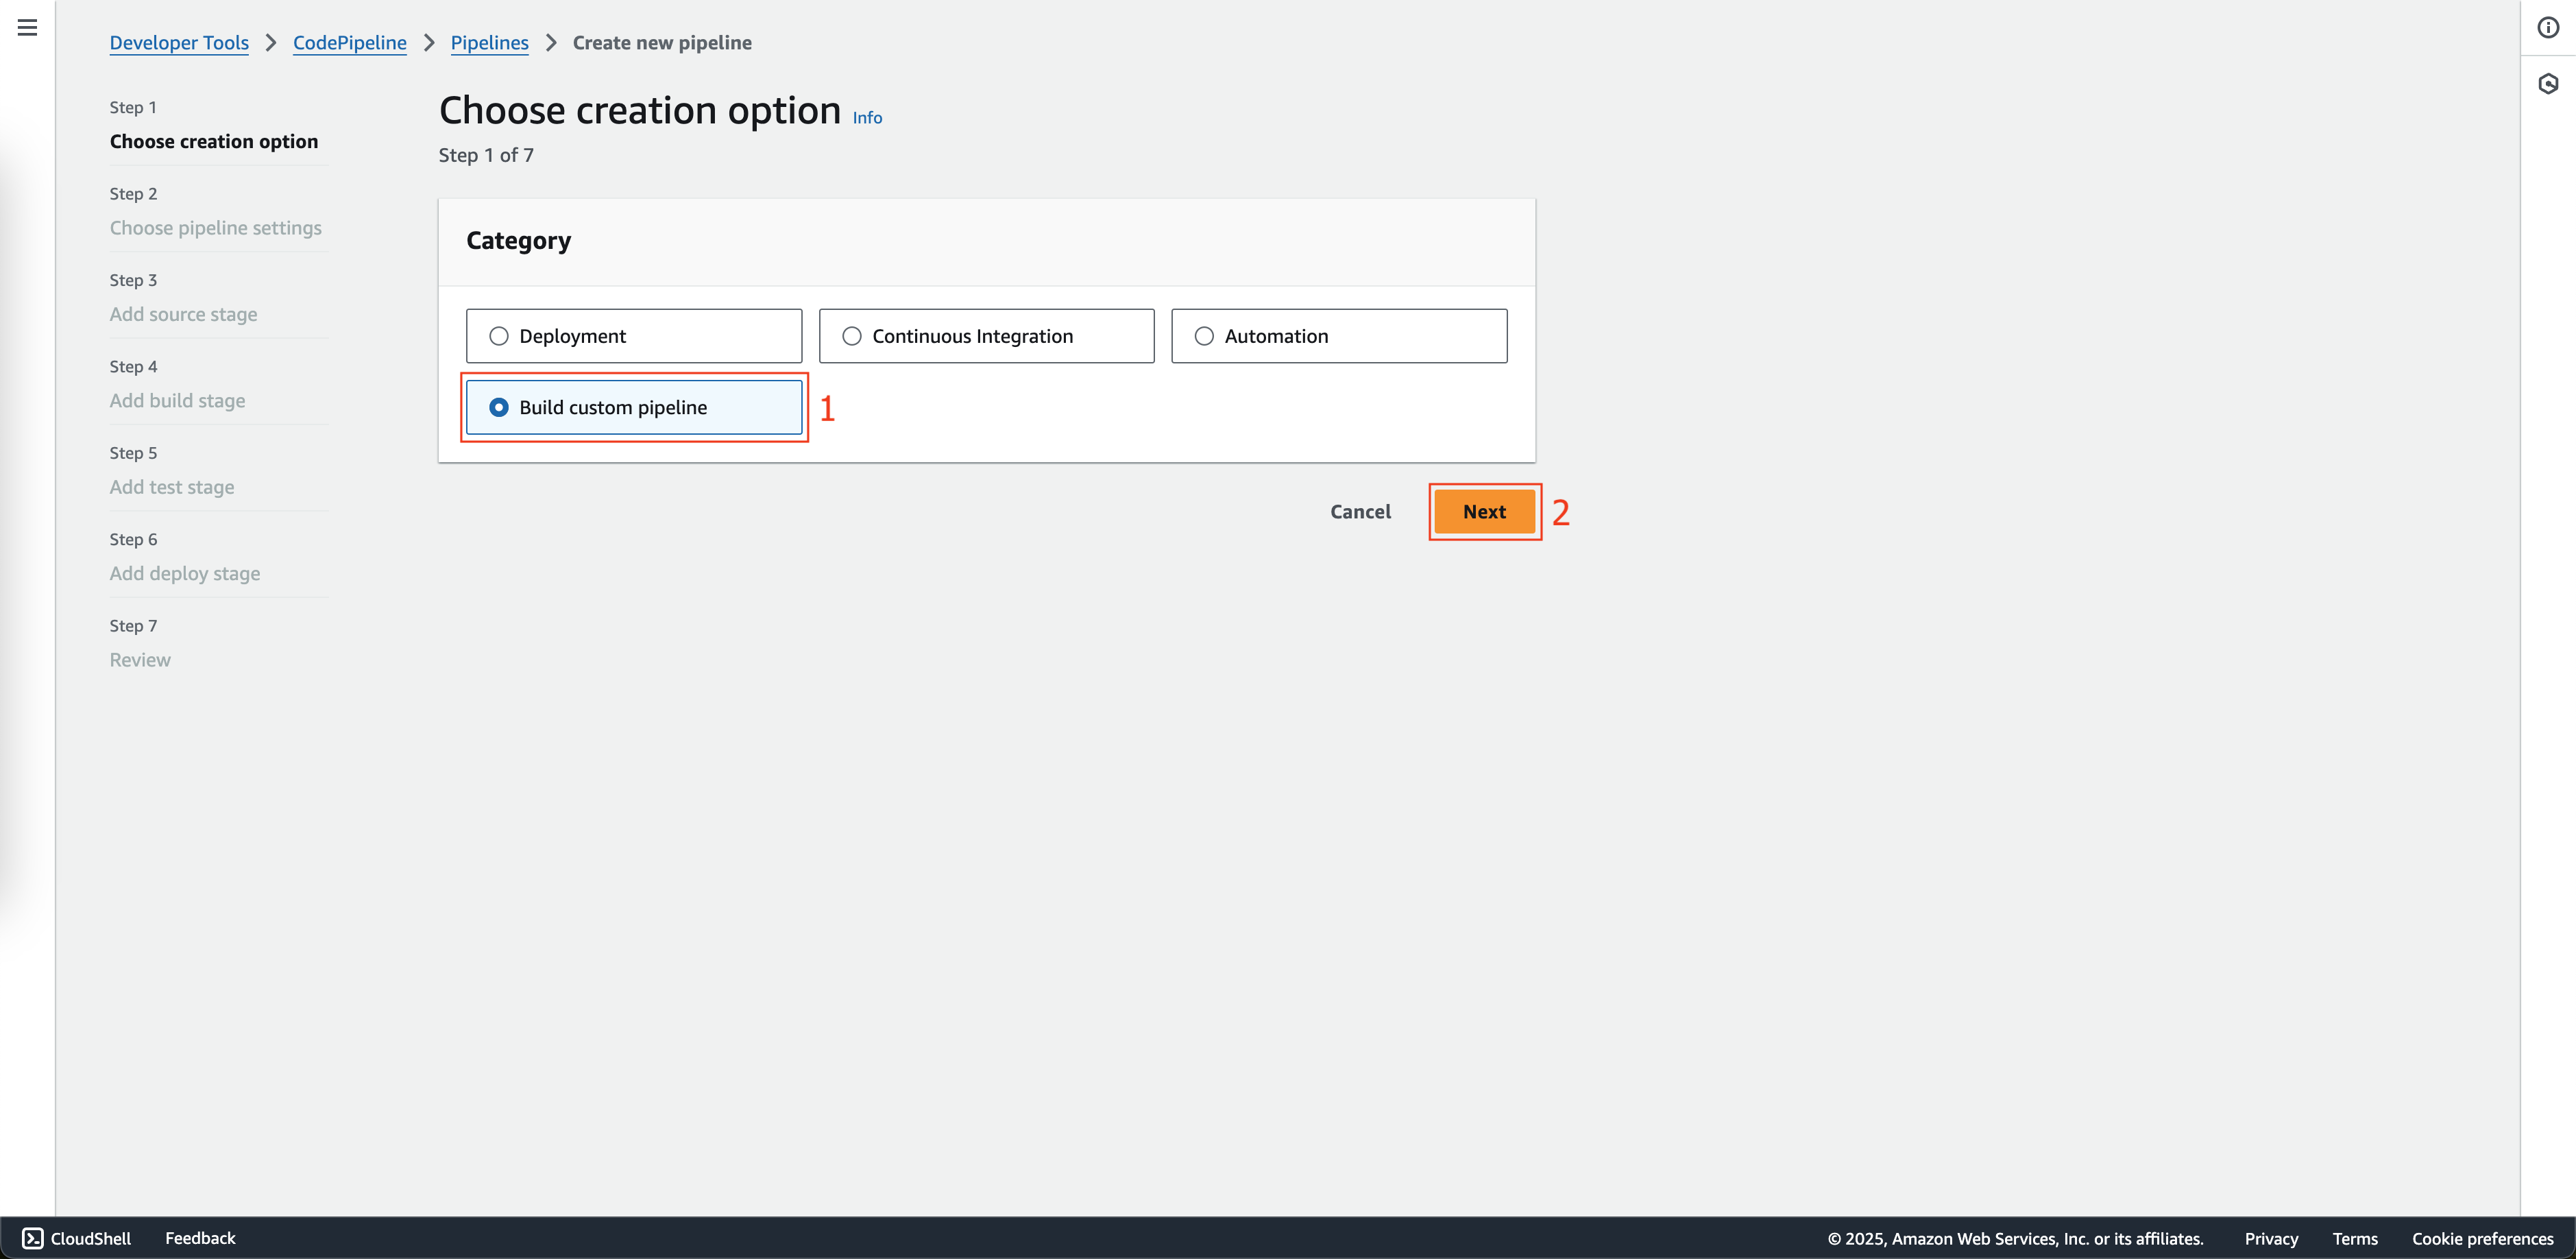
At Step 1: Choose creation option page.
- Choose Build custom pipeline at Creation options.
- Then click Next button.
-
At Step 2: Choose pipeline settings page.
- Enter
fcjBookStorePipelineat Pipeline name. - Choose Queued at Execution mode.
- Choose New service role at Service role.
- Enter
AWSCodePipelineServiceRole-us-east-1-fcjBookStorePipelineat Role name. - Click the Next button.
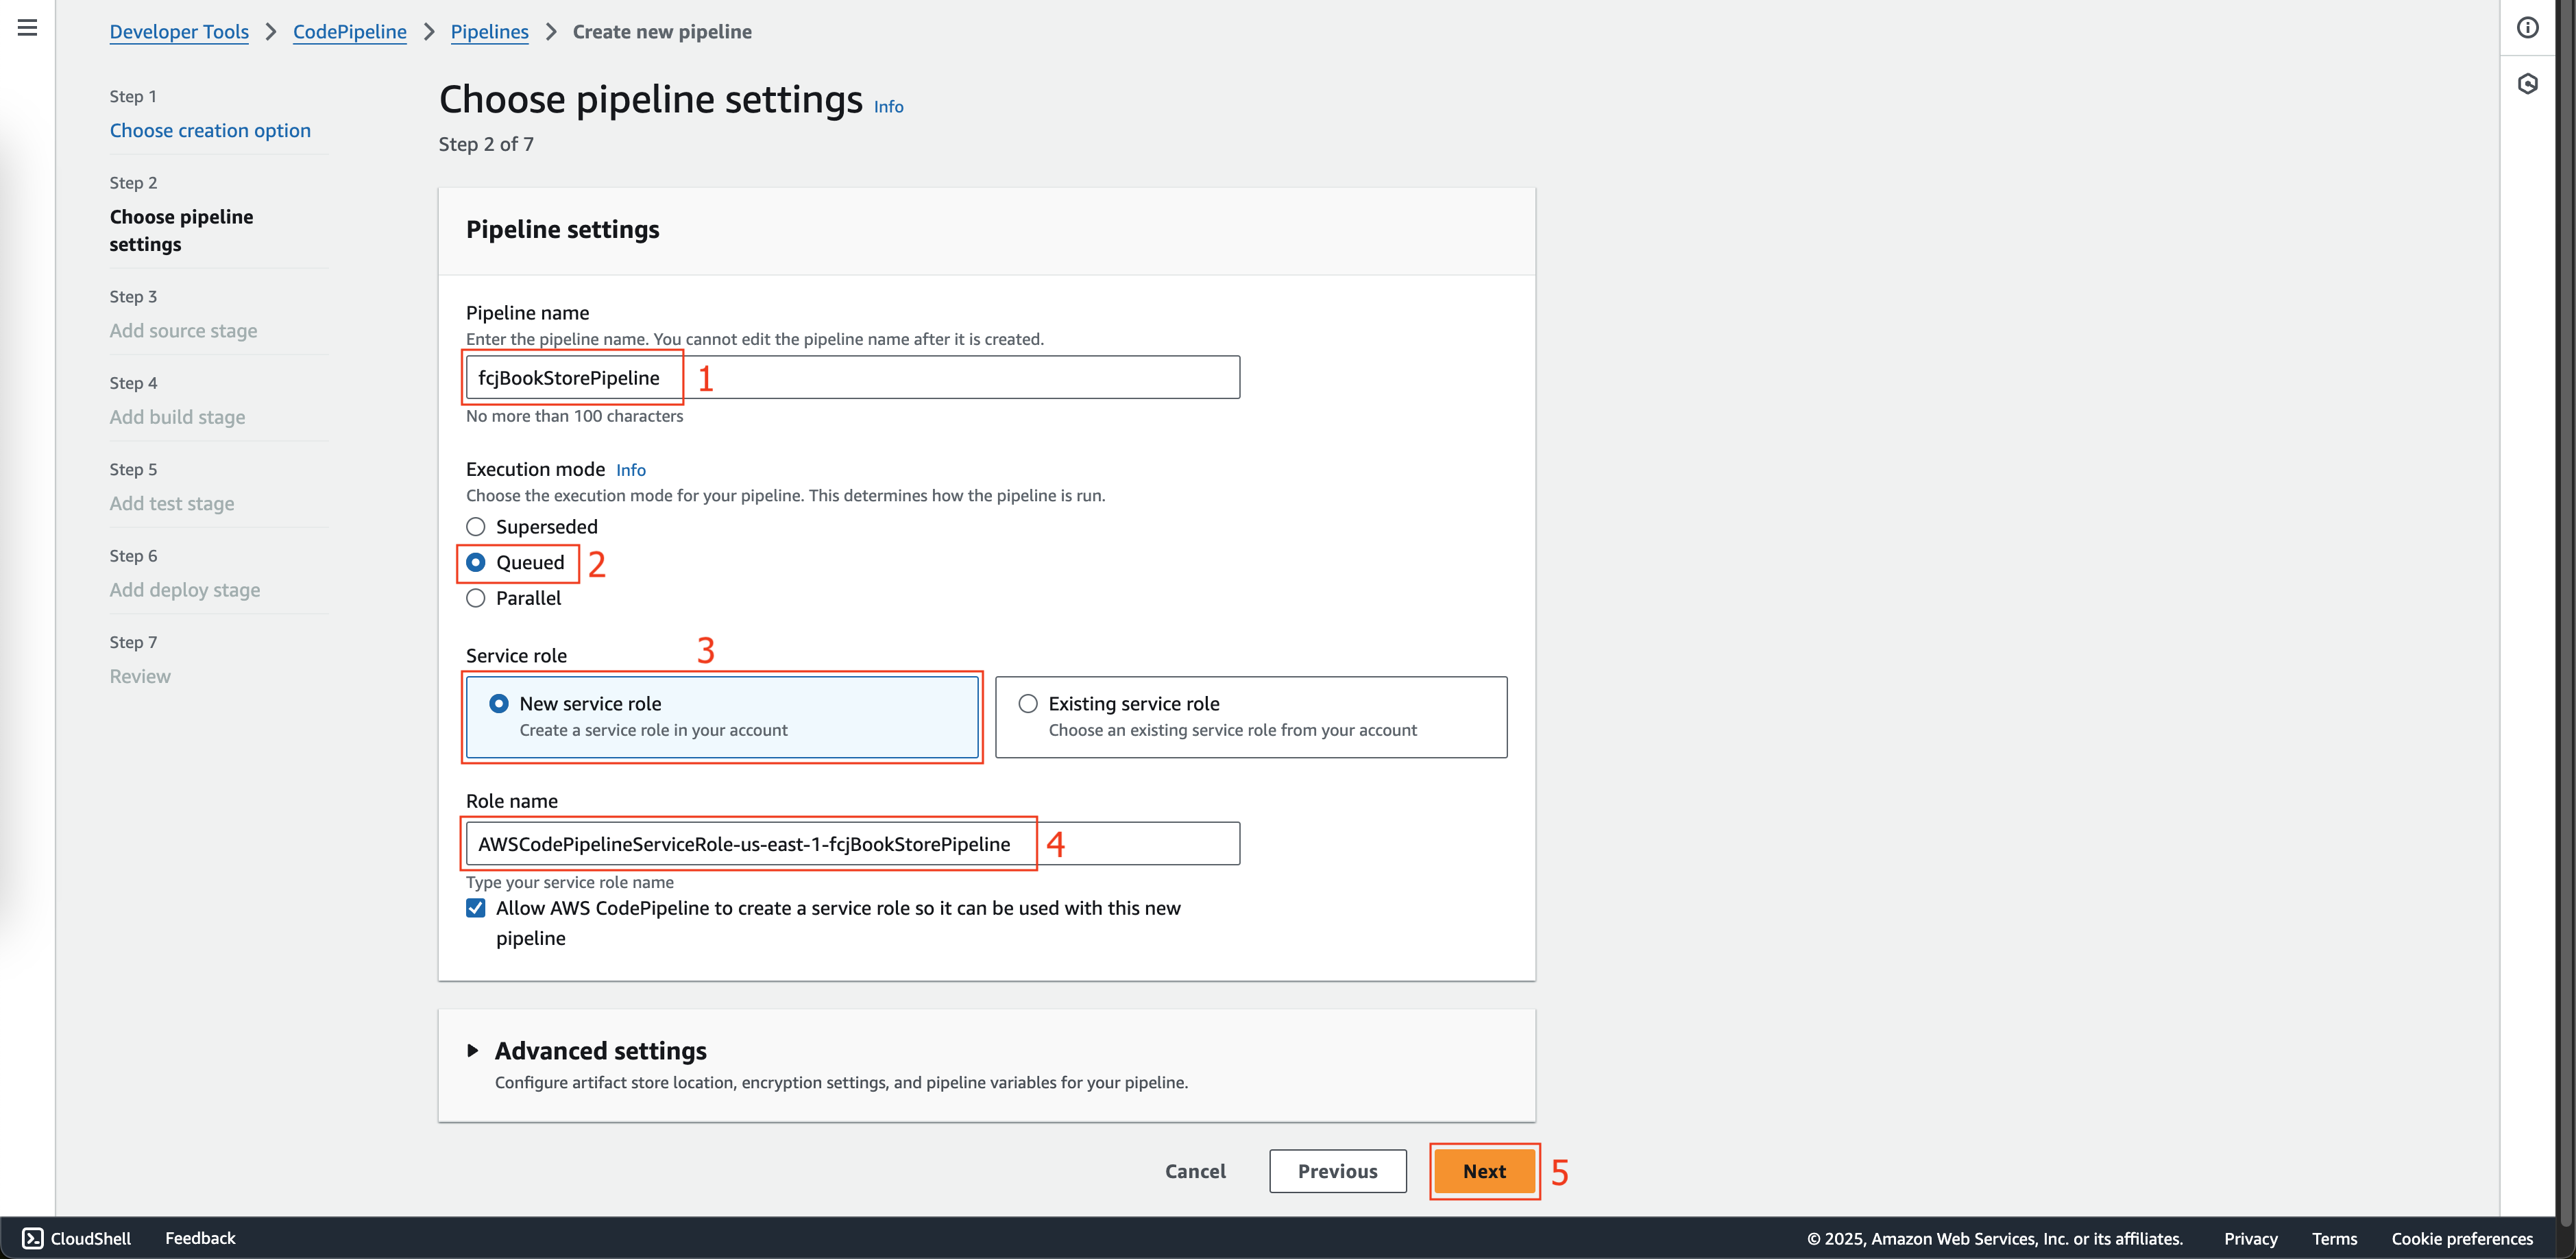
- Enter
-
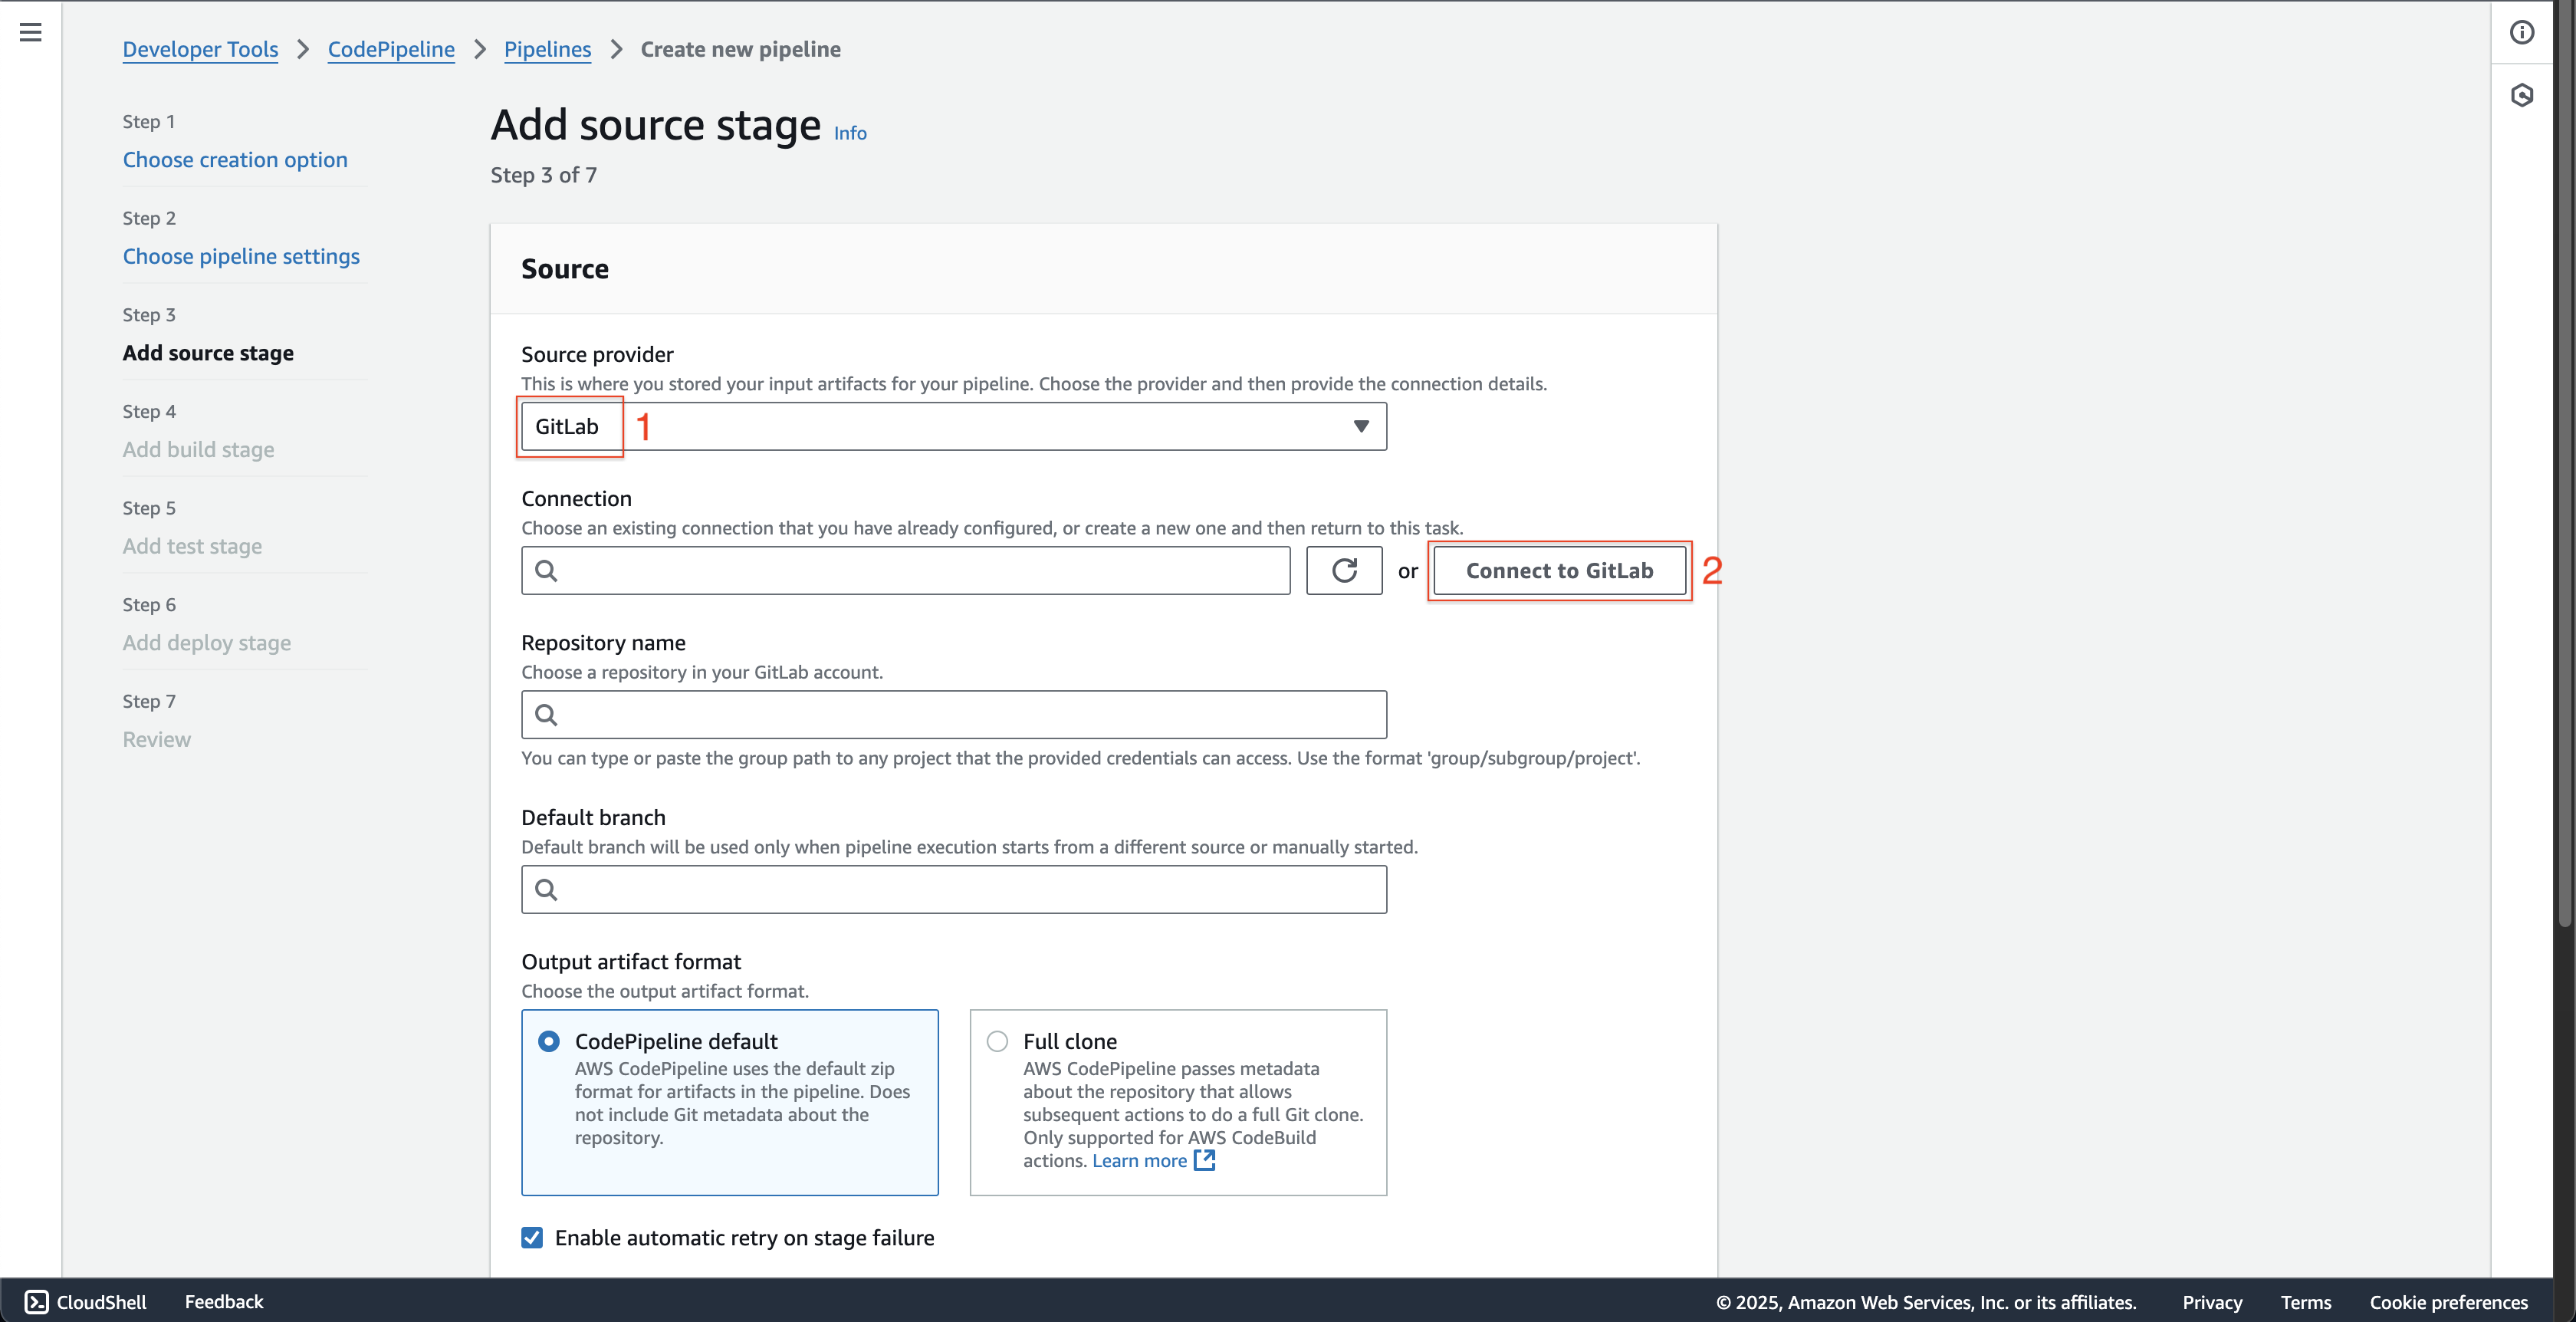
At Step 3: Add source stage page.
- Choose Gitlab at Source provider.
- Click the Connect to Gitlab button.
- At Create a connection page at new browser tab is just opened.
- Enter
fcjBookStoreGitlabConnectionat Connection name. - Click the Connect to Gitlab button.
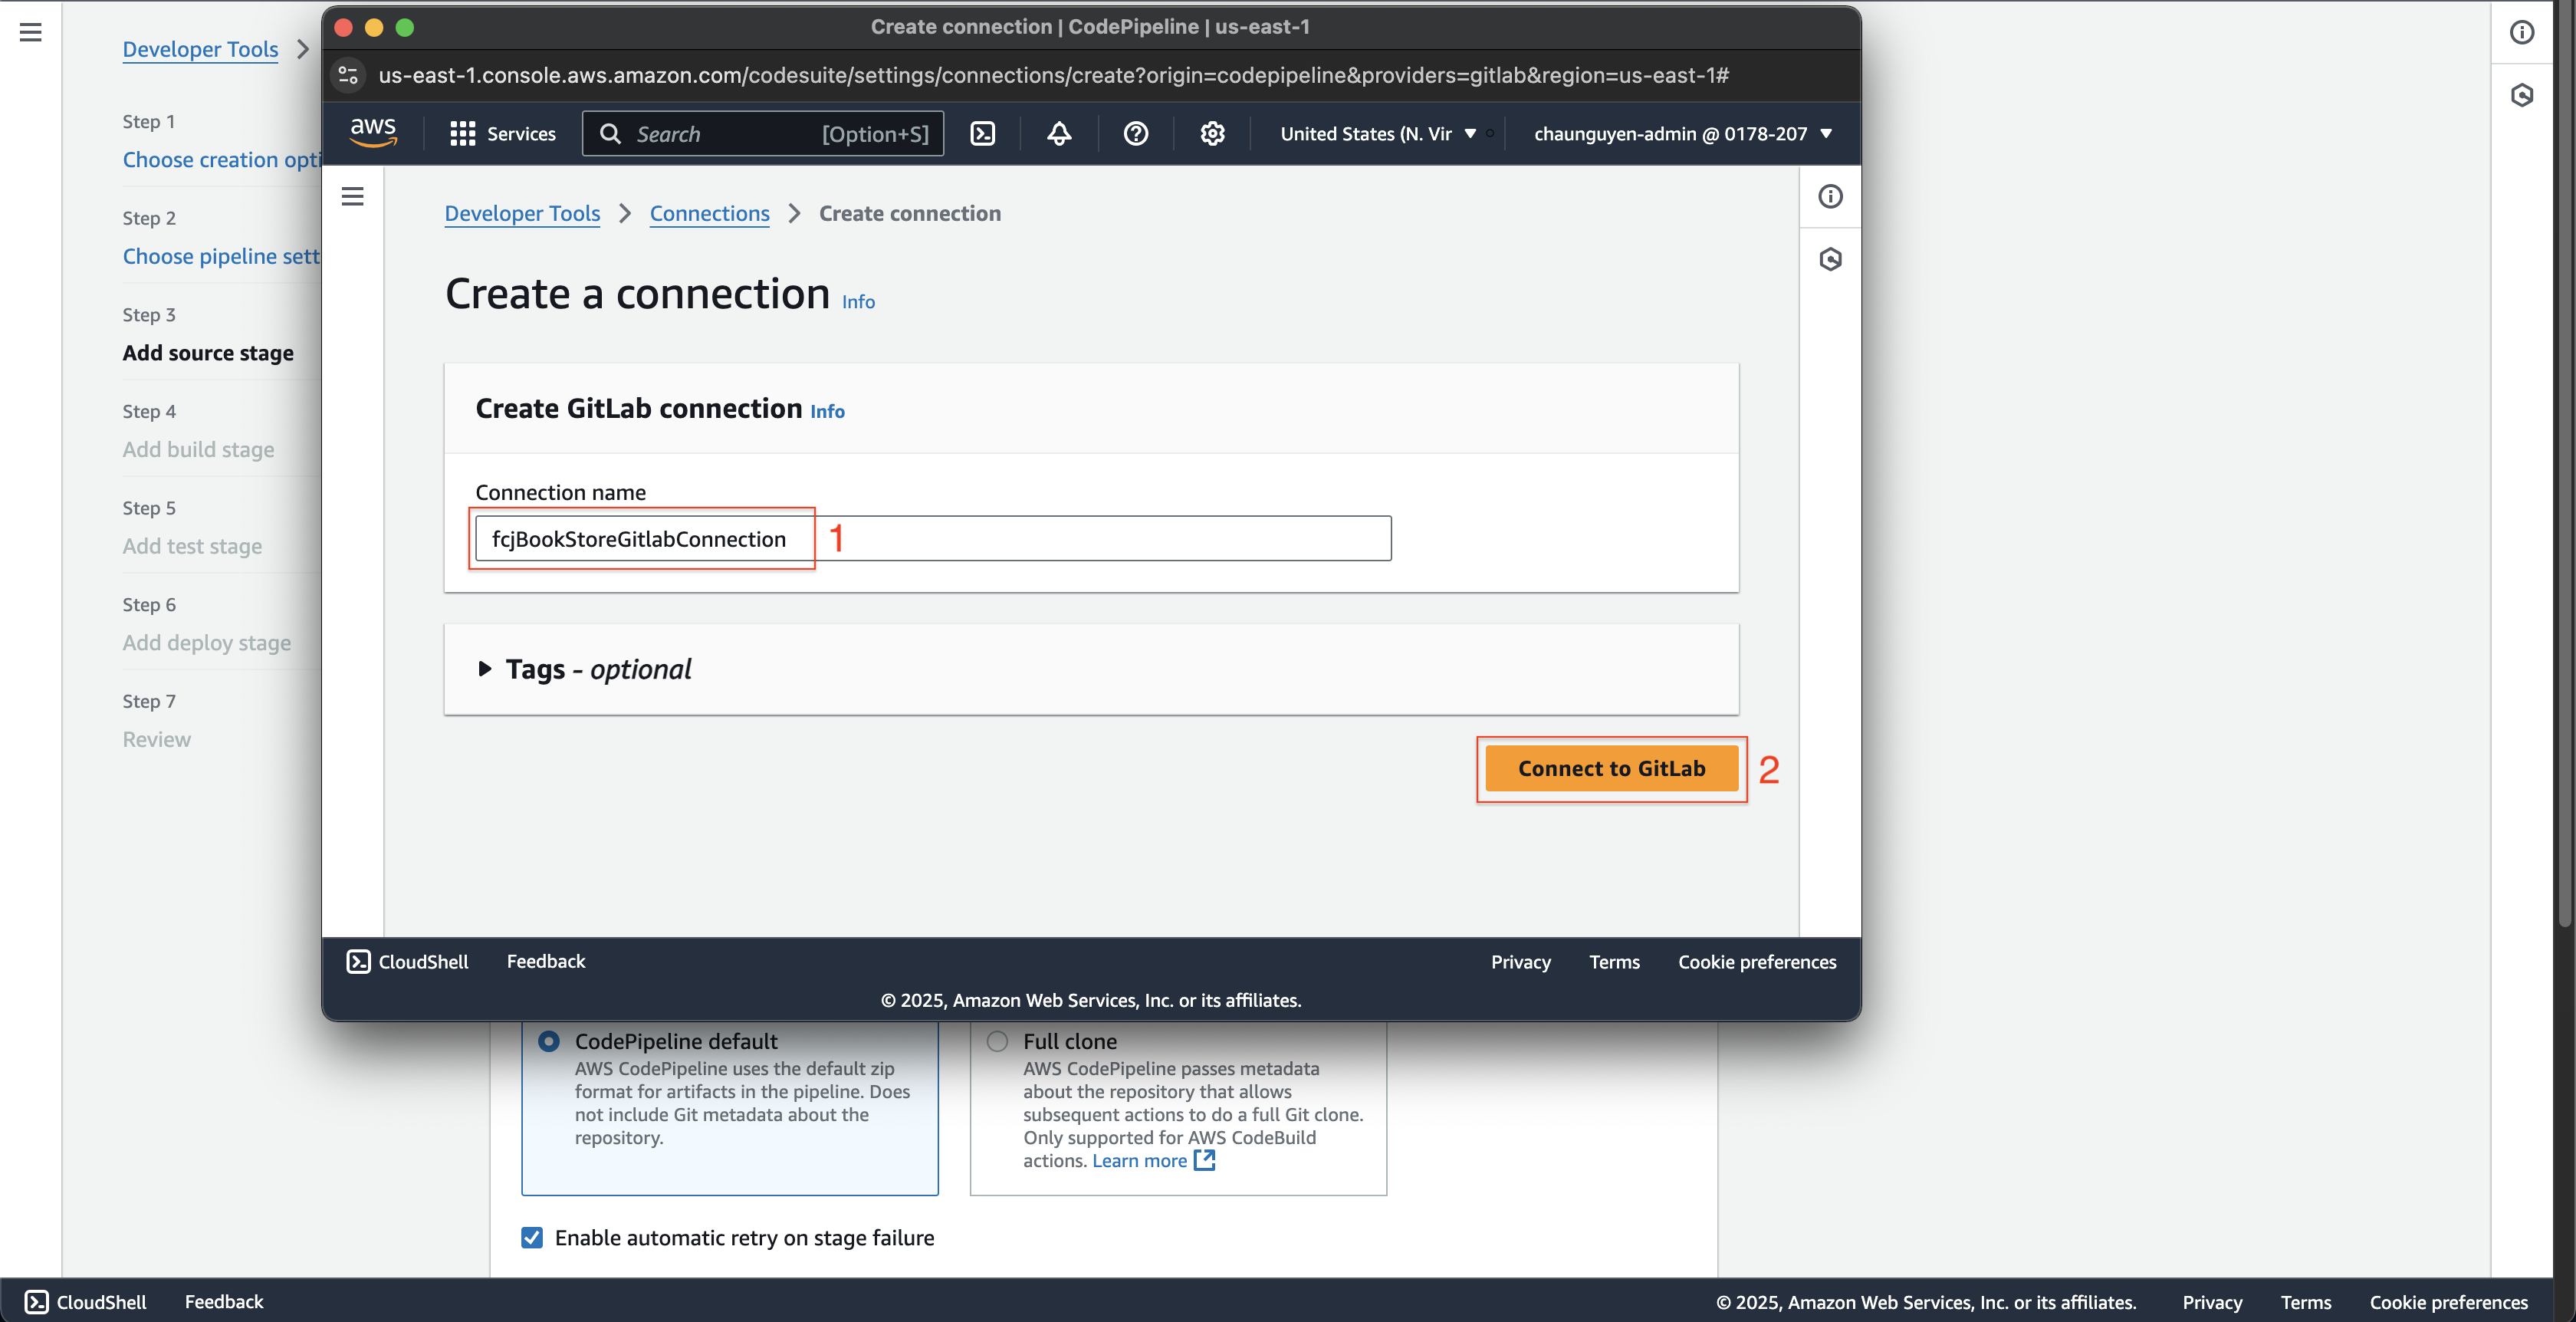
- After successful login to Gitlab, click the Connect button.

- Enter
- Check if the Gitlab connection is successful.
- Enter
fcj-ws/fcj-book-store-backendat Repository name. - Enter
masterat Default branch.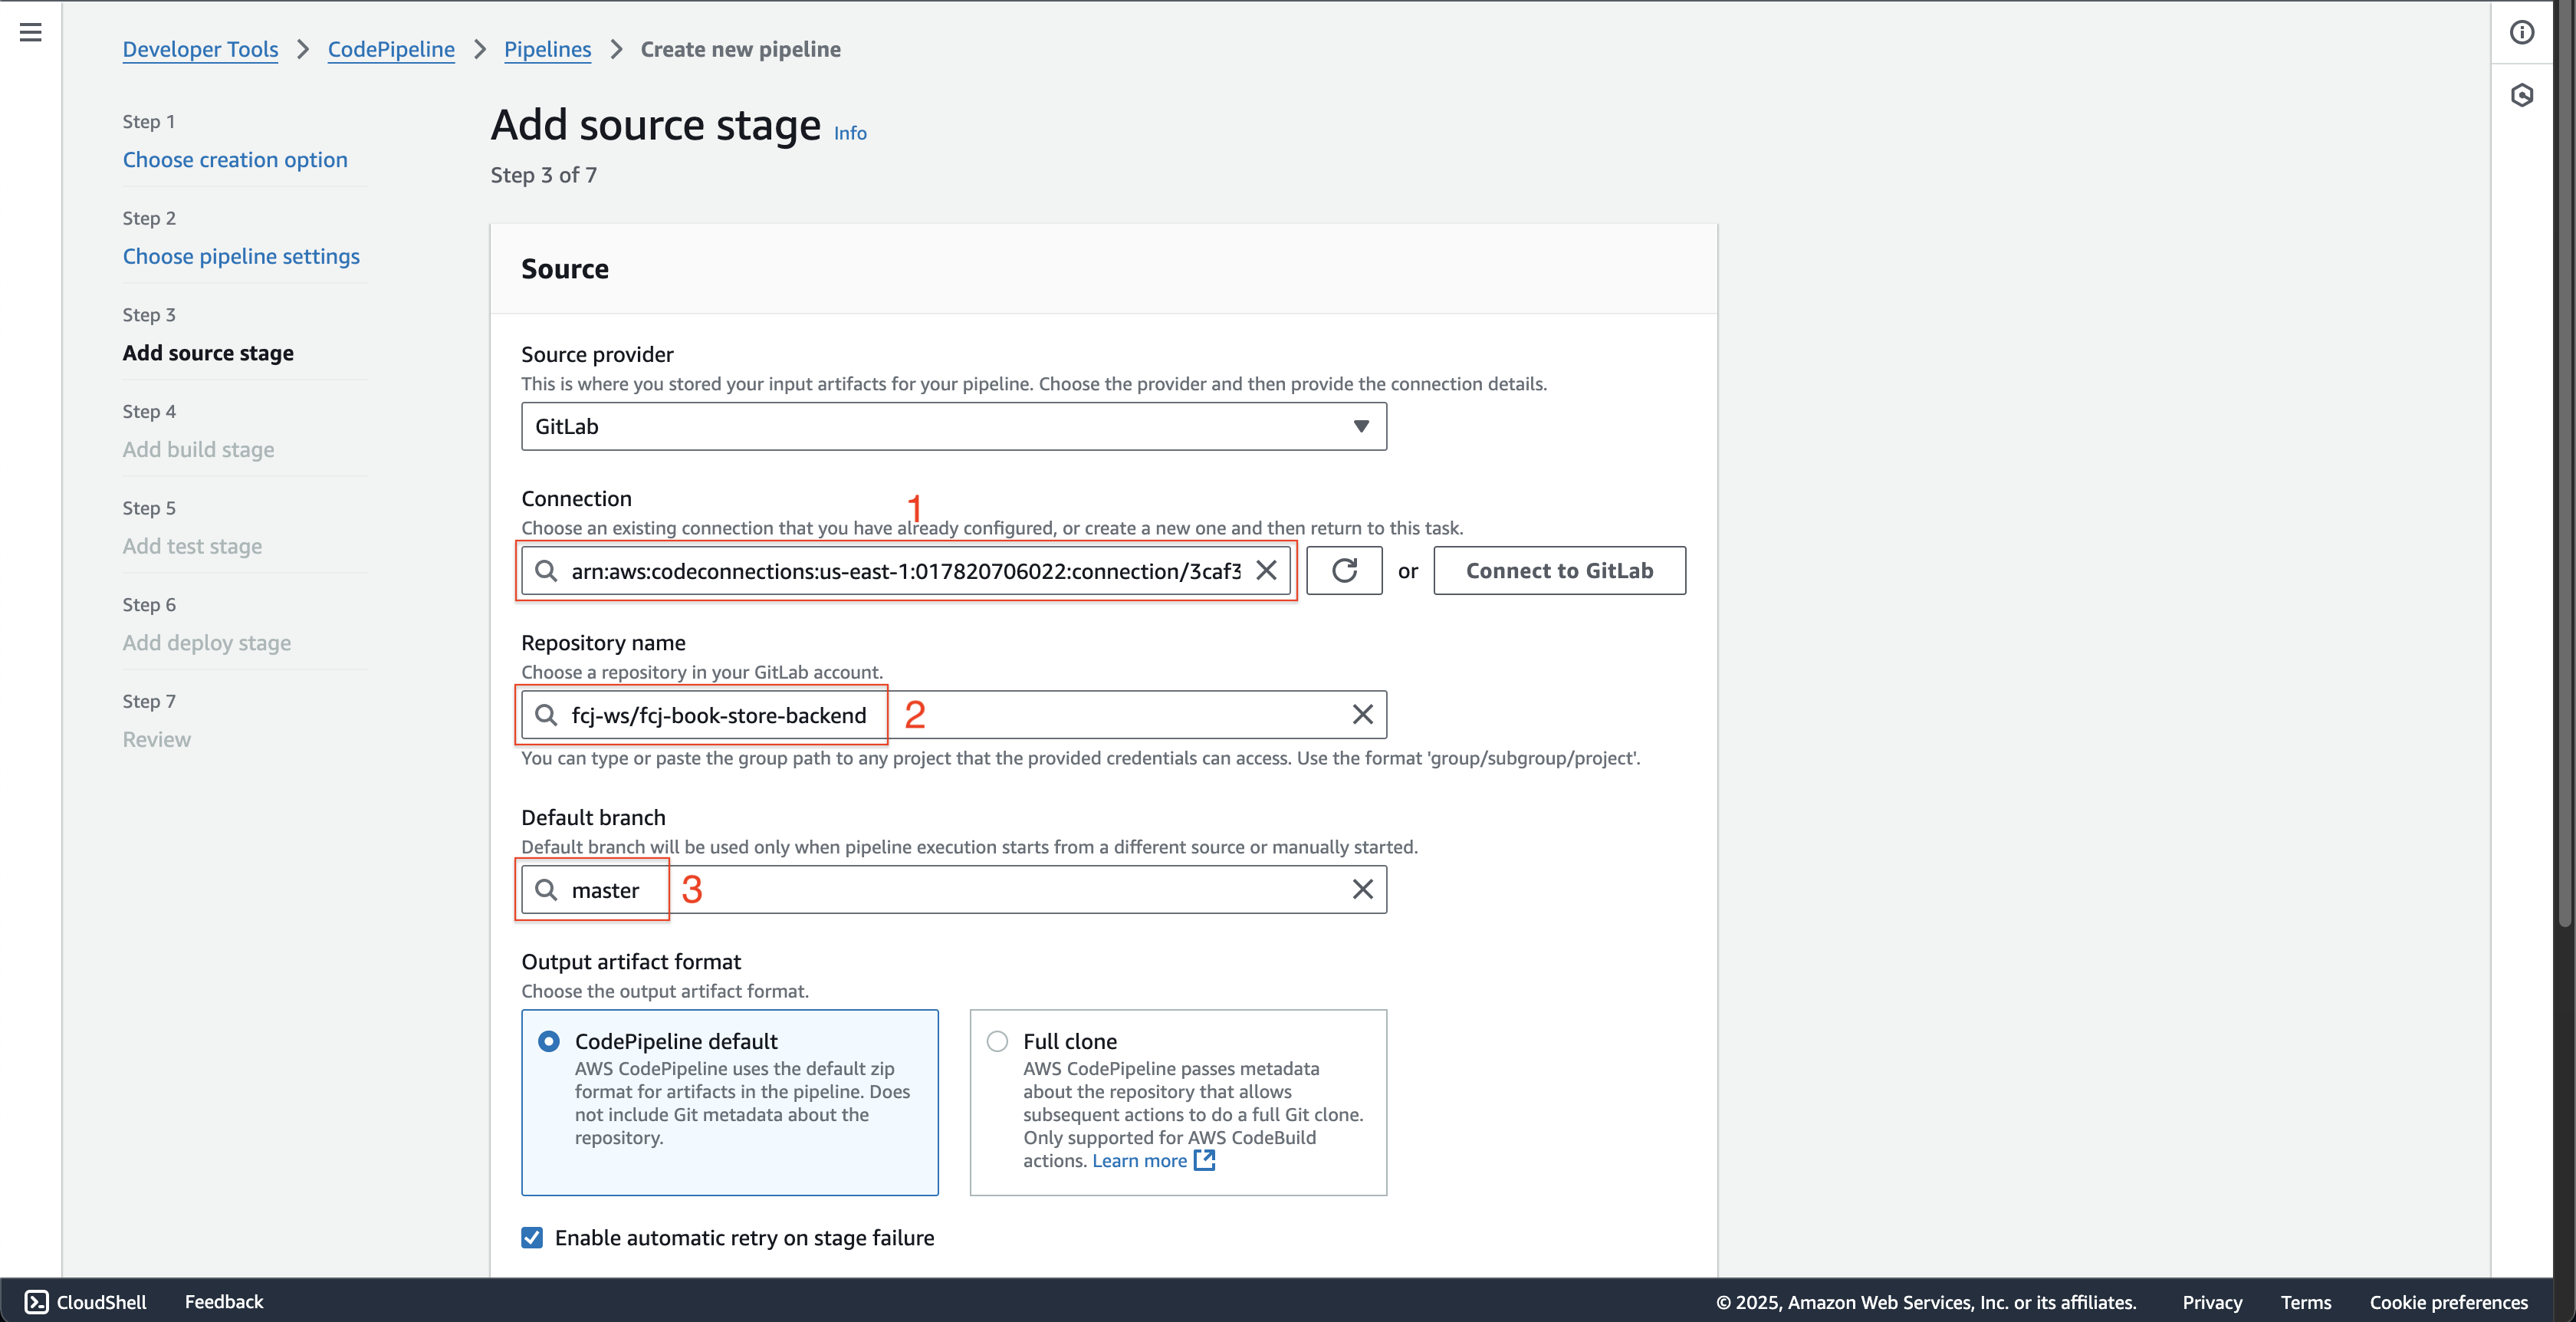
- Scroll down to the bottom and click the Next button.
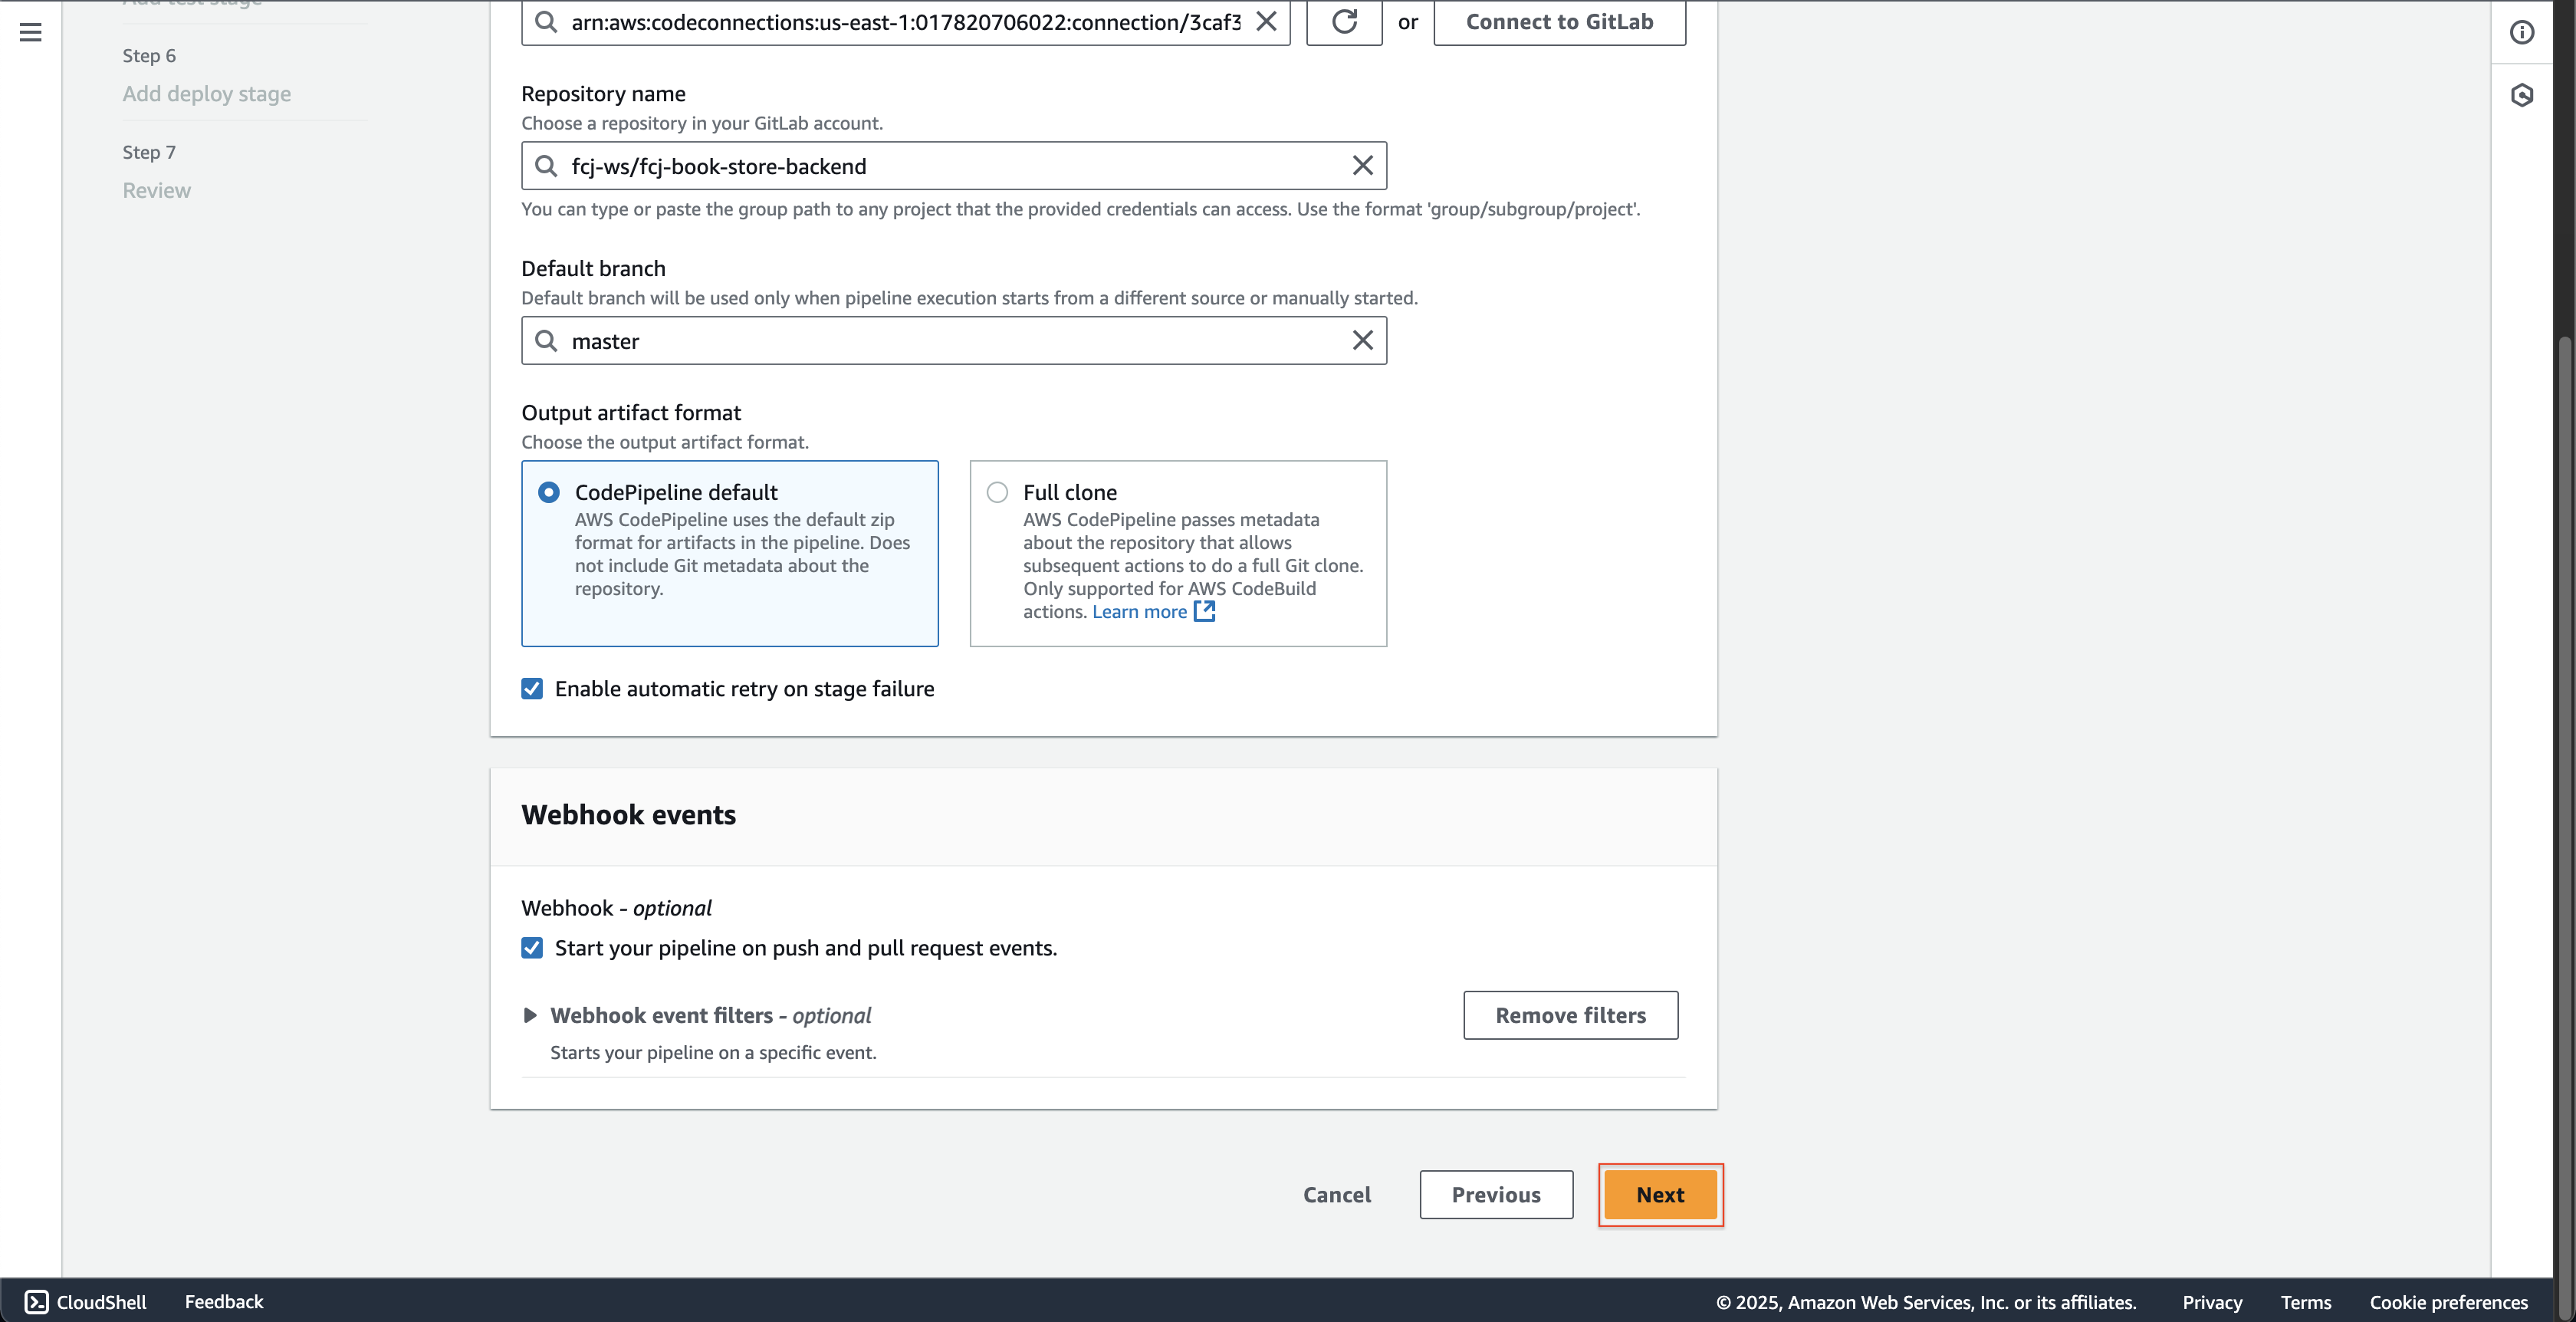
-
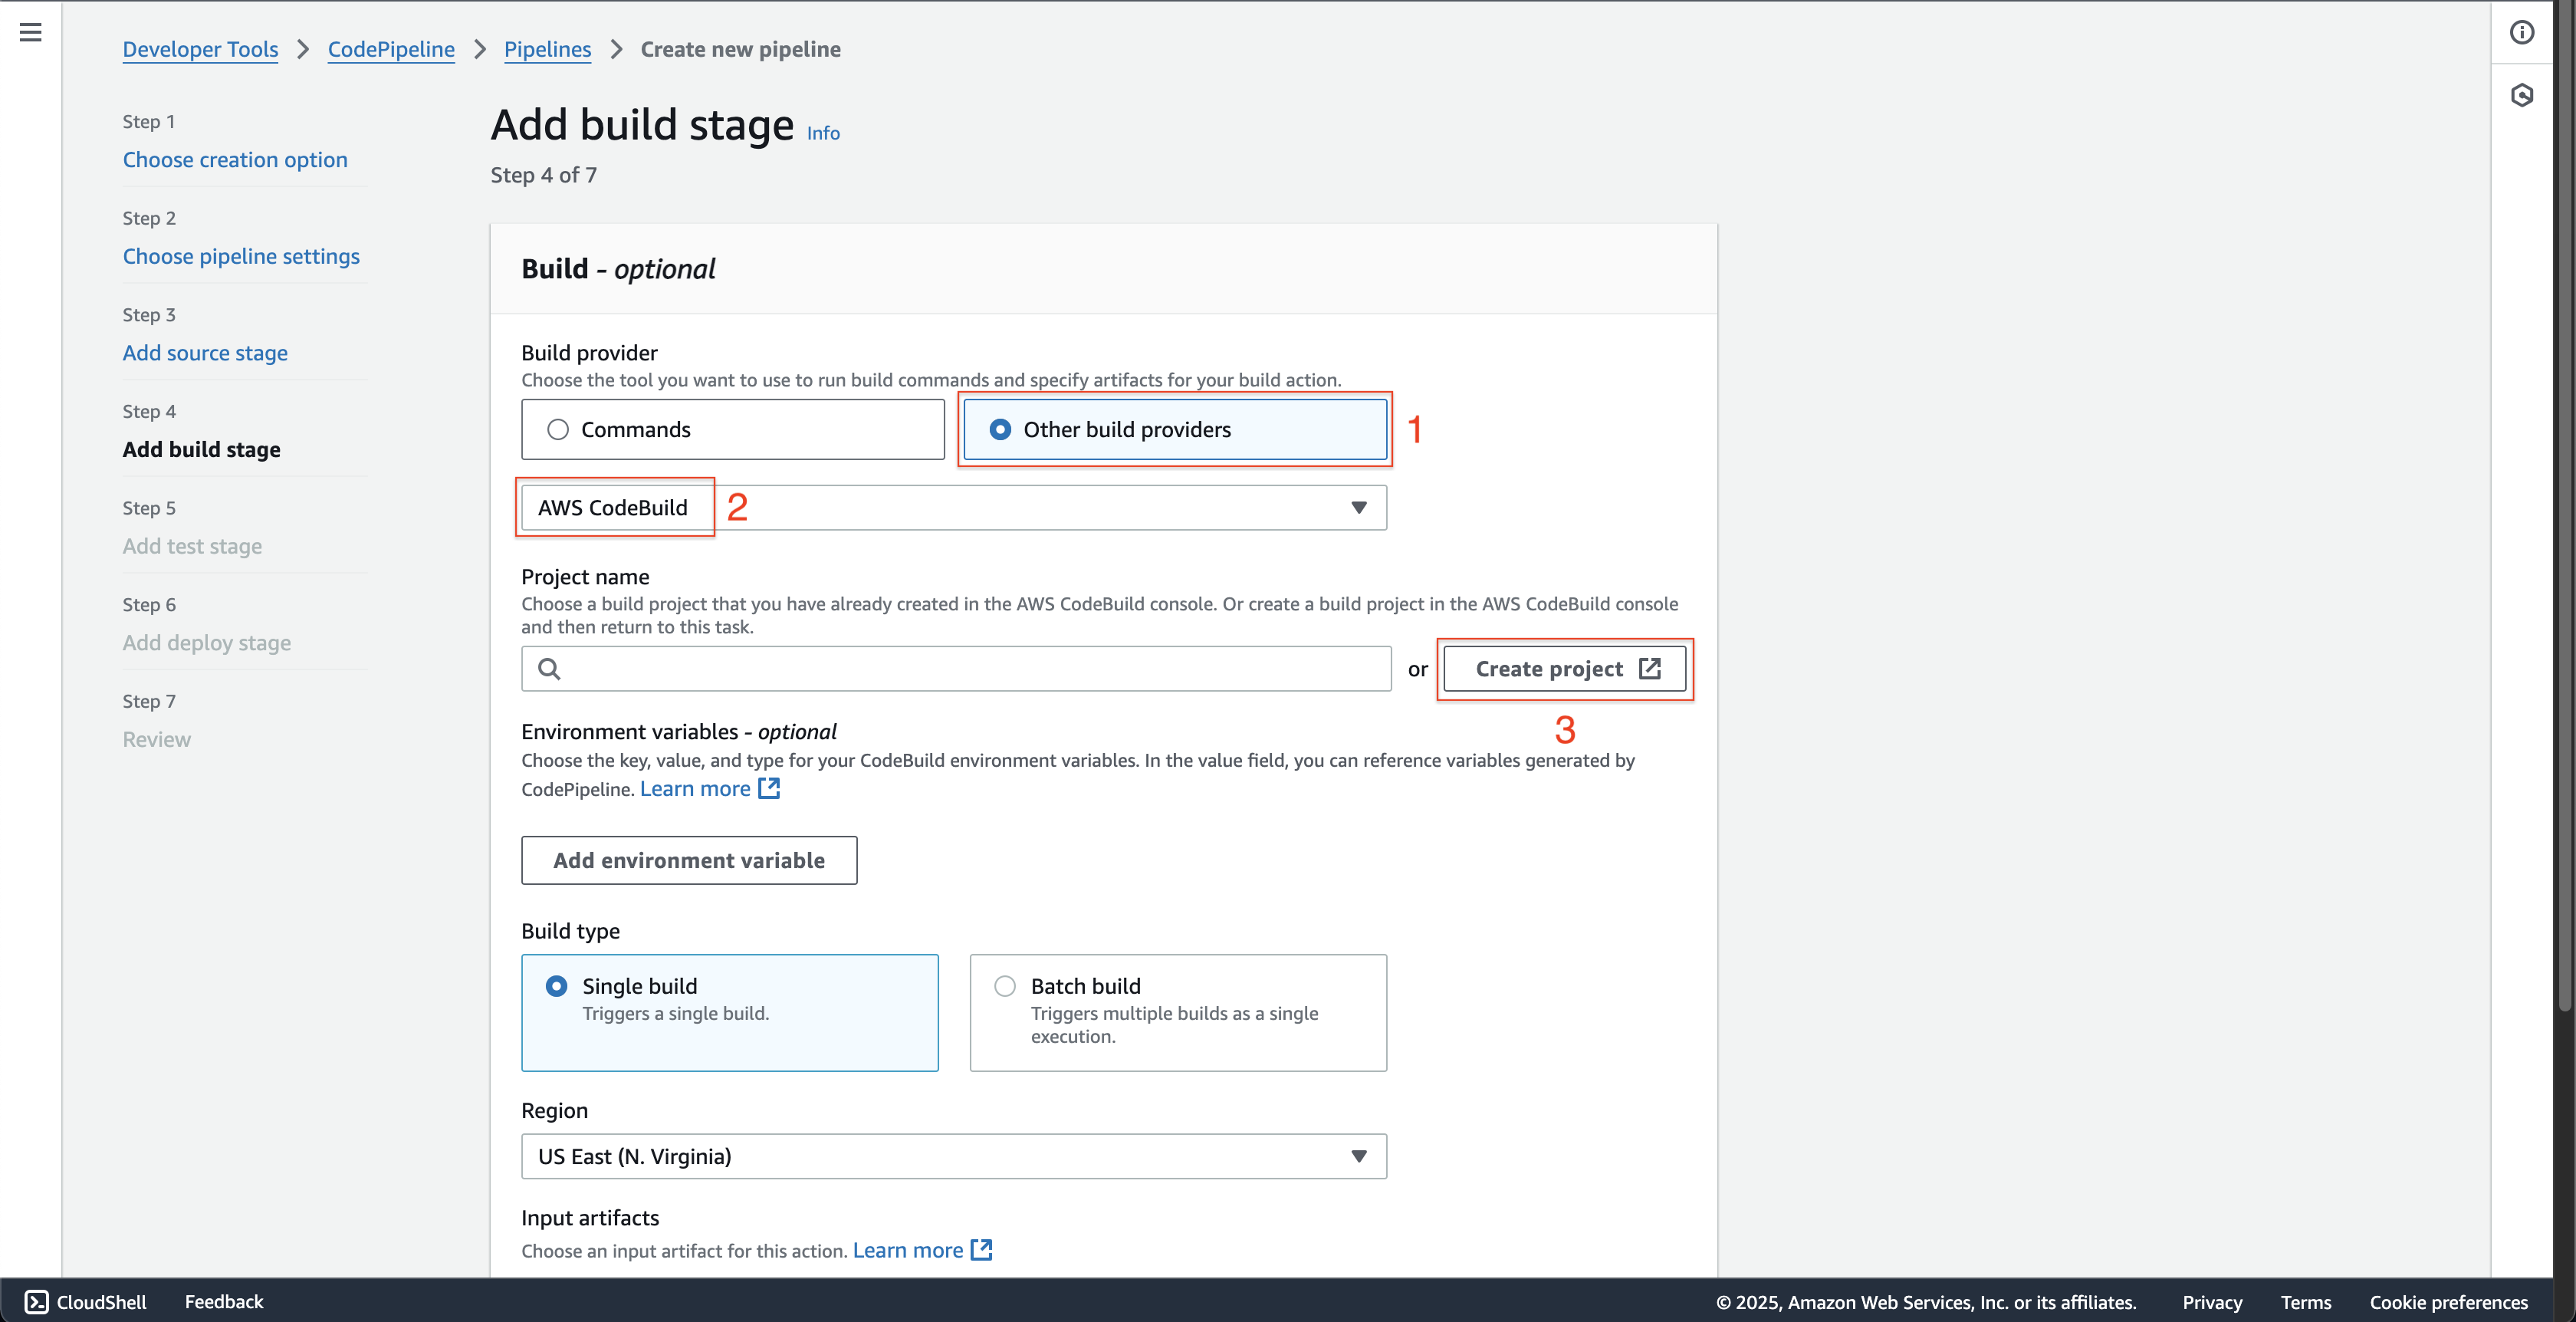
At Step 4: Add build stage page.
- Choose Other build providers at Build provider.
- Choose the AWS CodeBuild.
- Click the Create project button.
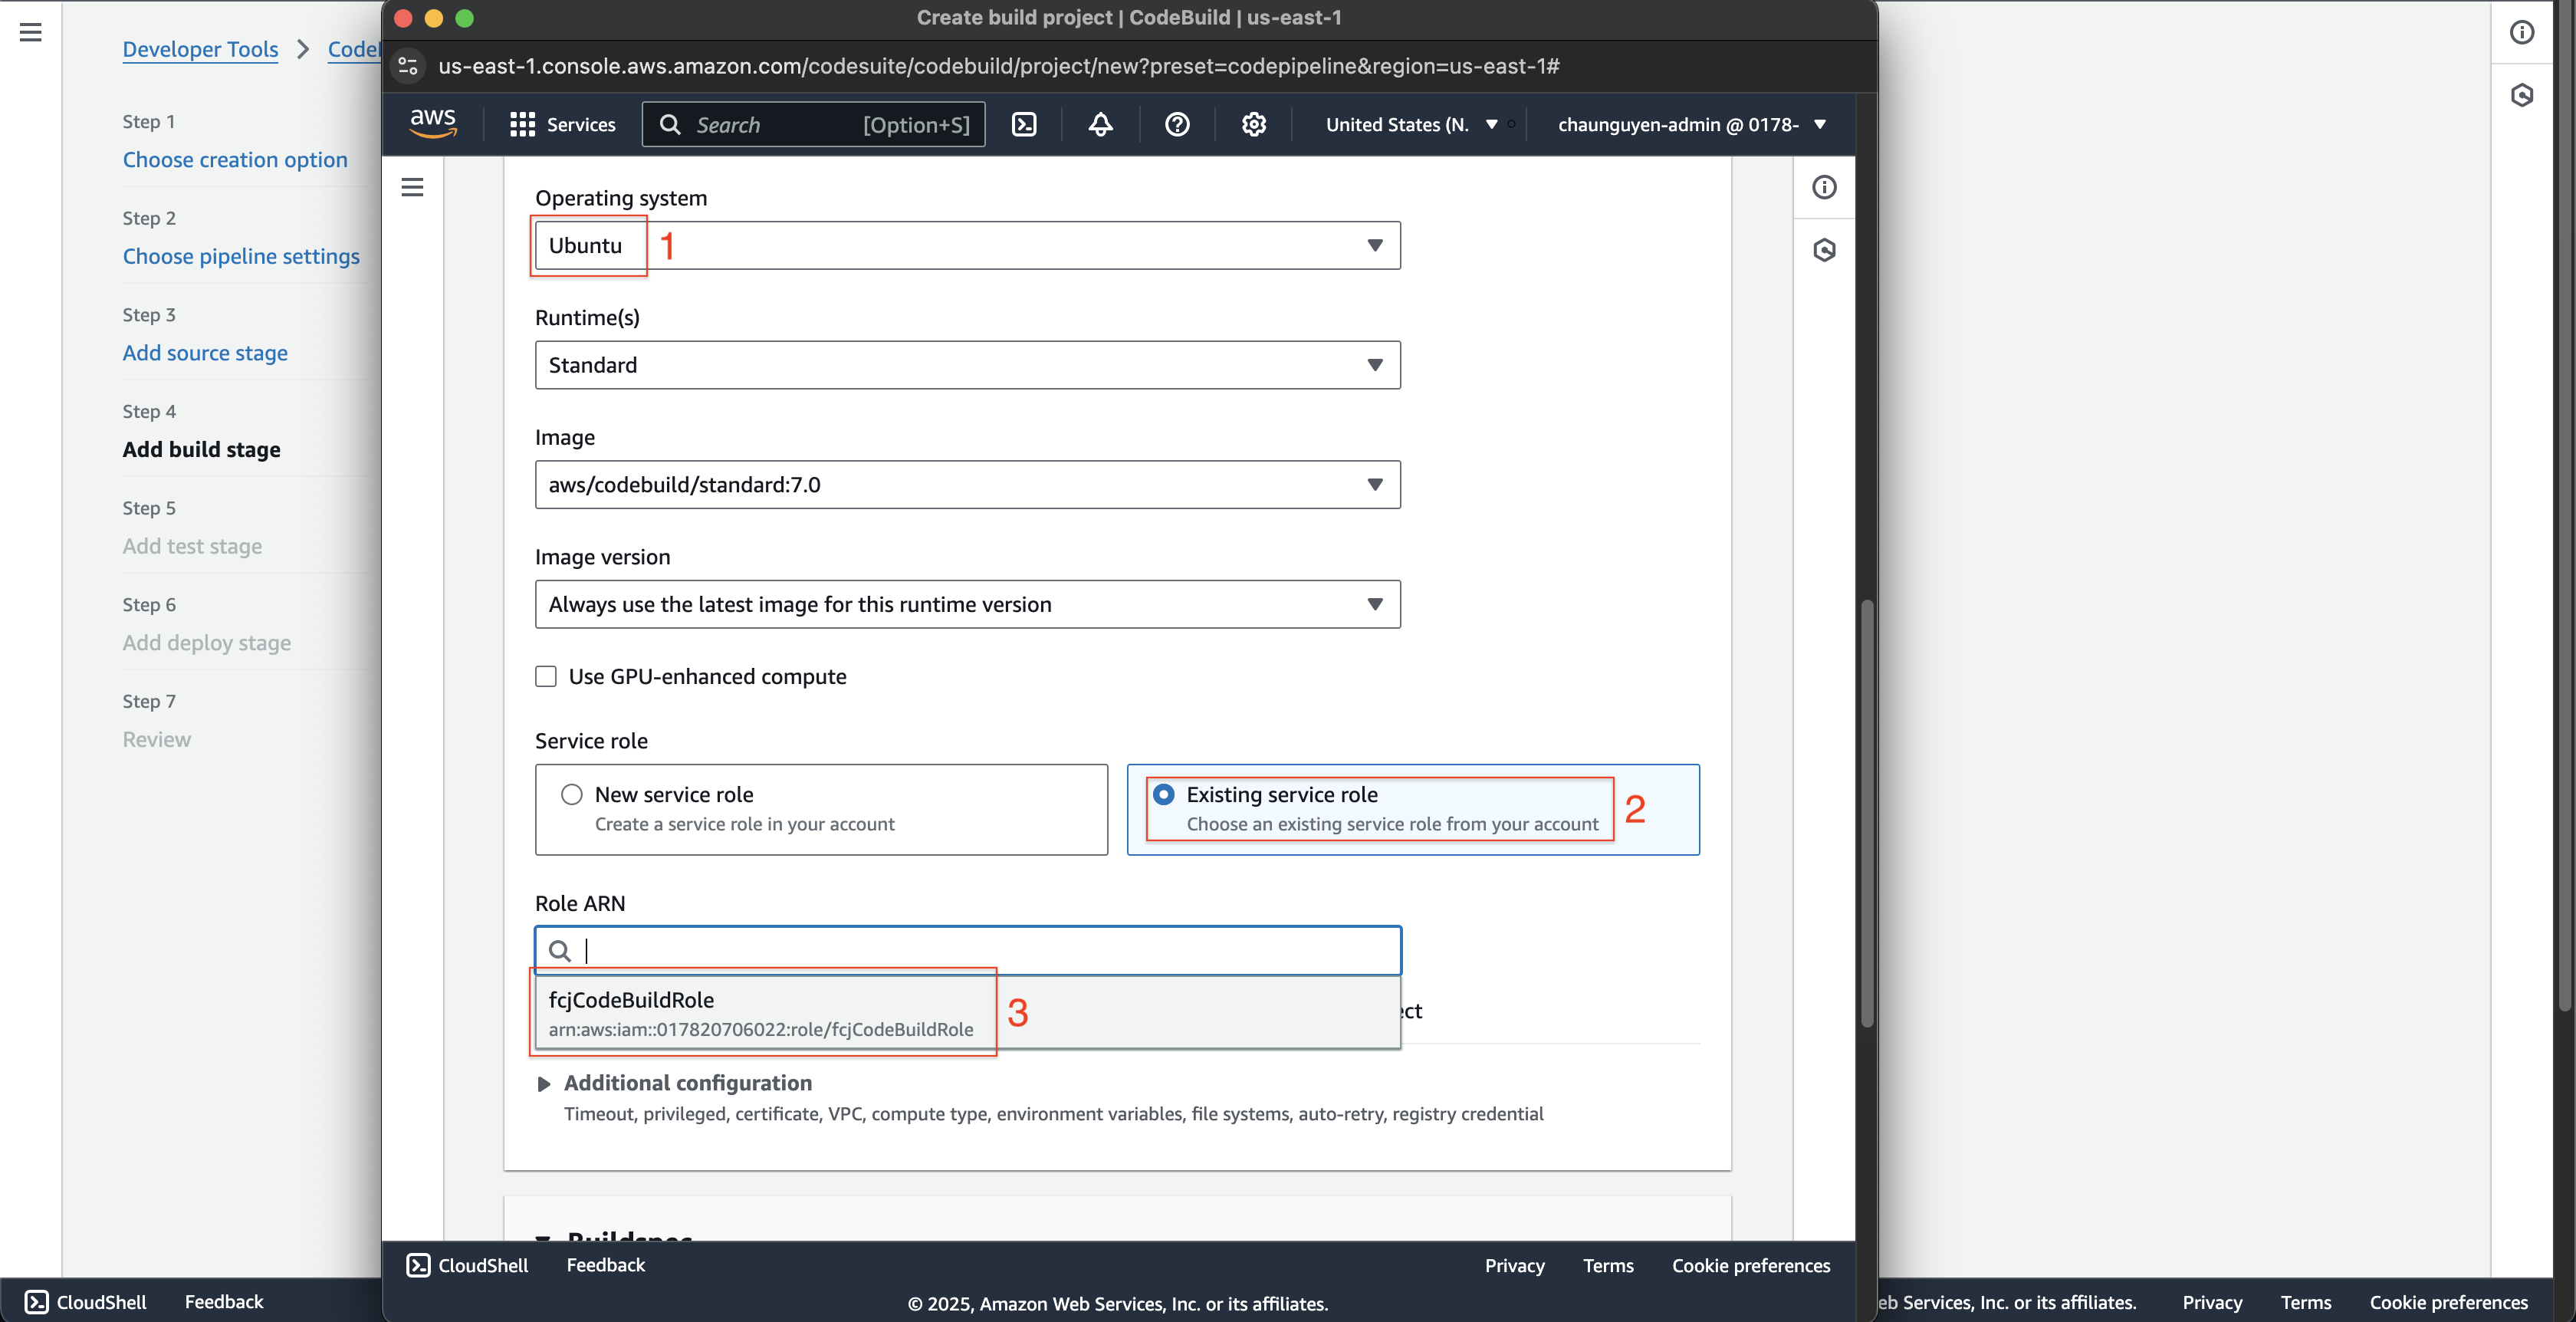
- At Create build project page at the new browser tab is just opened.
- Enter
fcjBookStoreBuildProjectat Project name.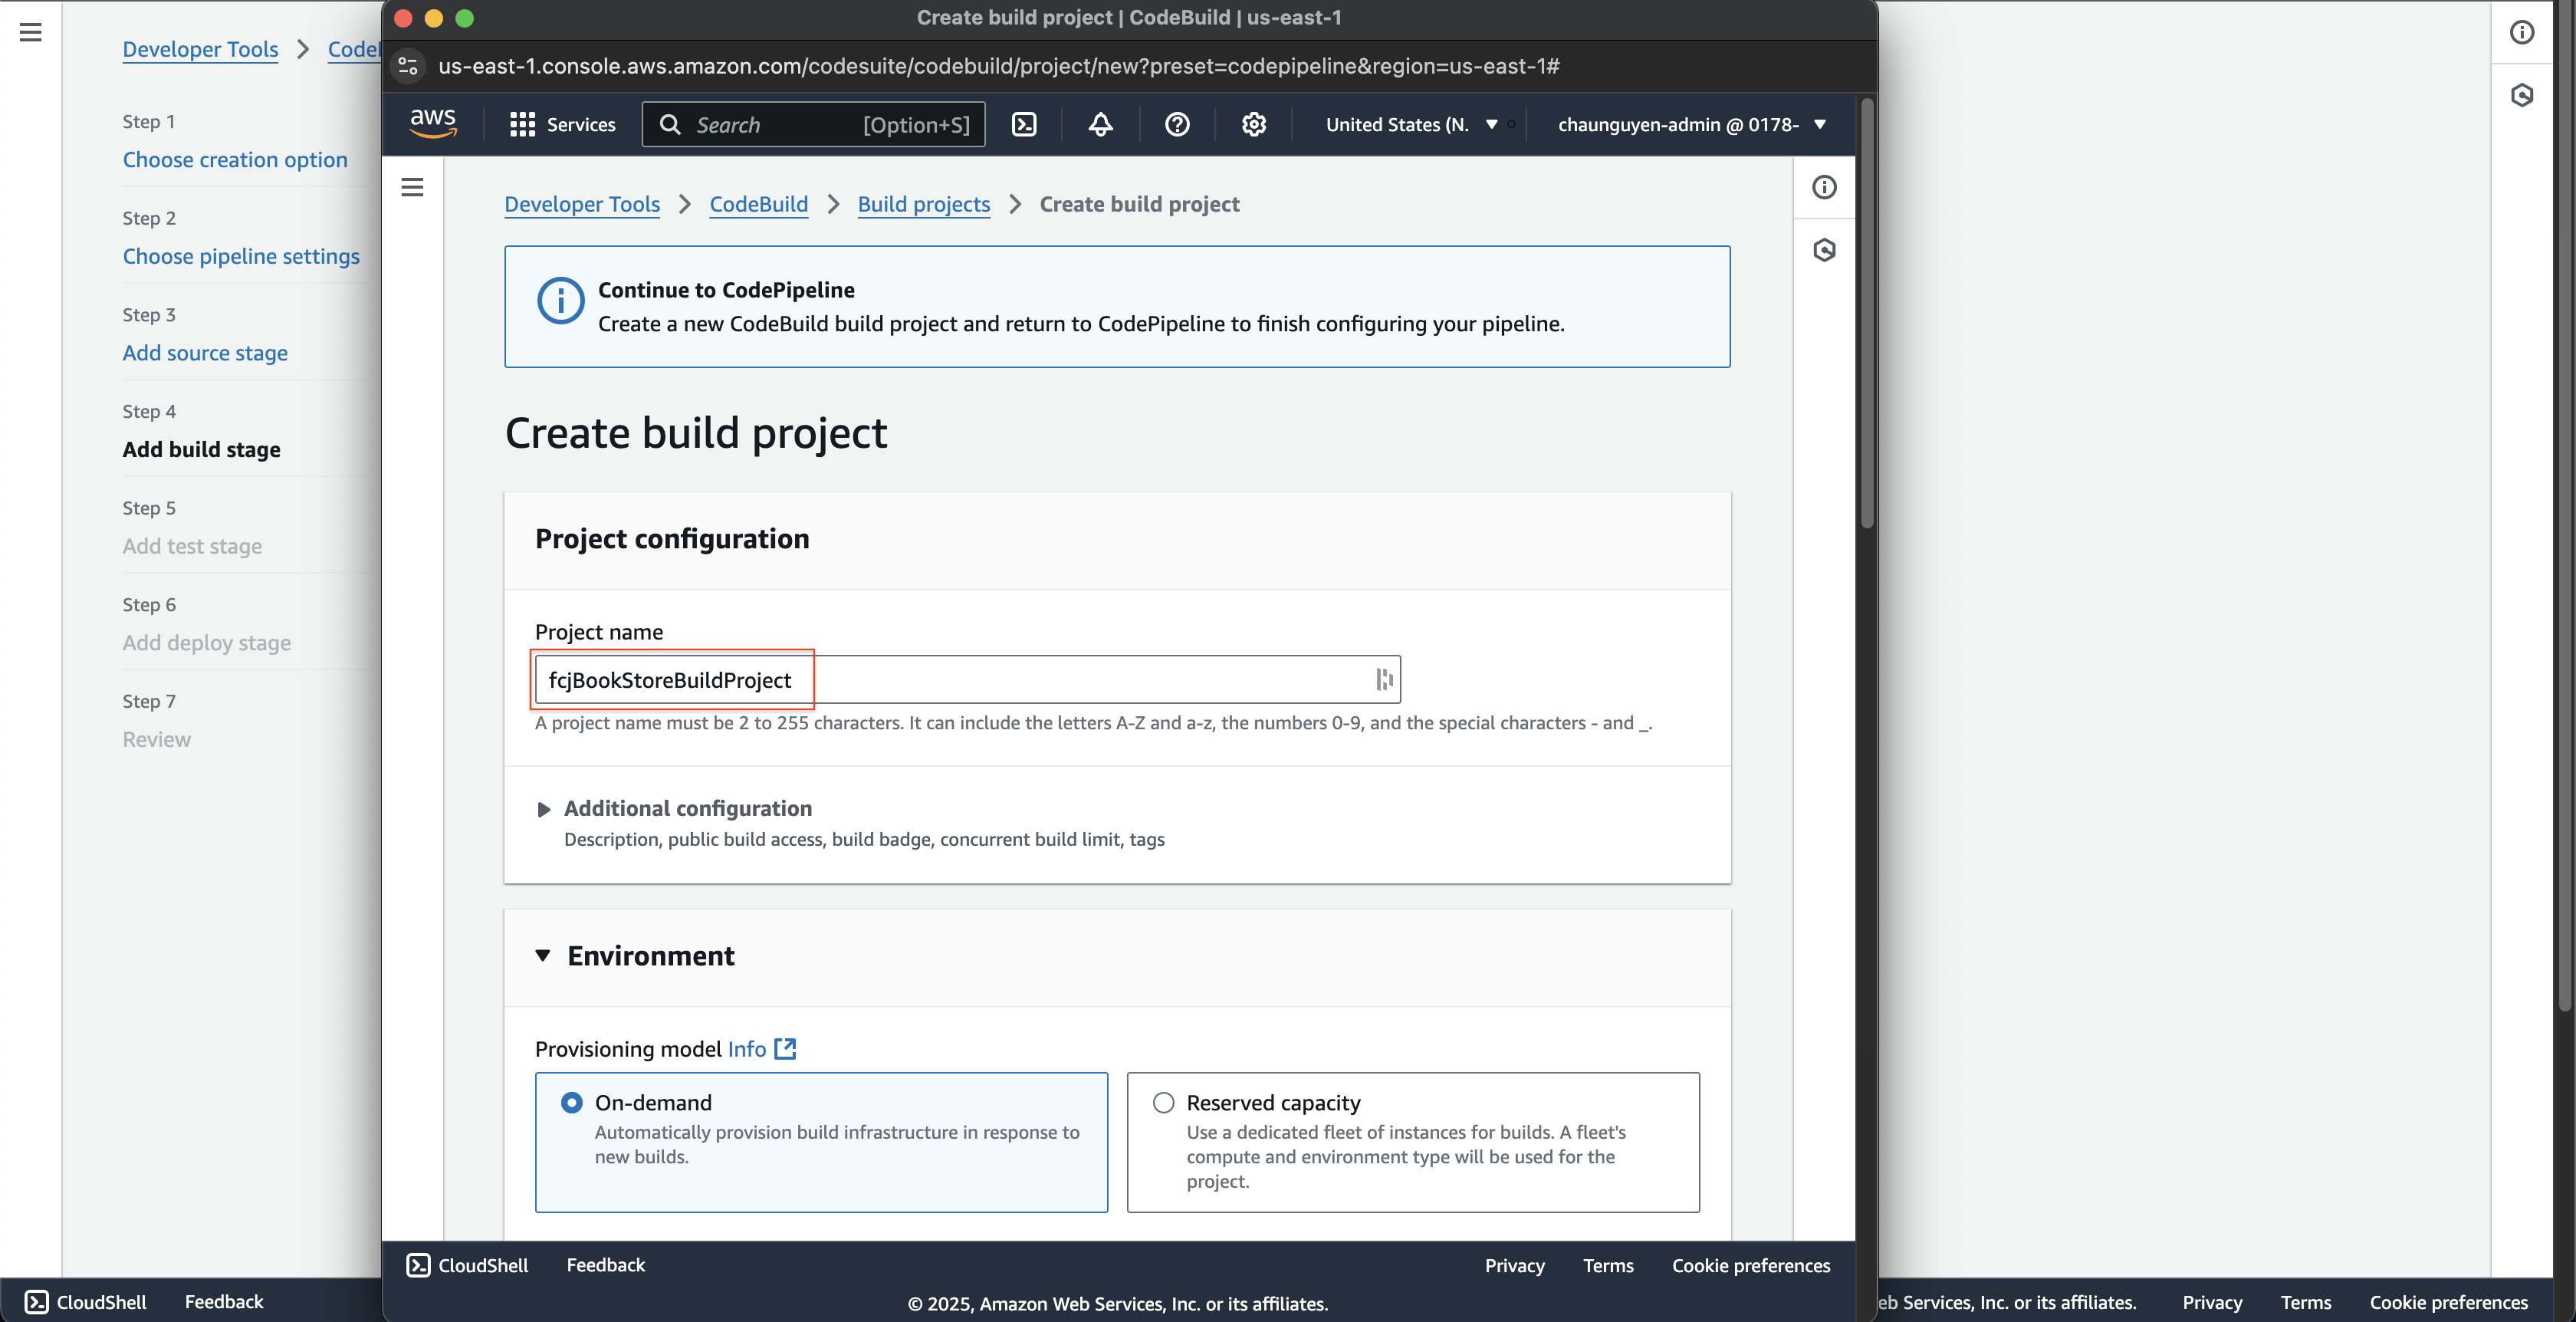
- Scroll down, choose Ubuntu at Operating system.
- Choose Existing service role at Service role.
- Choose fcjCodeBuildRole at Role ARN.
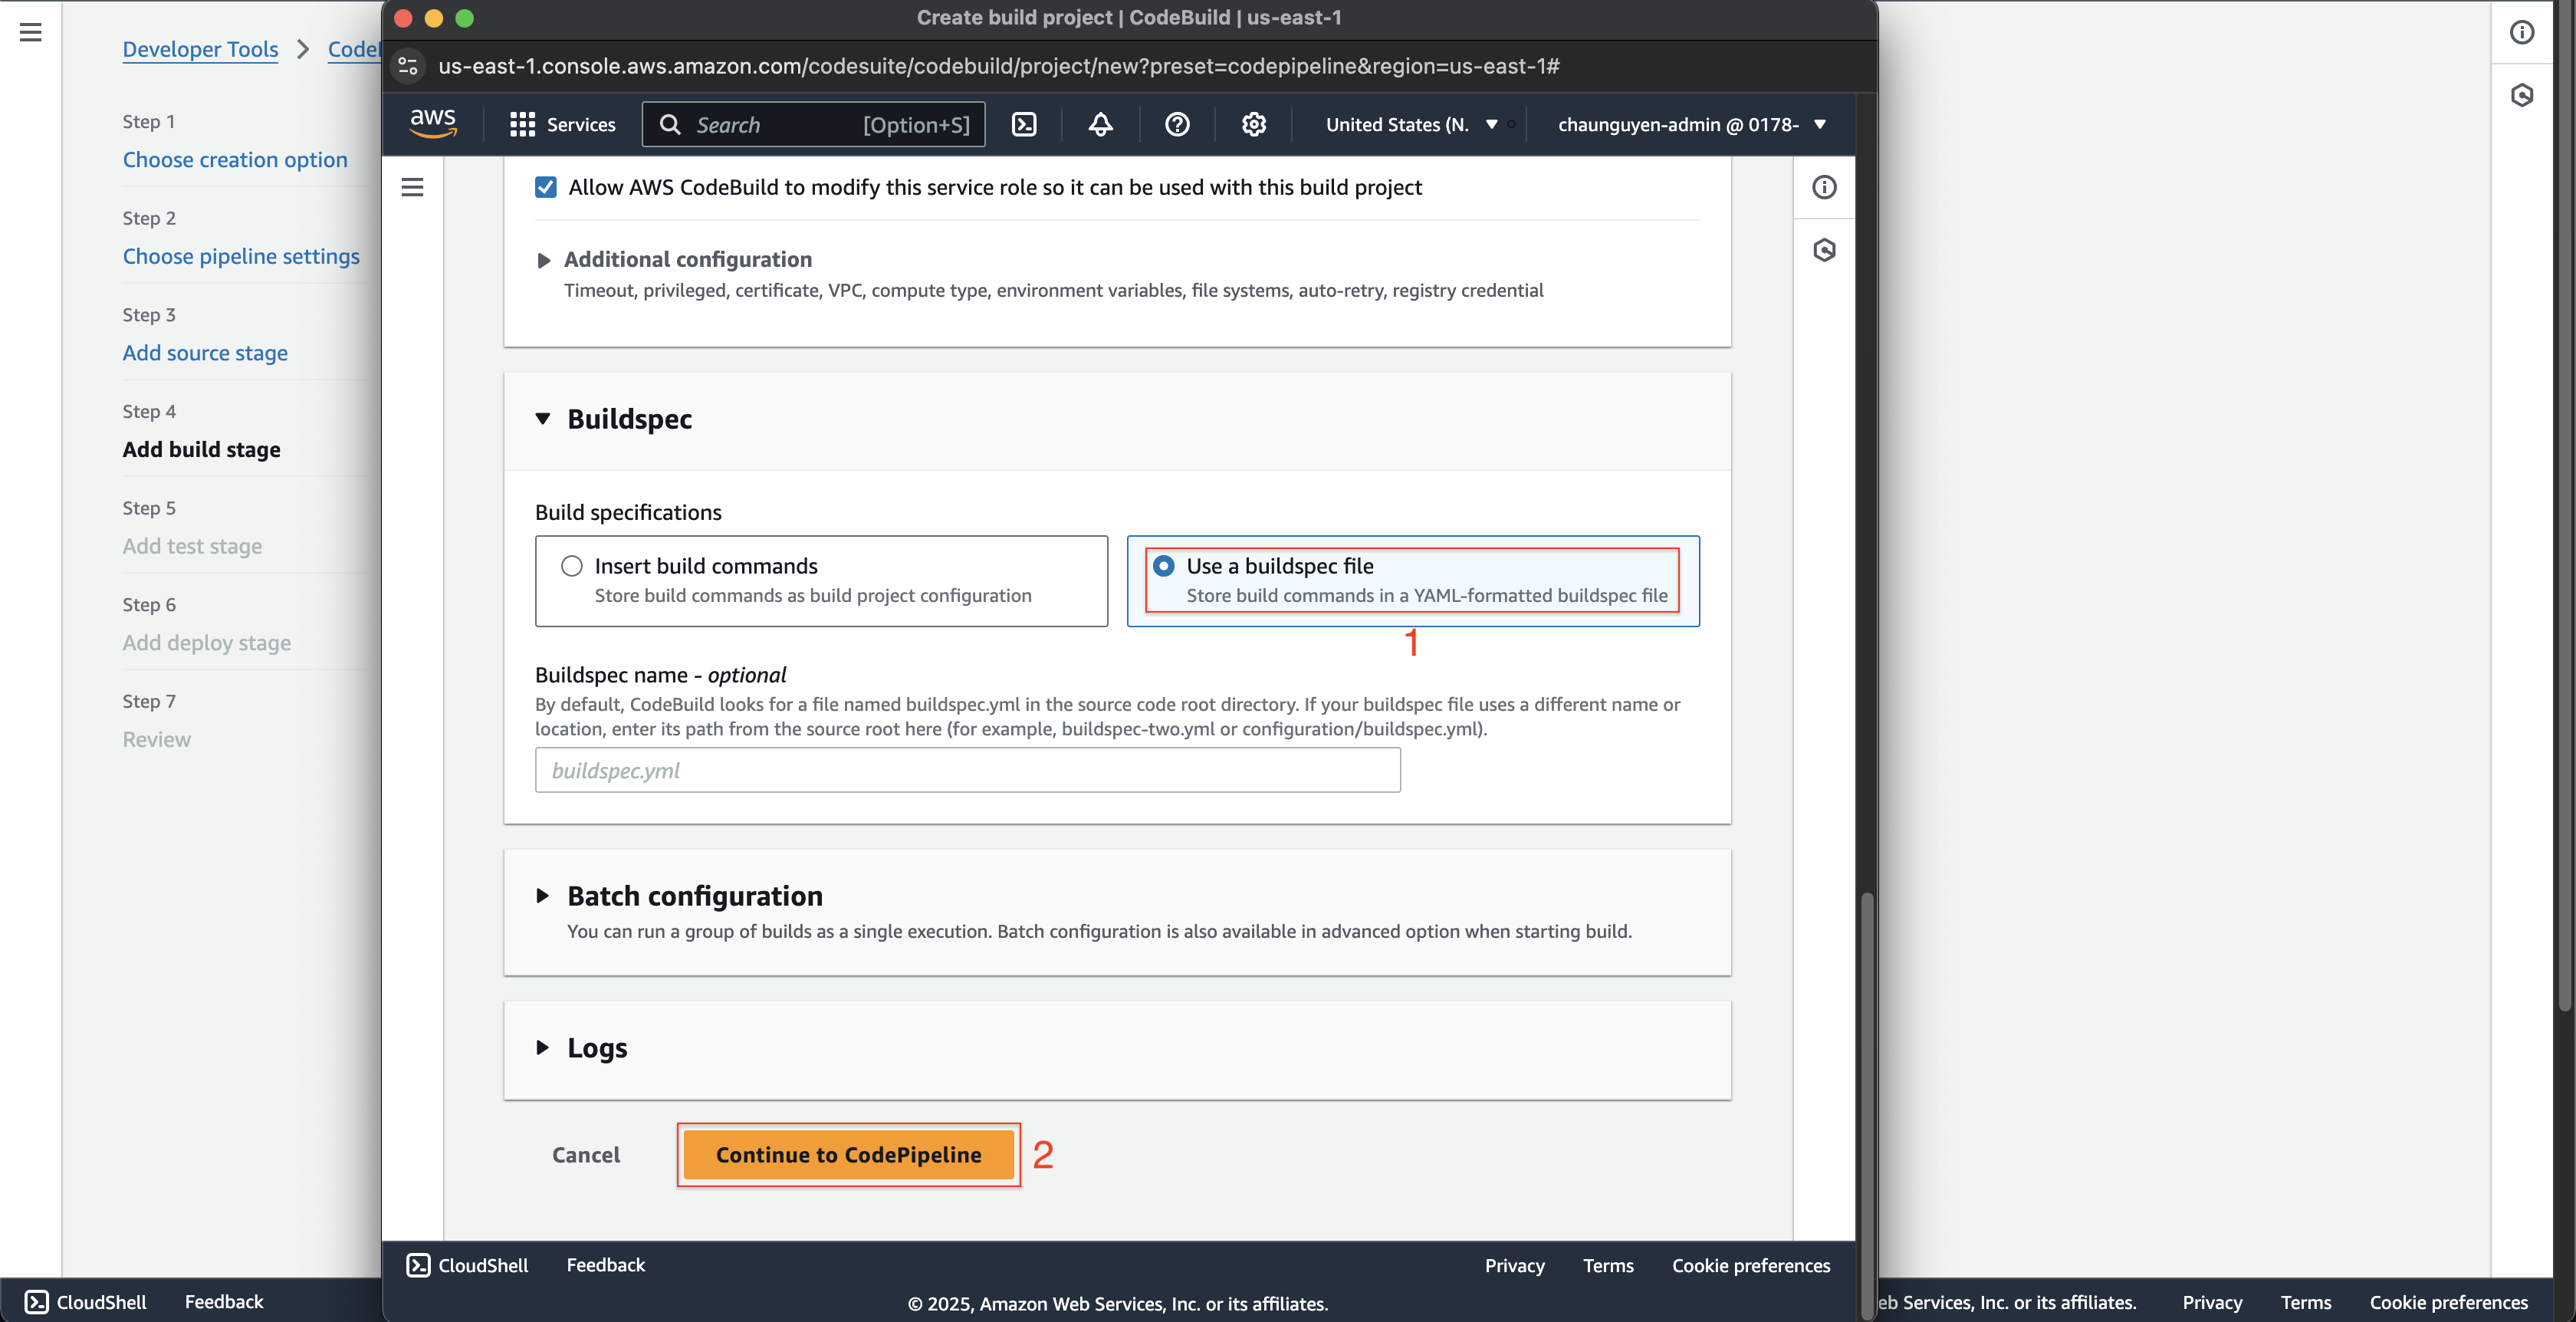
- Scroll down to the bottom, choose Use a buildspec file at Build specifications.
- Click the Continue to CodePipeline button.
- Enter
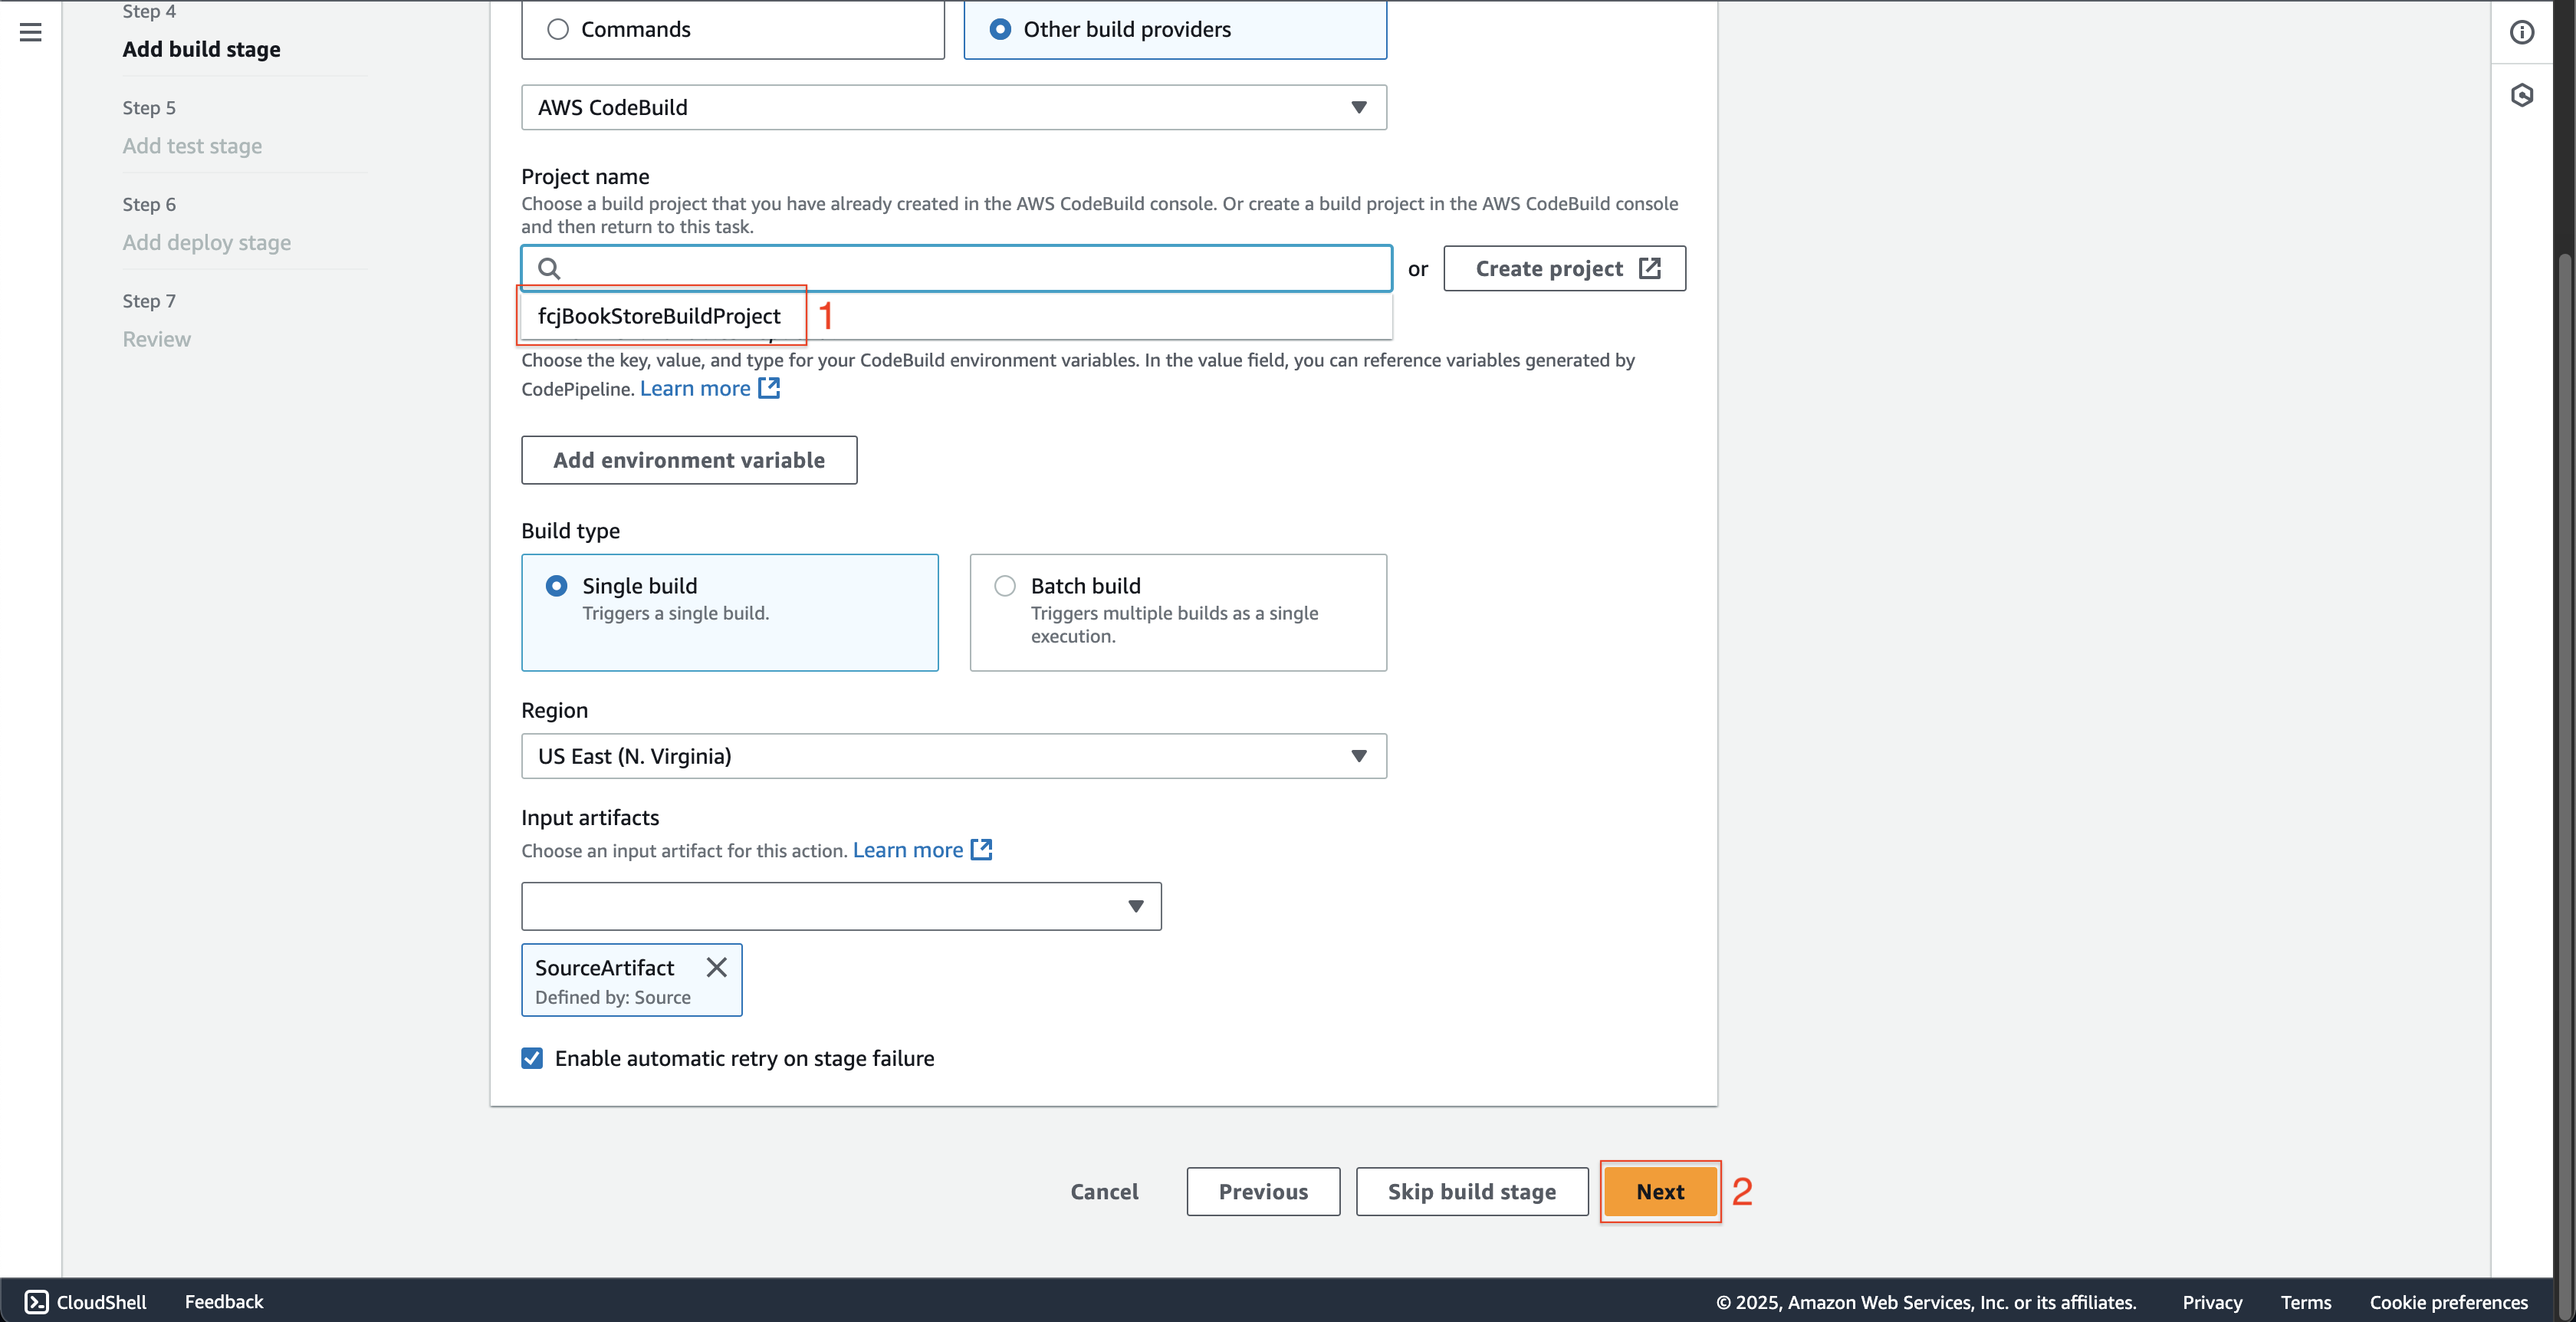
- Choose the fcjBookStoreBuildProject at Project name.
- Leave as default and click the Next button.
-
At Step 5: Add test stage page.
- Click the Skip test stage button.
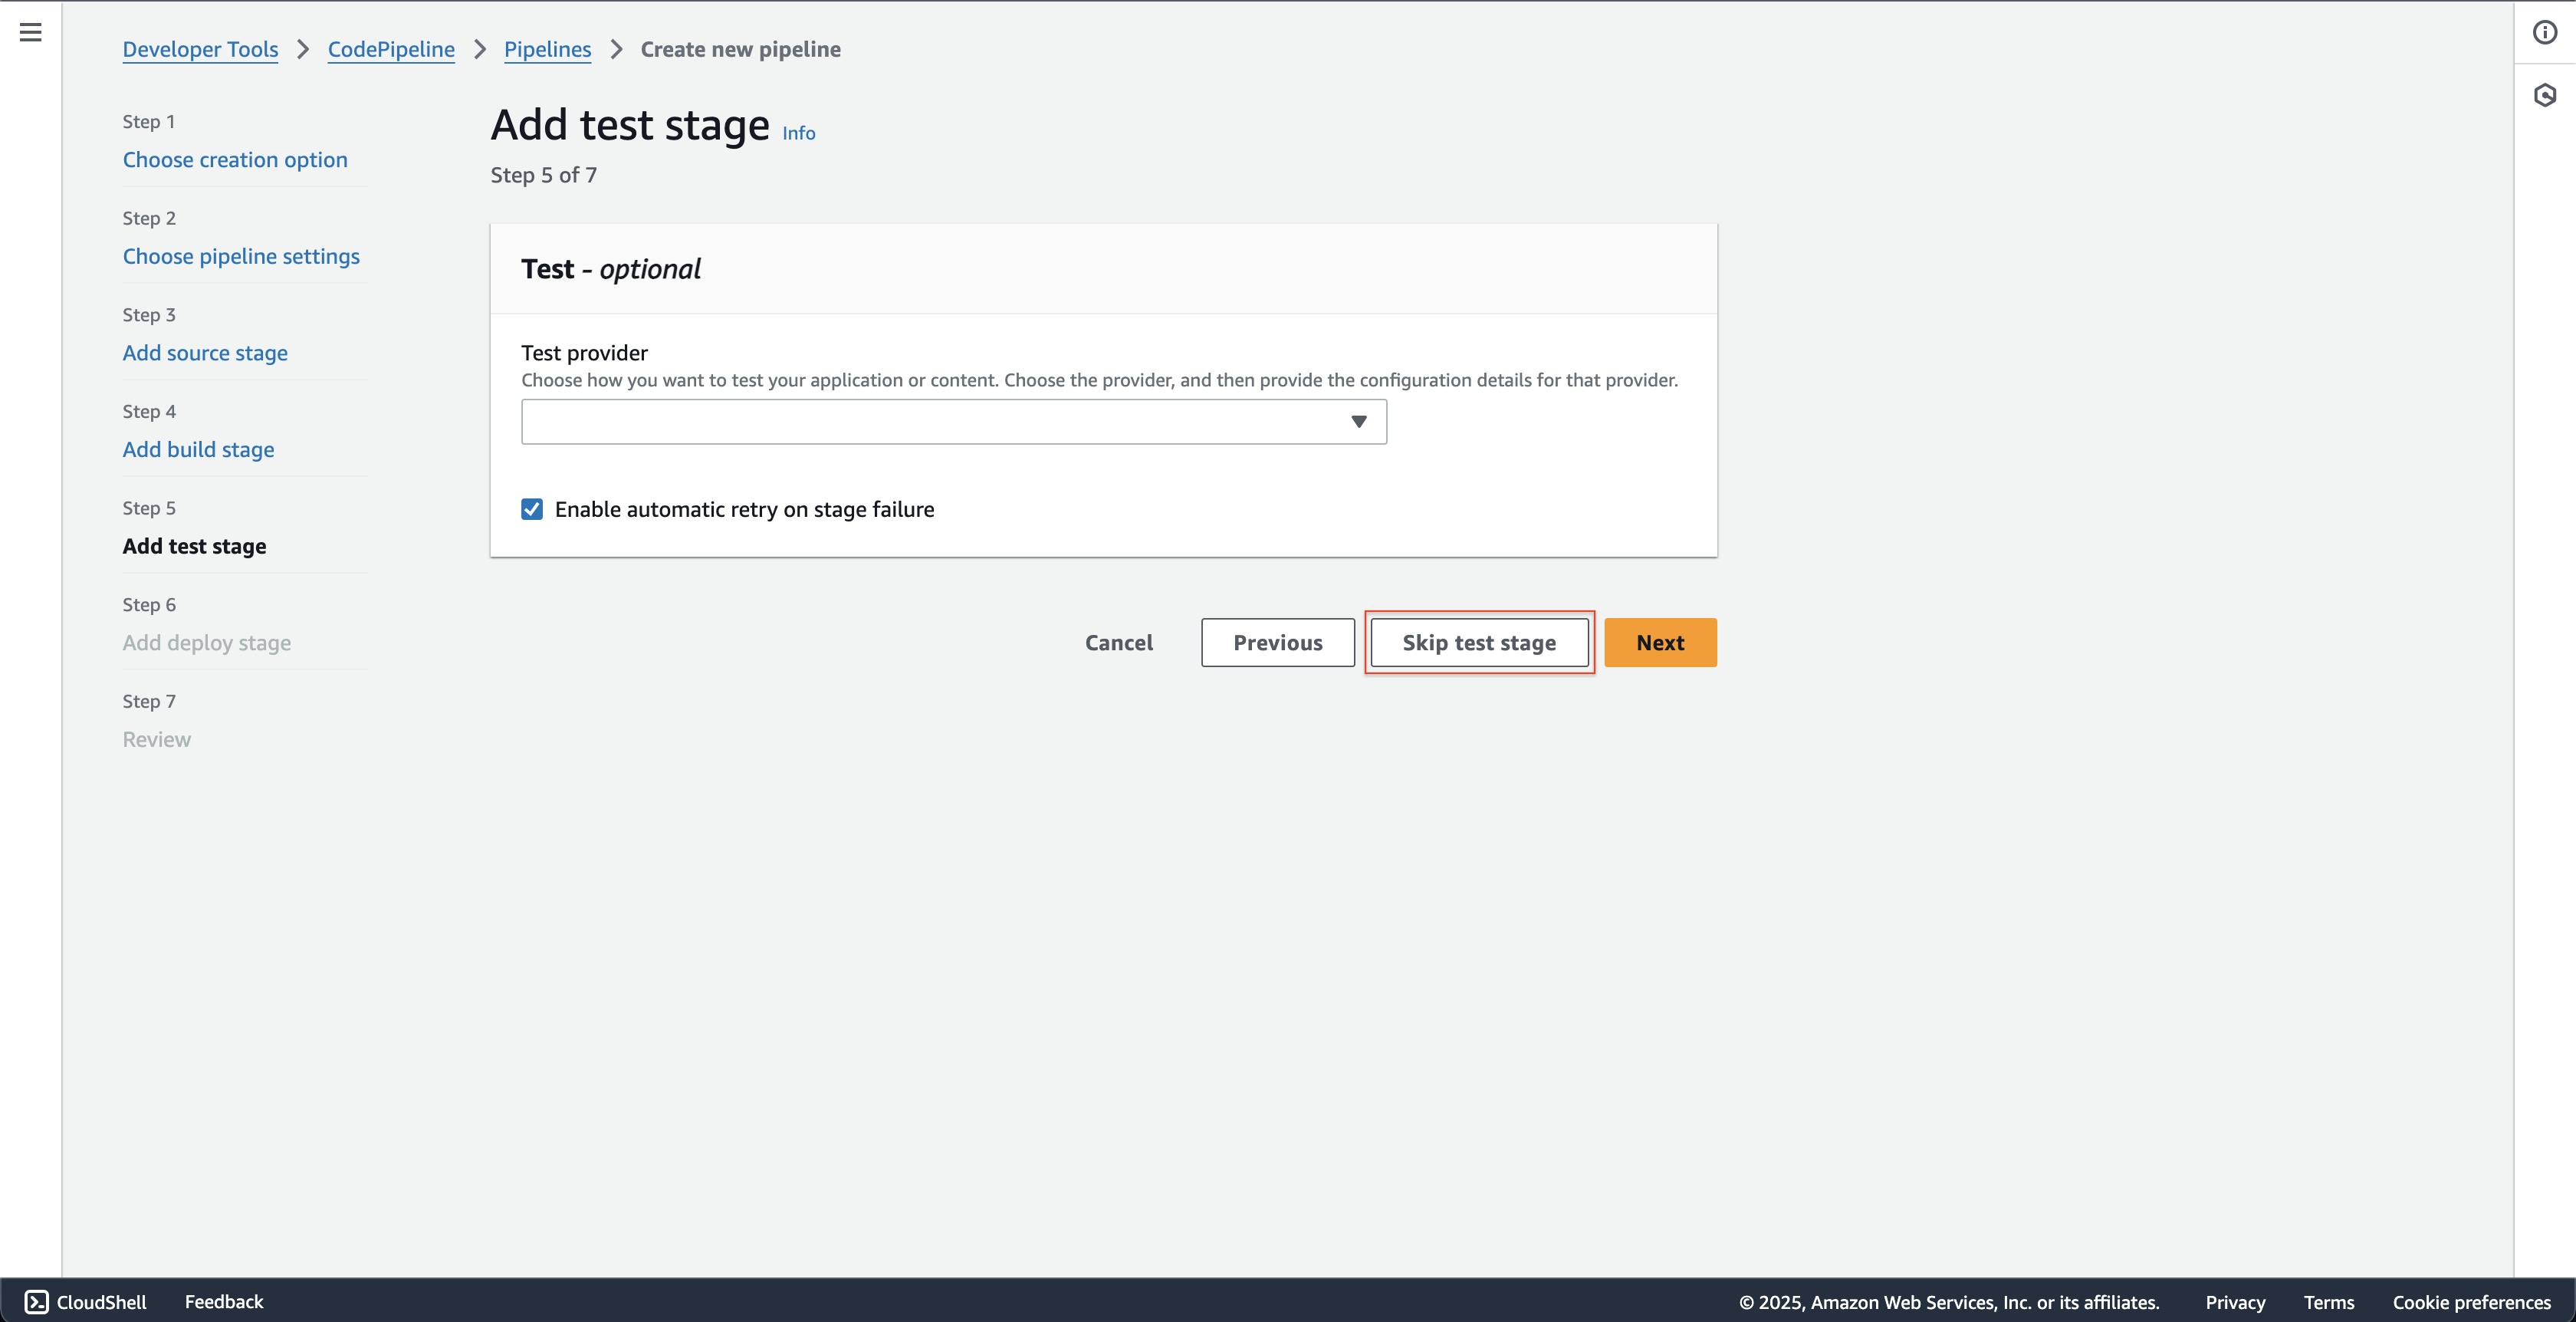
- Click the Skip test stage button.
-
At Step 6: Add deploy stage page.
- Choose the AWS CloudFormation at Deploy provider.
- Choose the BuildArtifact at Input artifacts.
- Choose the Create or update a stack at Action mode.
- Enter
fcj-book-storeat Stack name.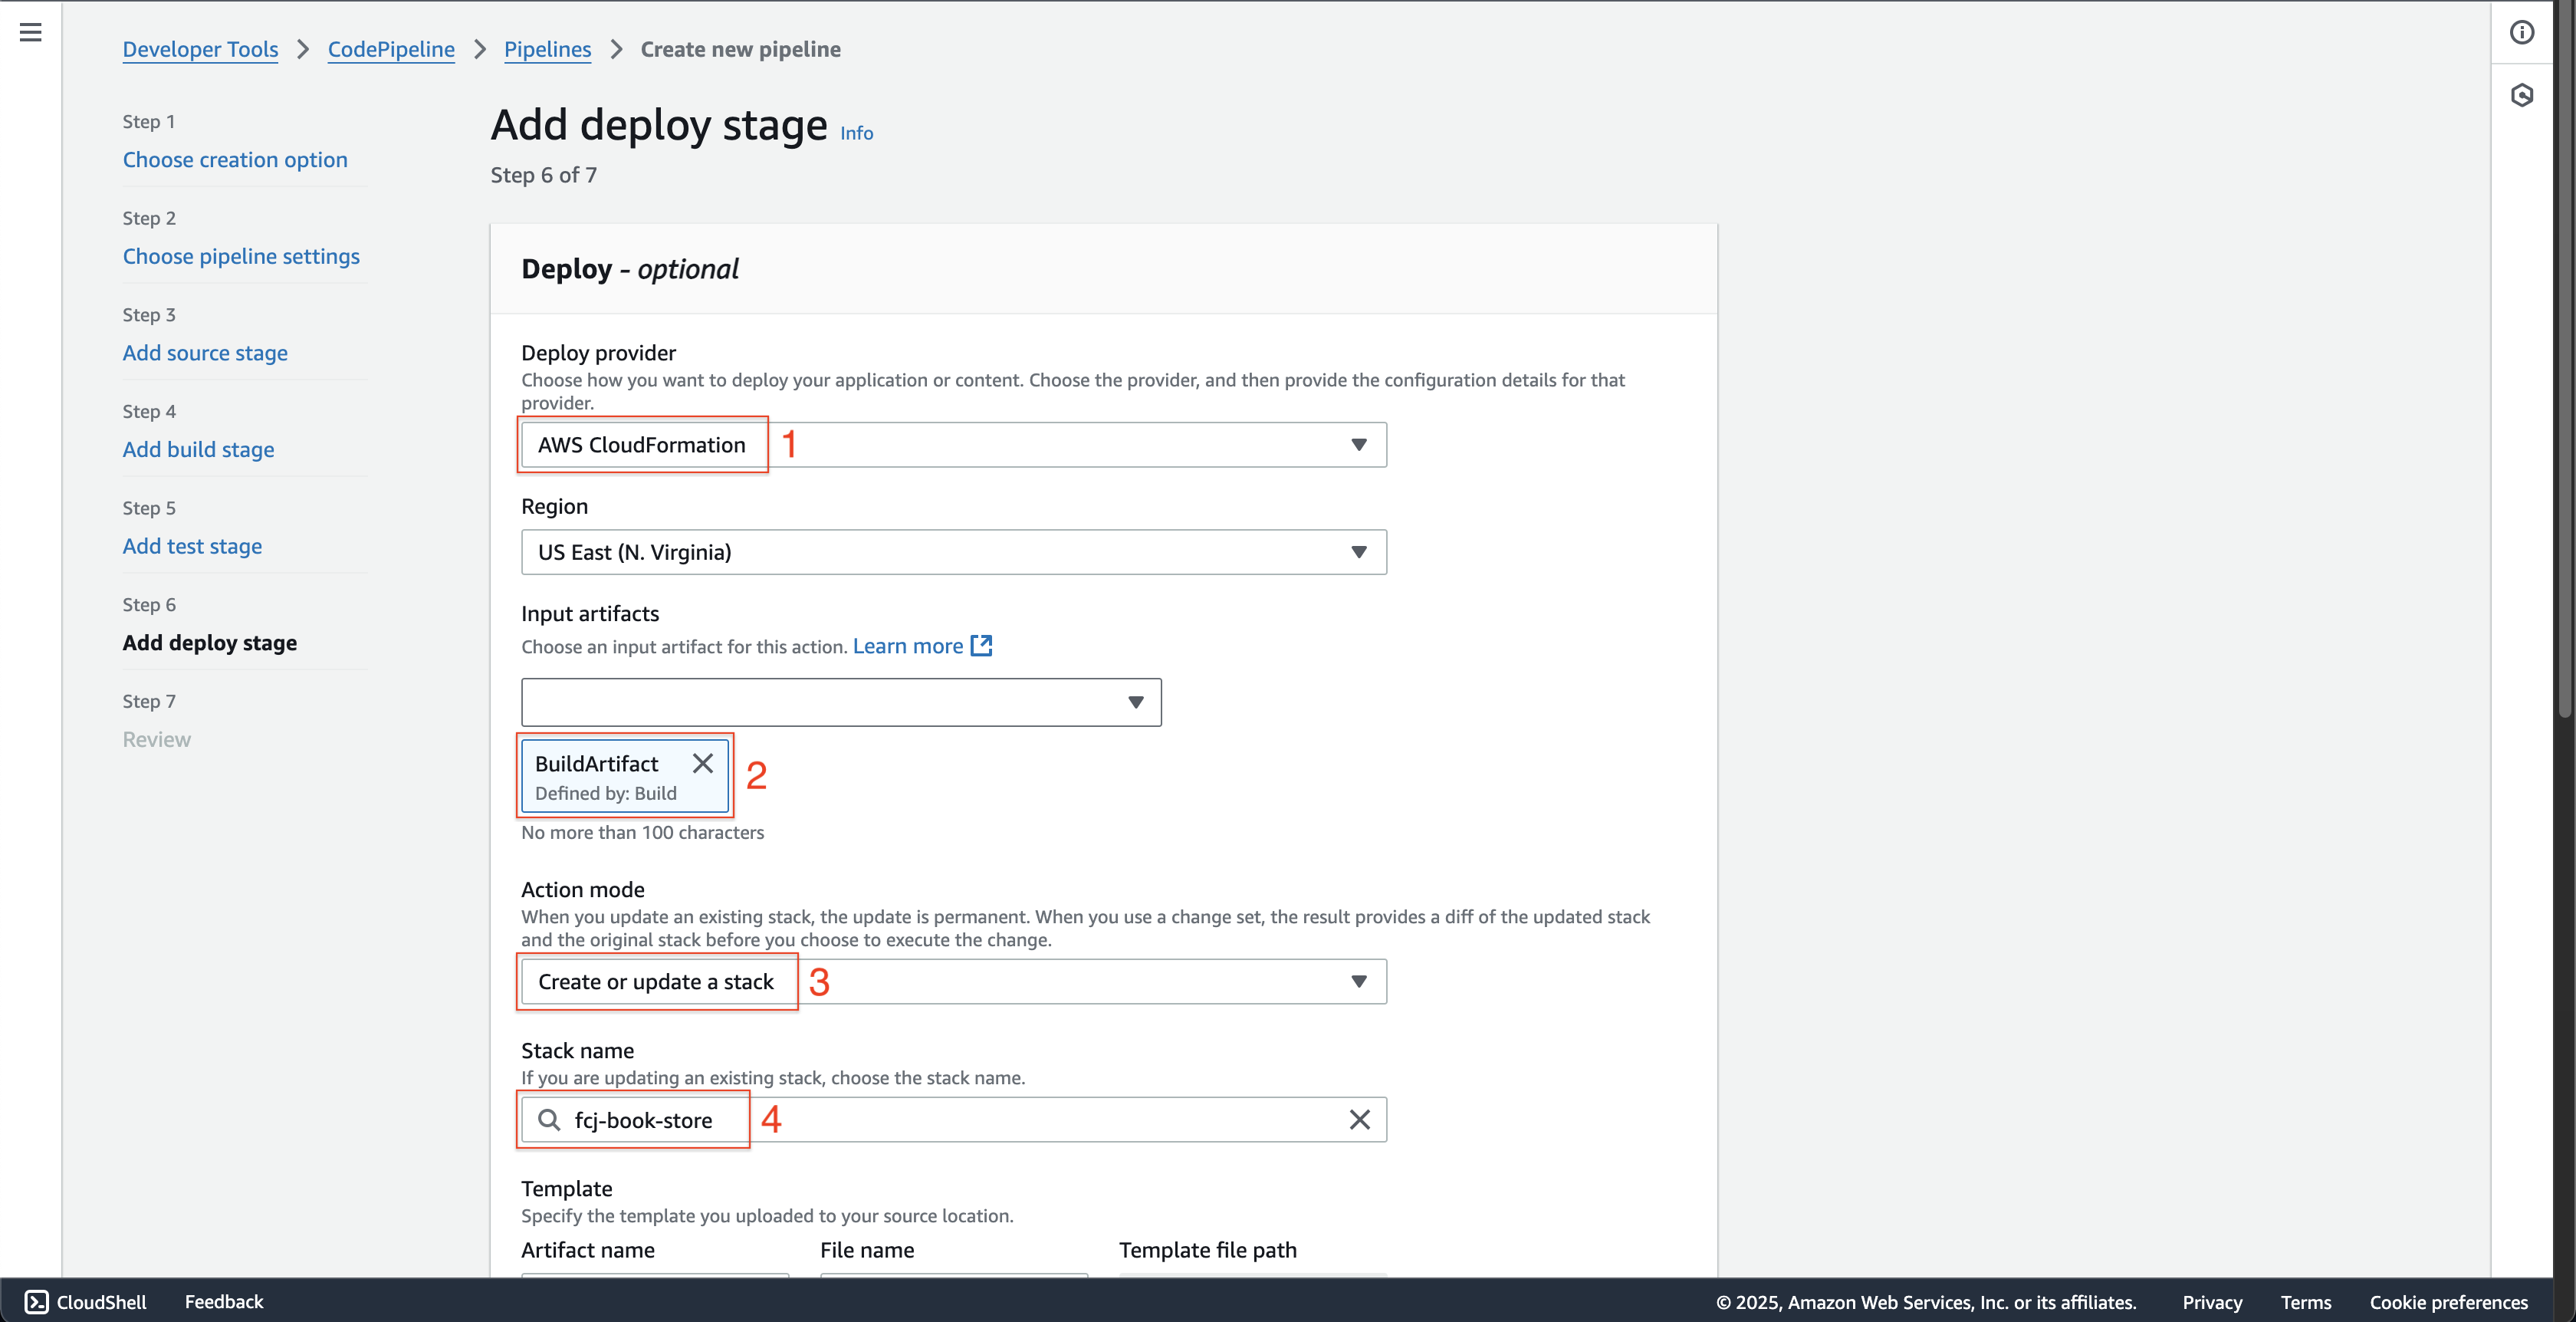
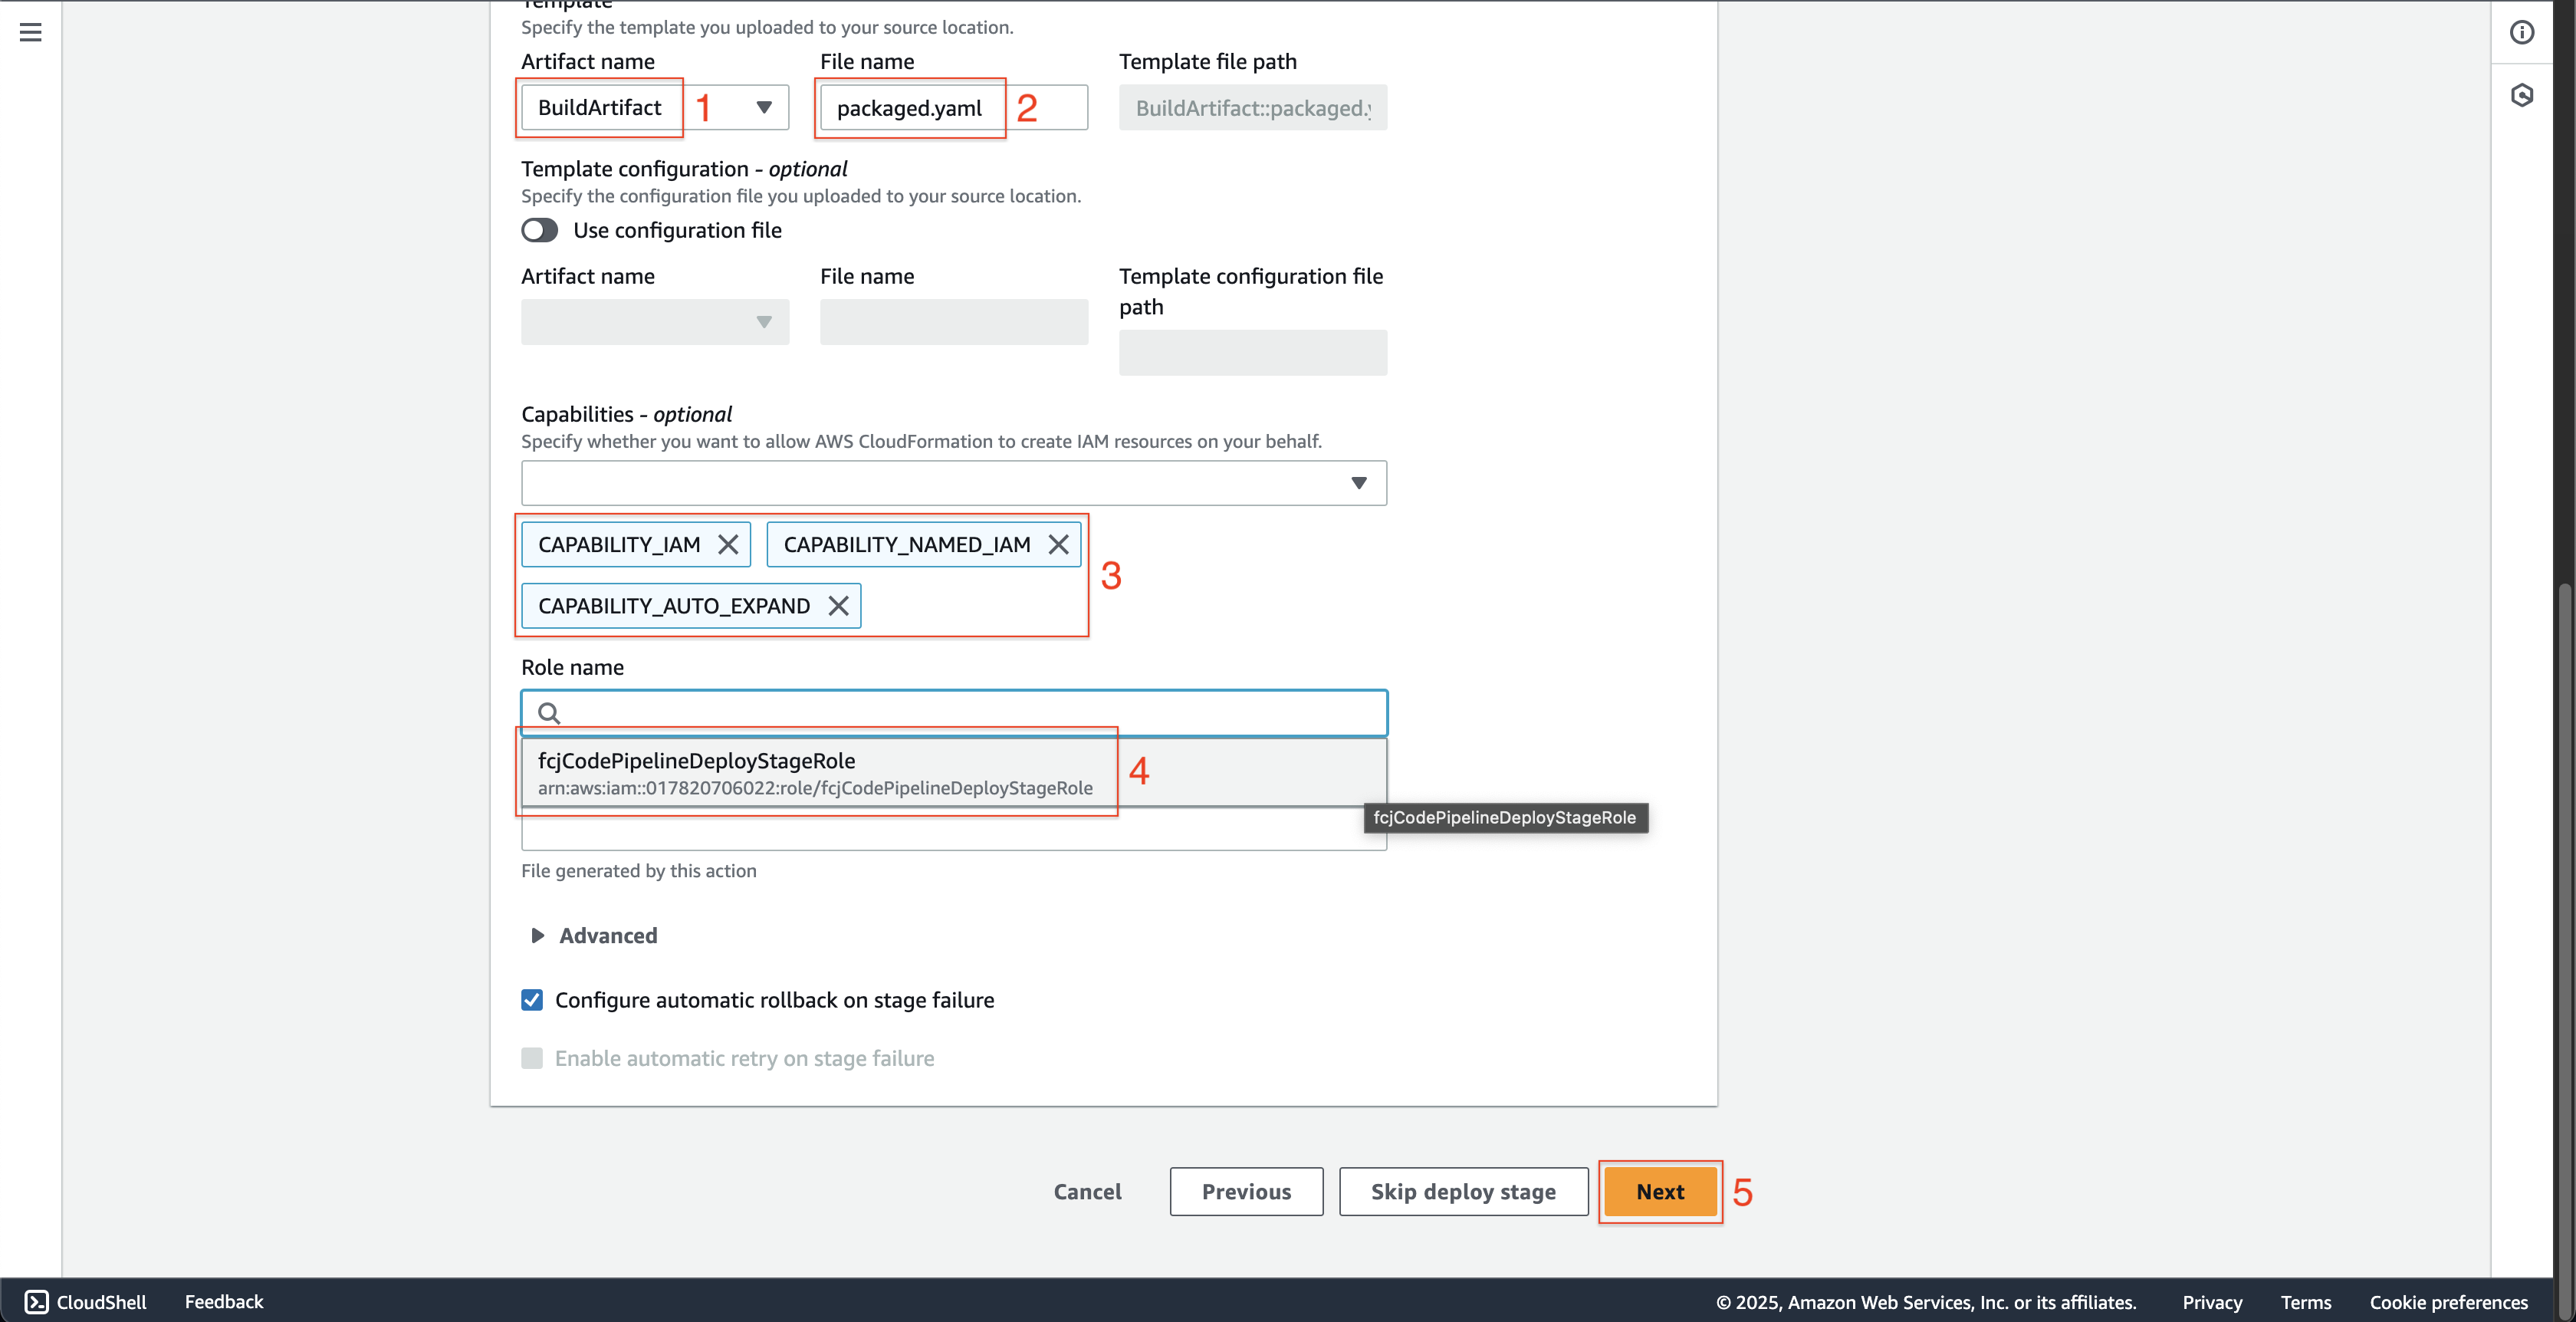
- Scroll down, choose BuildArtifact at Artifact name.
- Enter
packaged.yamlat File name. - Choose the CAPABILITY_IAM, CAPABILITY_NAMED_IAM and CAPABILITY_AUTO_EXPAND at Capabilities - optional.
- Choose the fcjCodePipelineDeployStageRole at Role name.
- Click the Next button.
-
At Step 7: Review page.
- Scroll down and click the Create pipeline button.

- Scroll down and click the Create pipeline button.
Test the pipeline
-
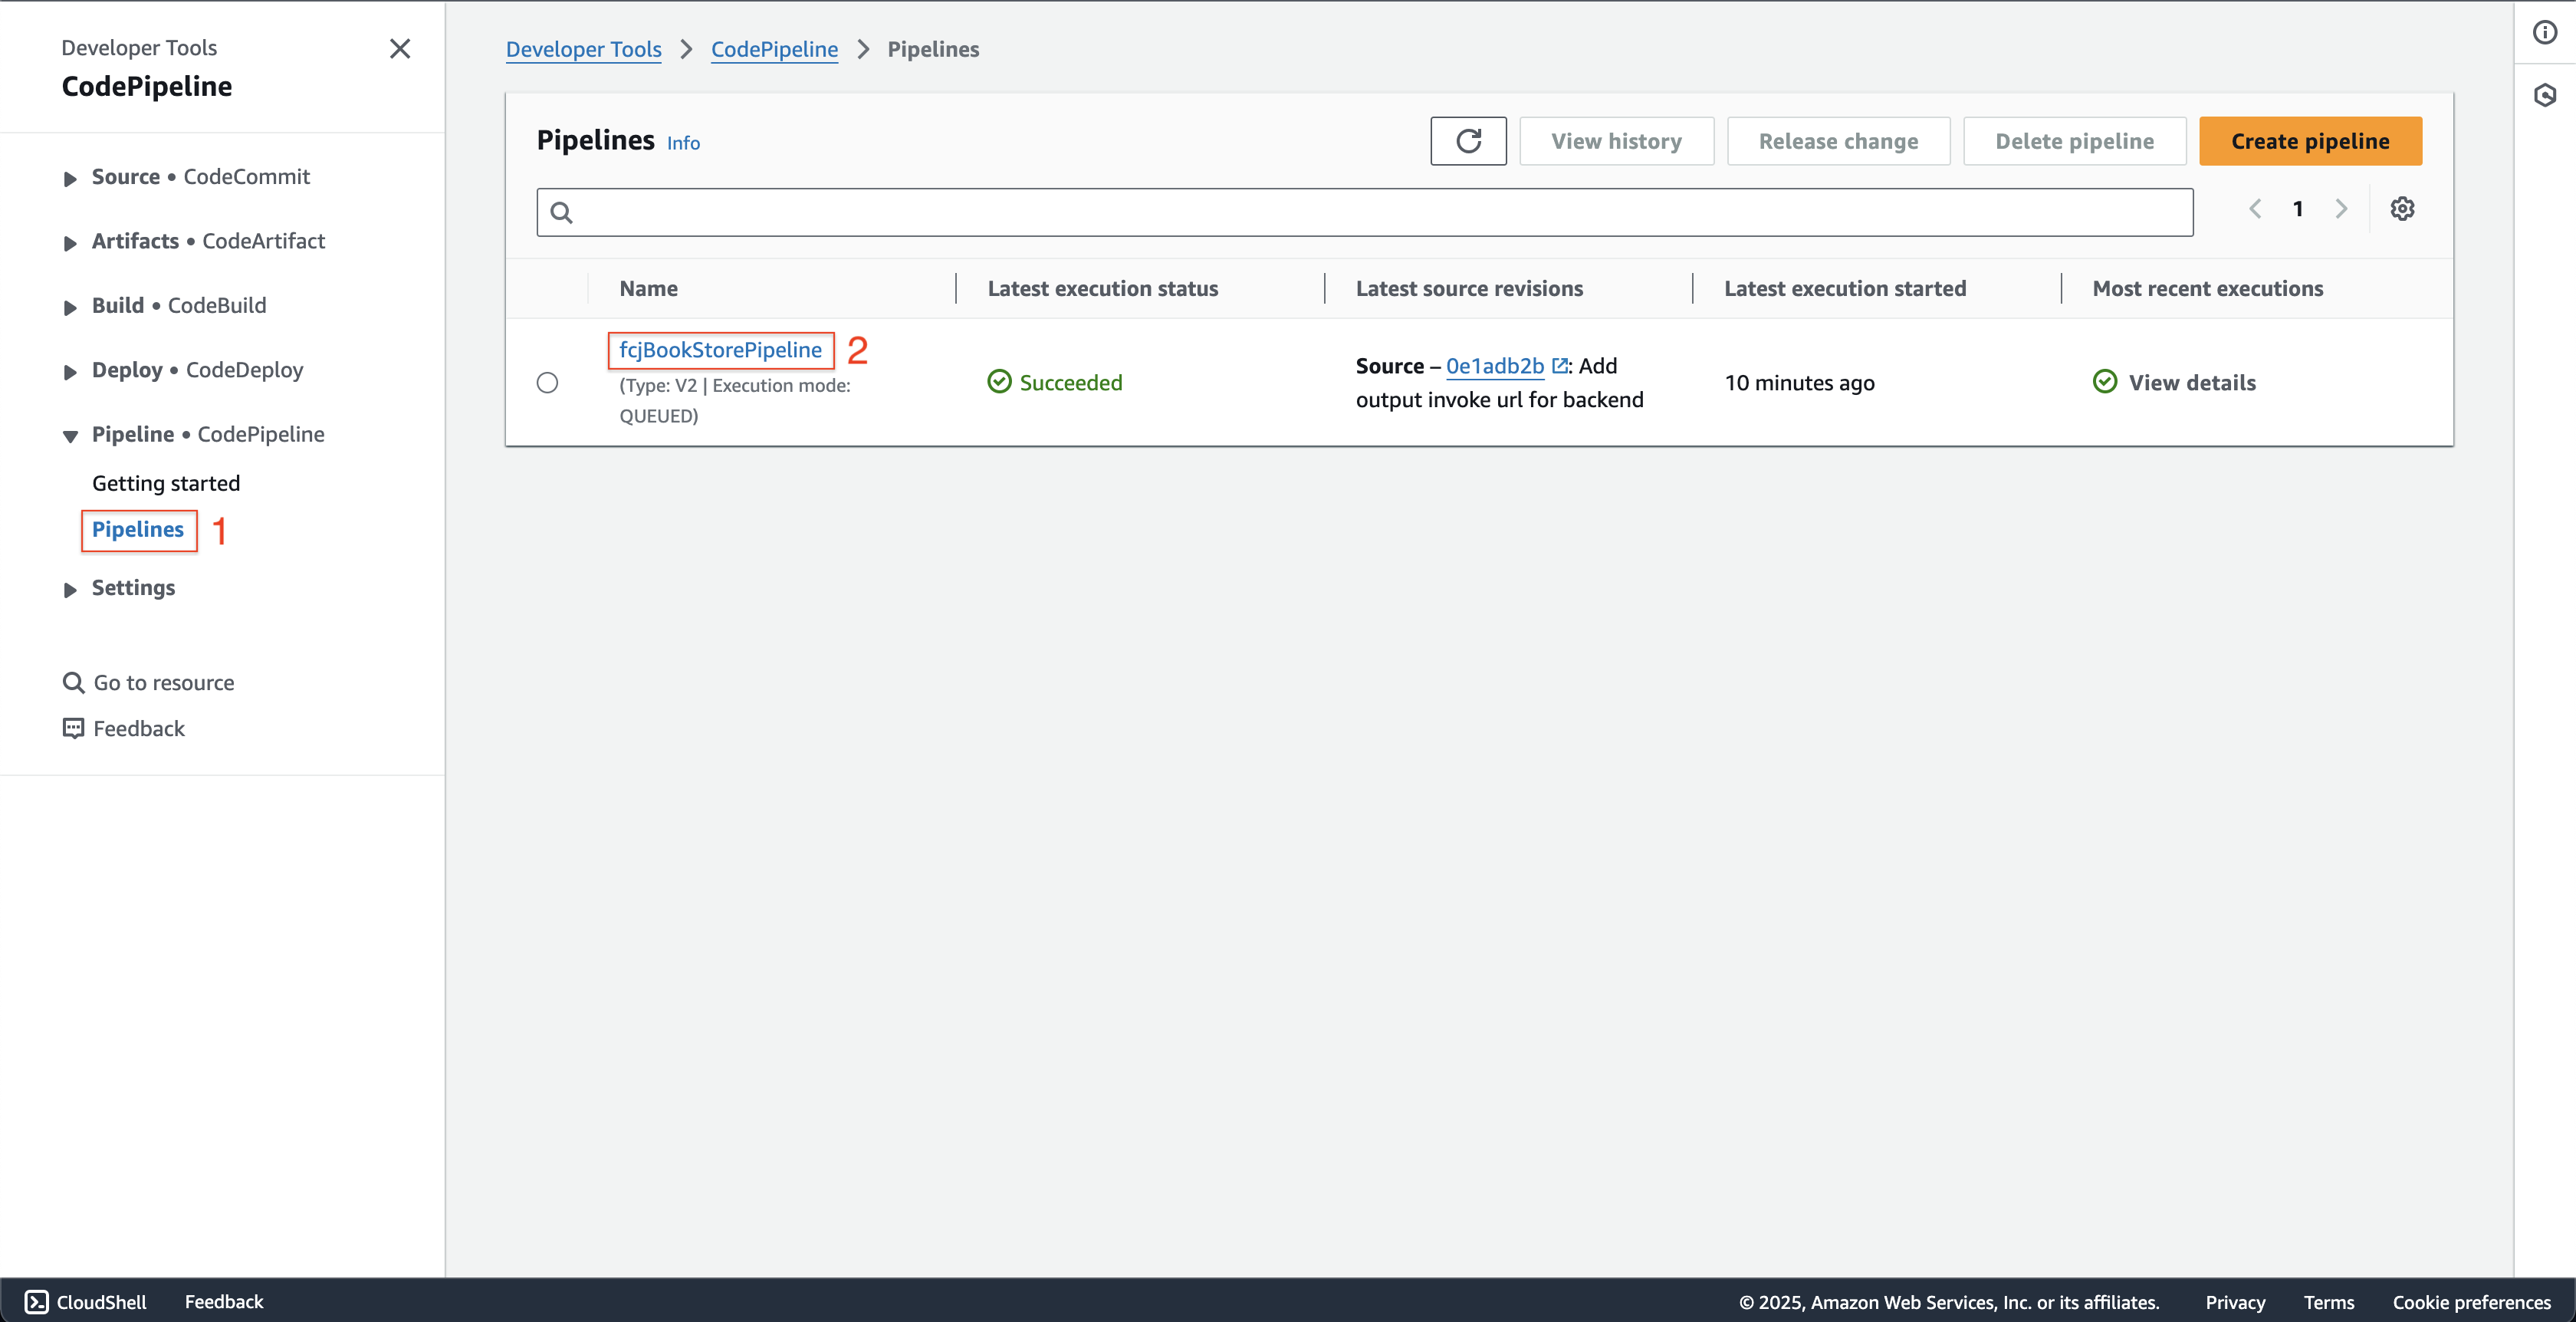
Open AWS CodePipeline console.
- Click Pipelines on the left menu.
- Choose fcjBookStorePipeline pipeline.
-
At fcjBookStorePipeline page.
- Scroll down to the bottom, click the View details button.
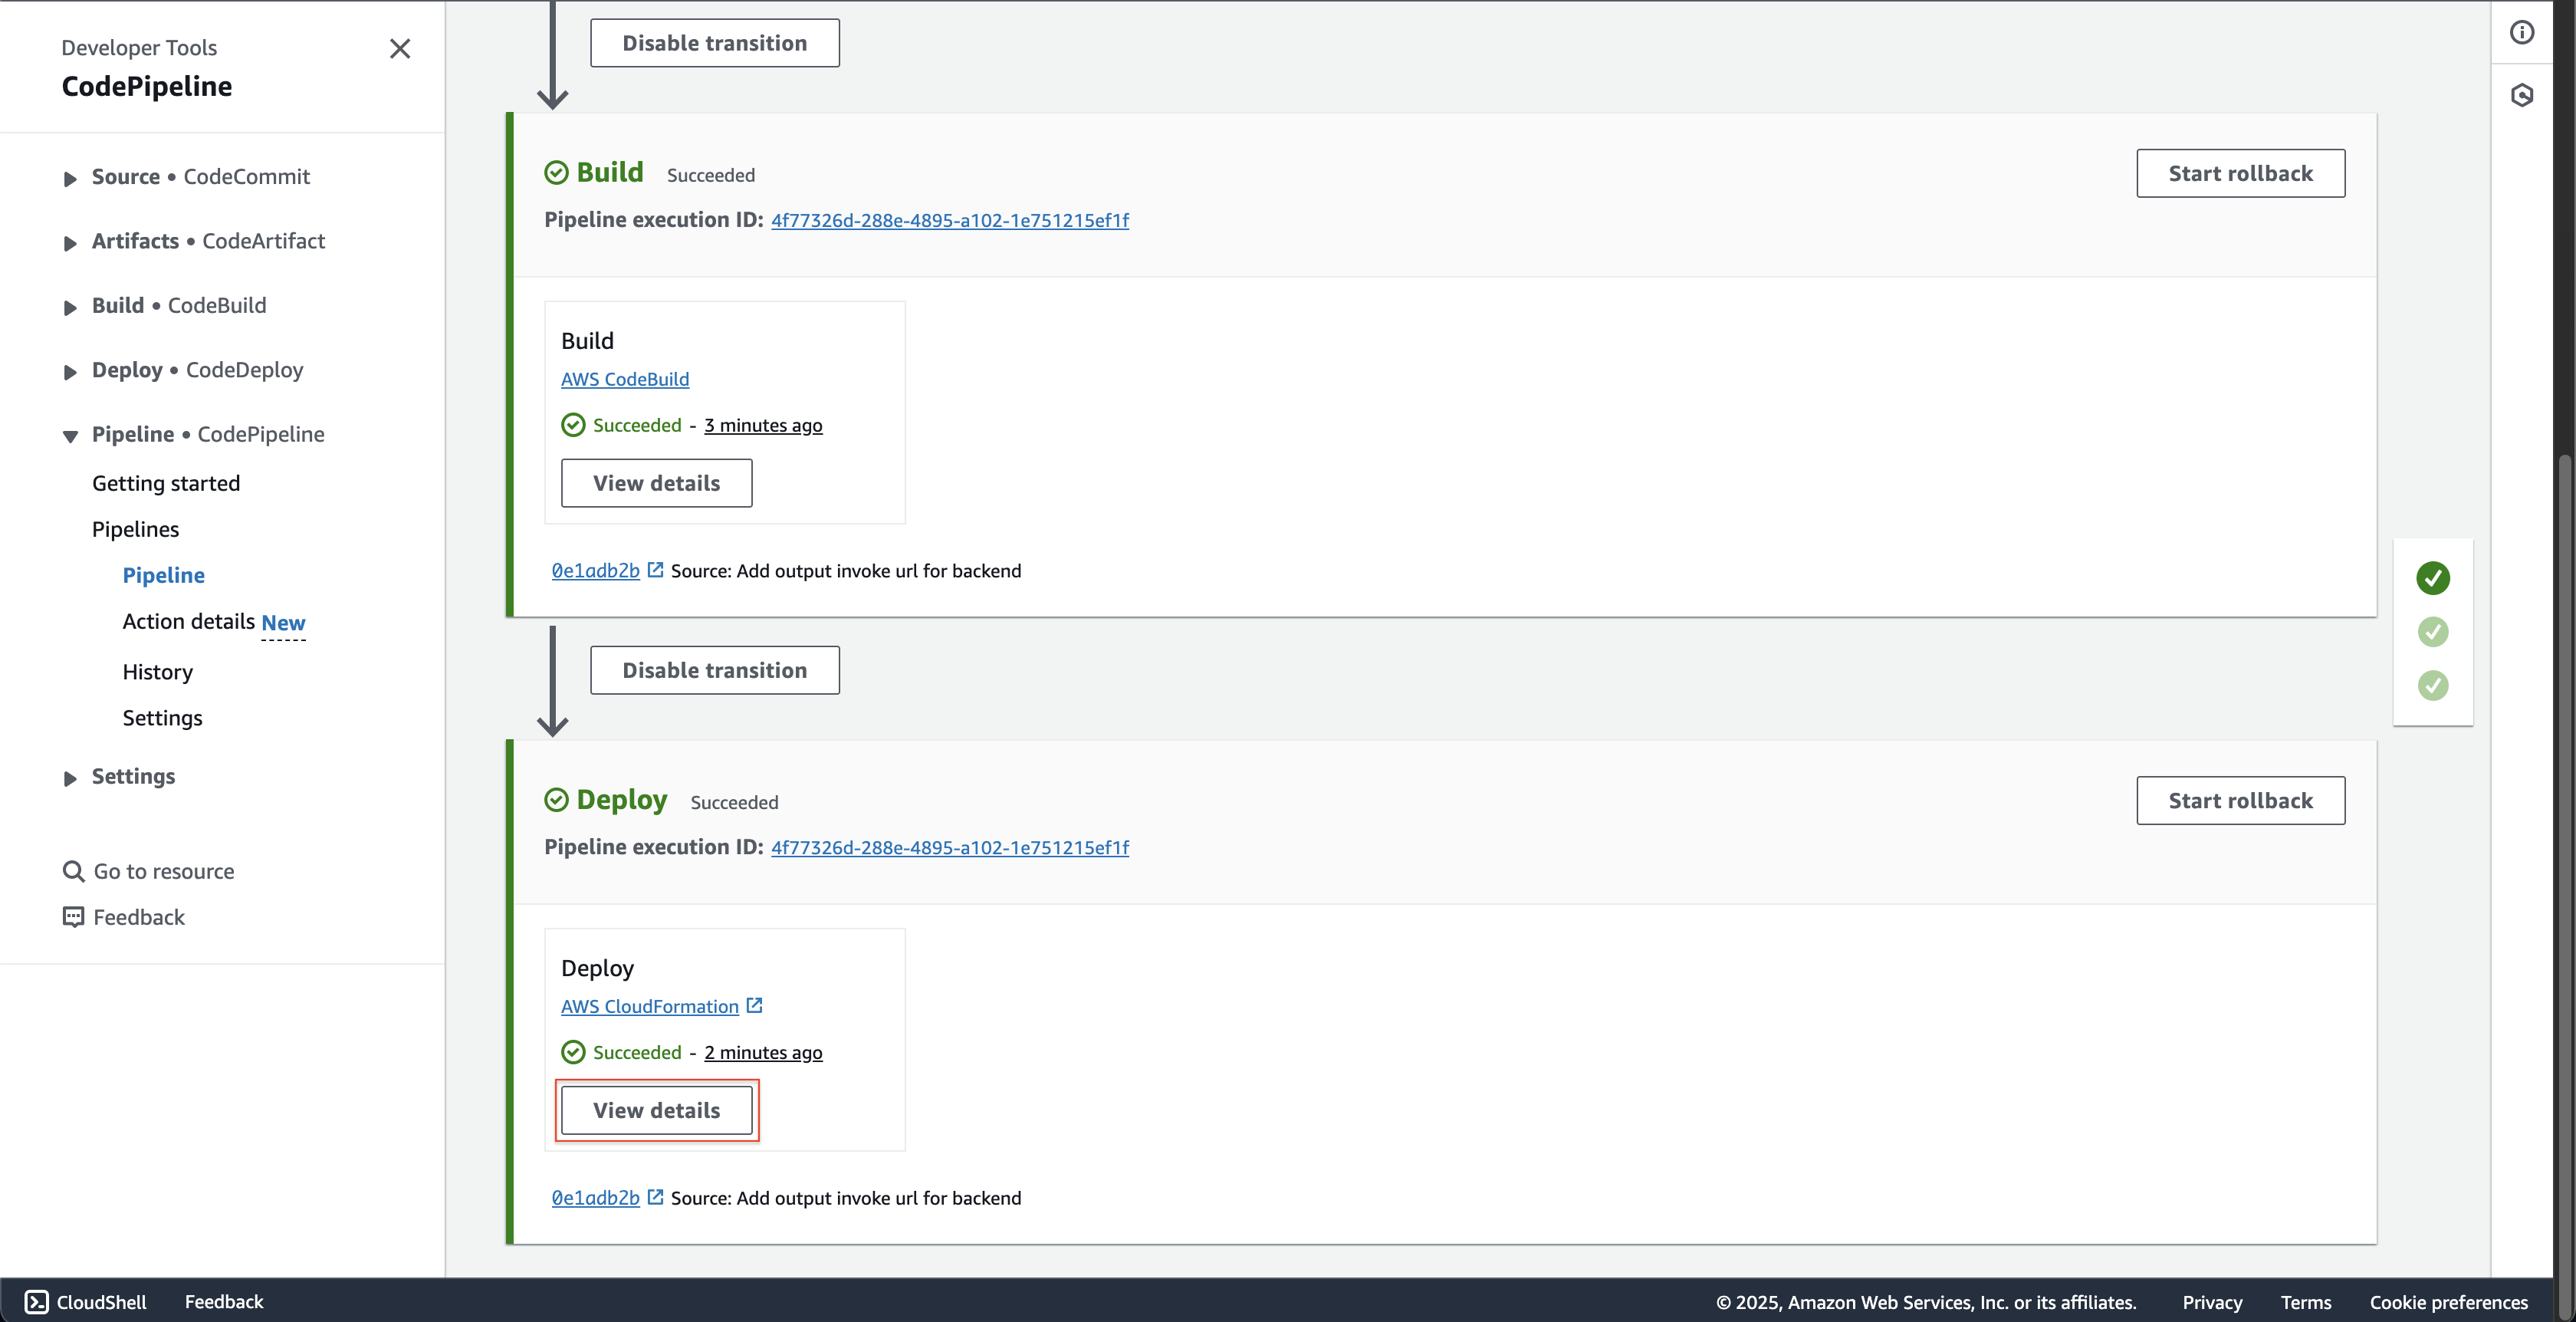
- Scroll down to the bottom, click the View details button.
-
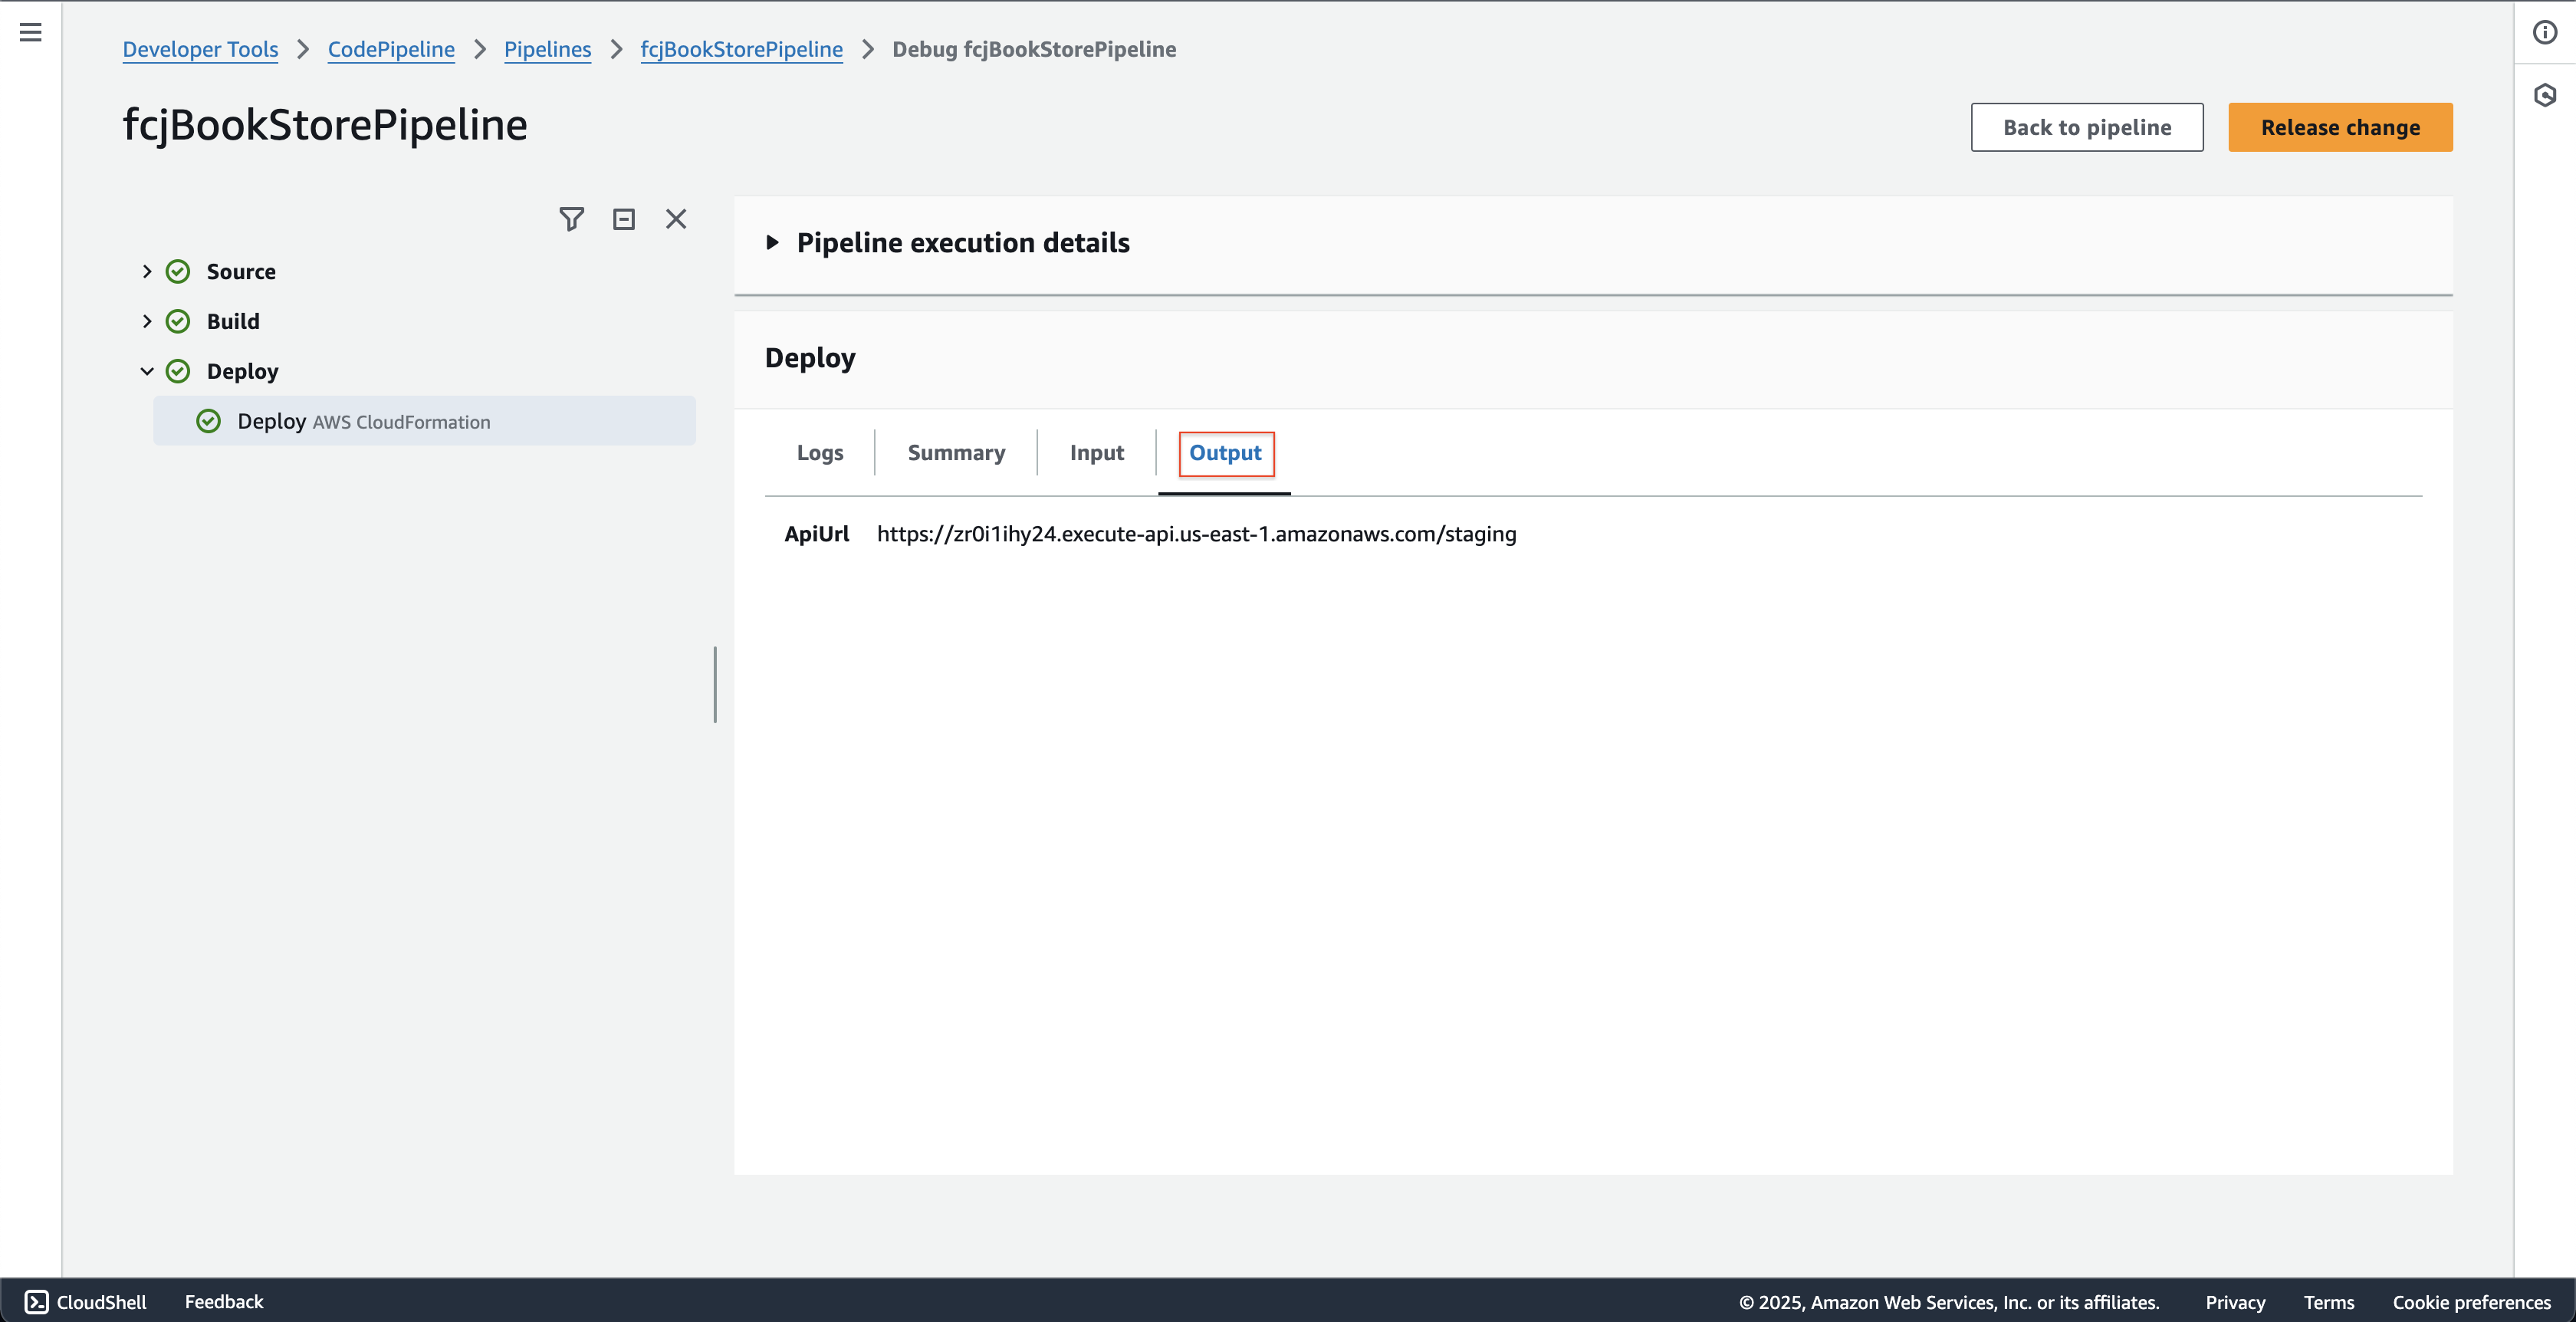
At fcjBookStorePipeline - Deploy stage page.
- Choose the Output tab and record the ApiUrl.
- Choose the Output tab and record the ApiUrl.