Create pipeline
Create the pipeline
-
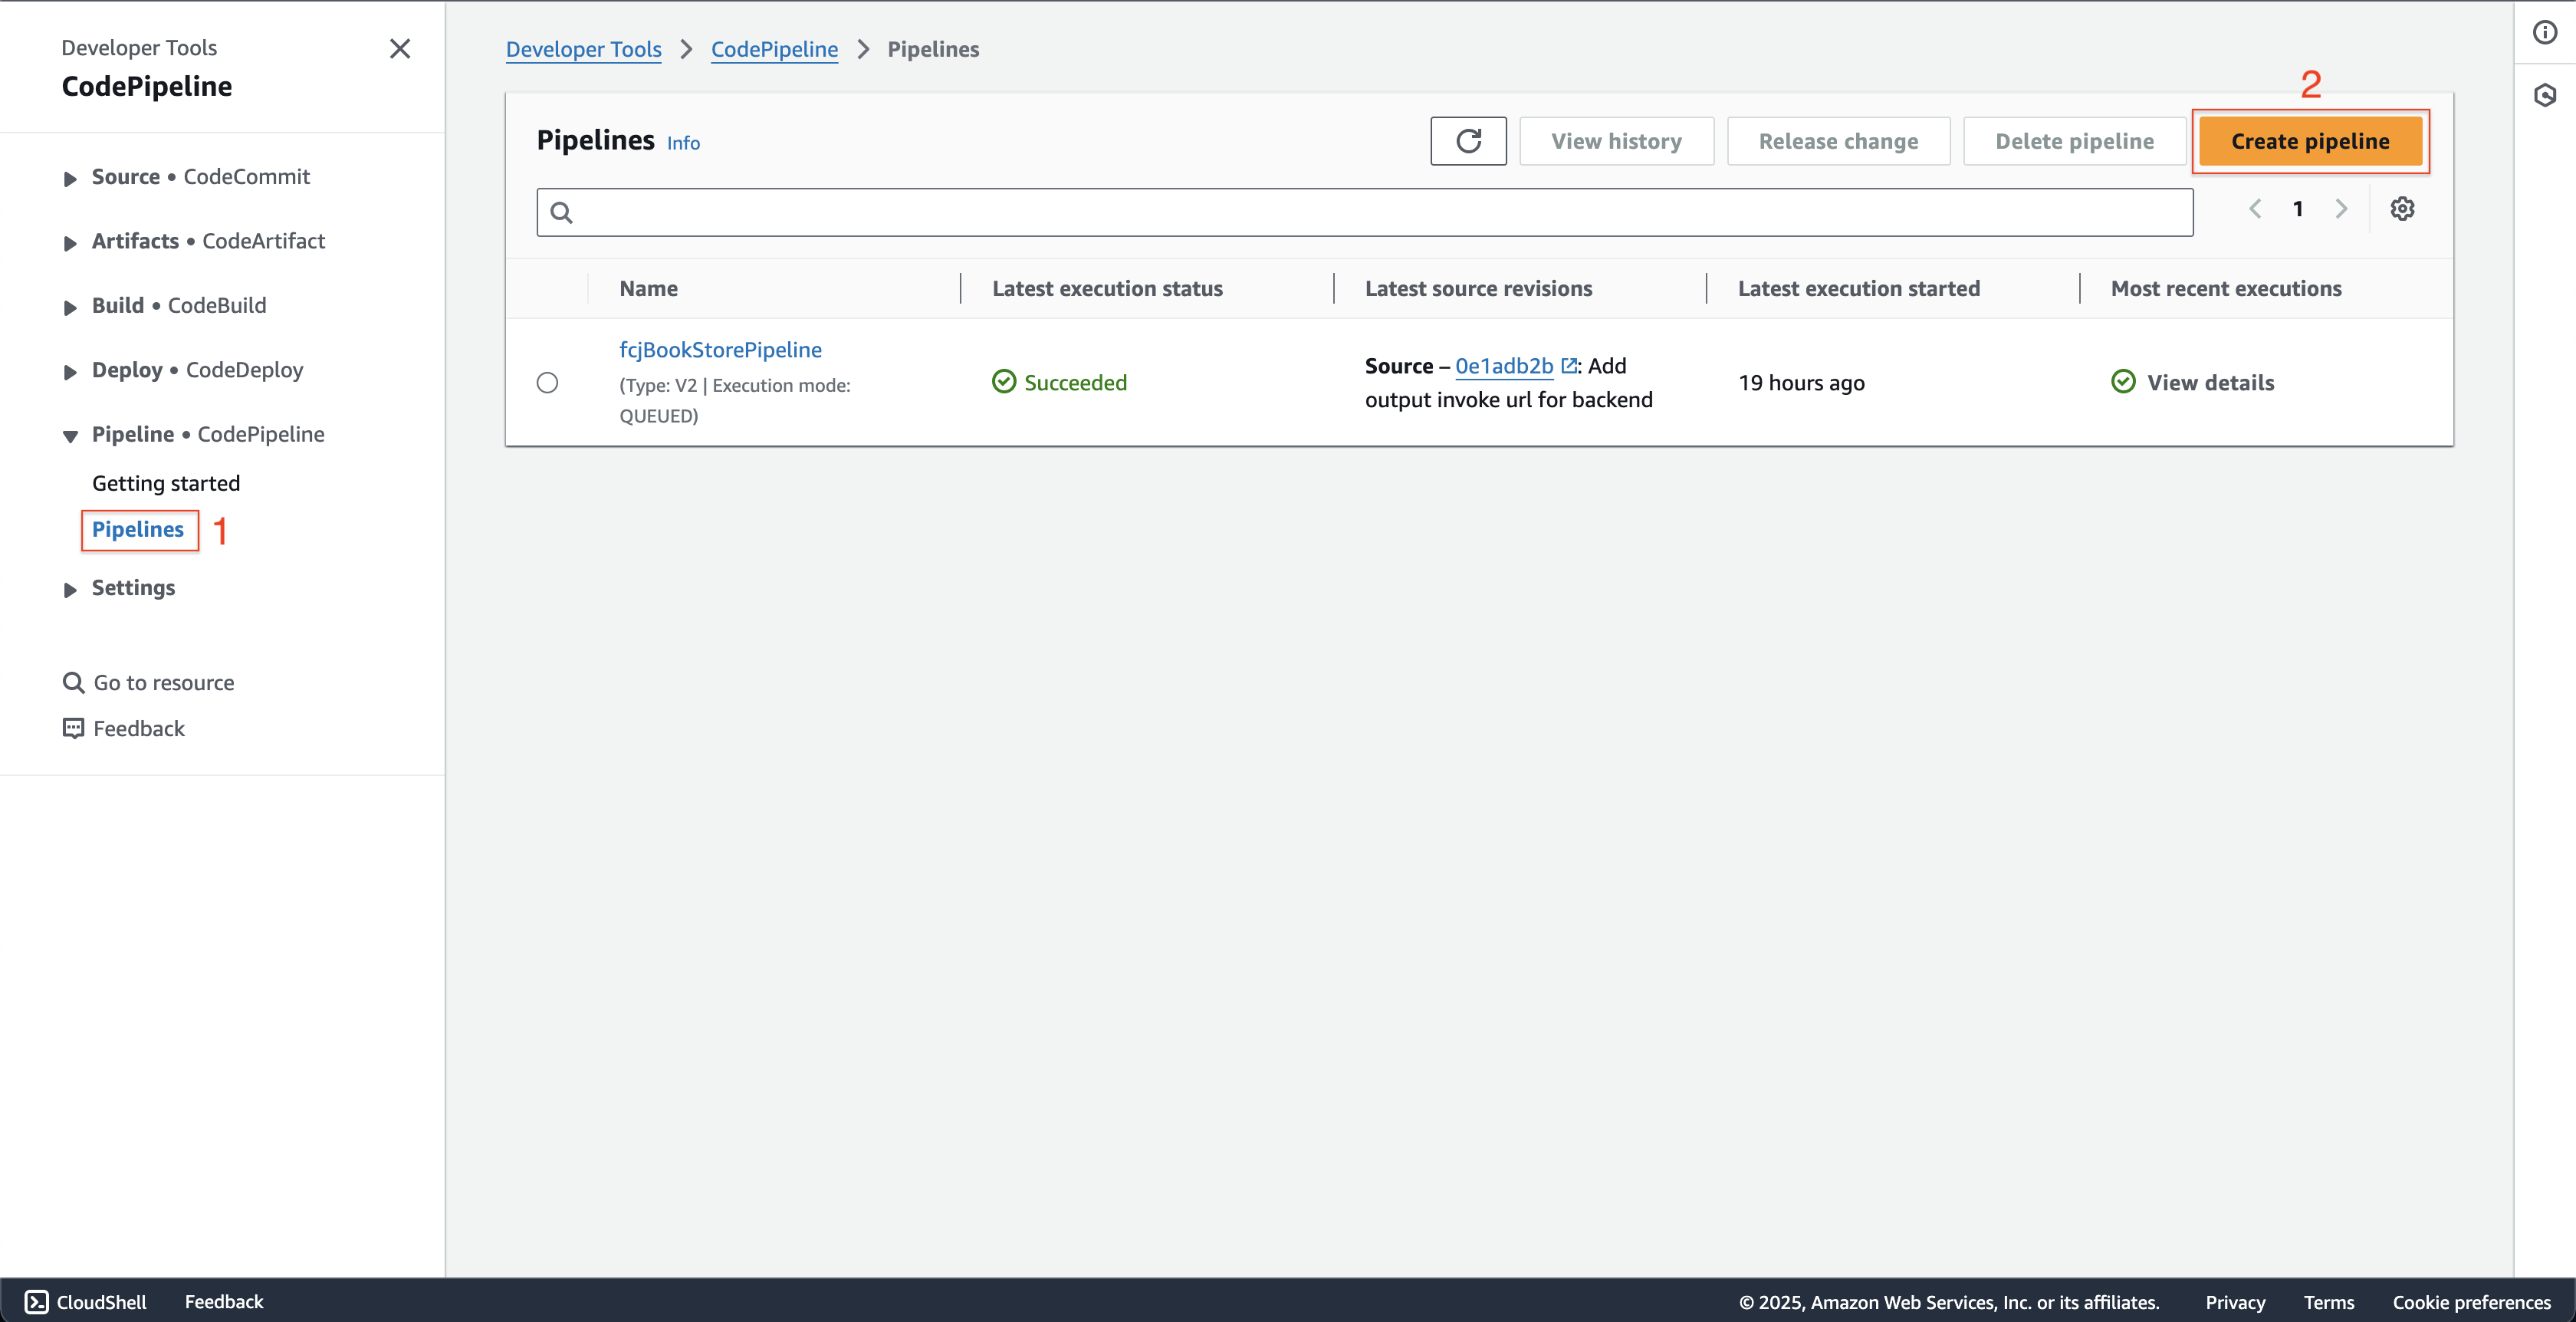
Open AWS CodePipeline console.
- Click Pipelines on the left menu.
- Click Create pipeline button.
-
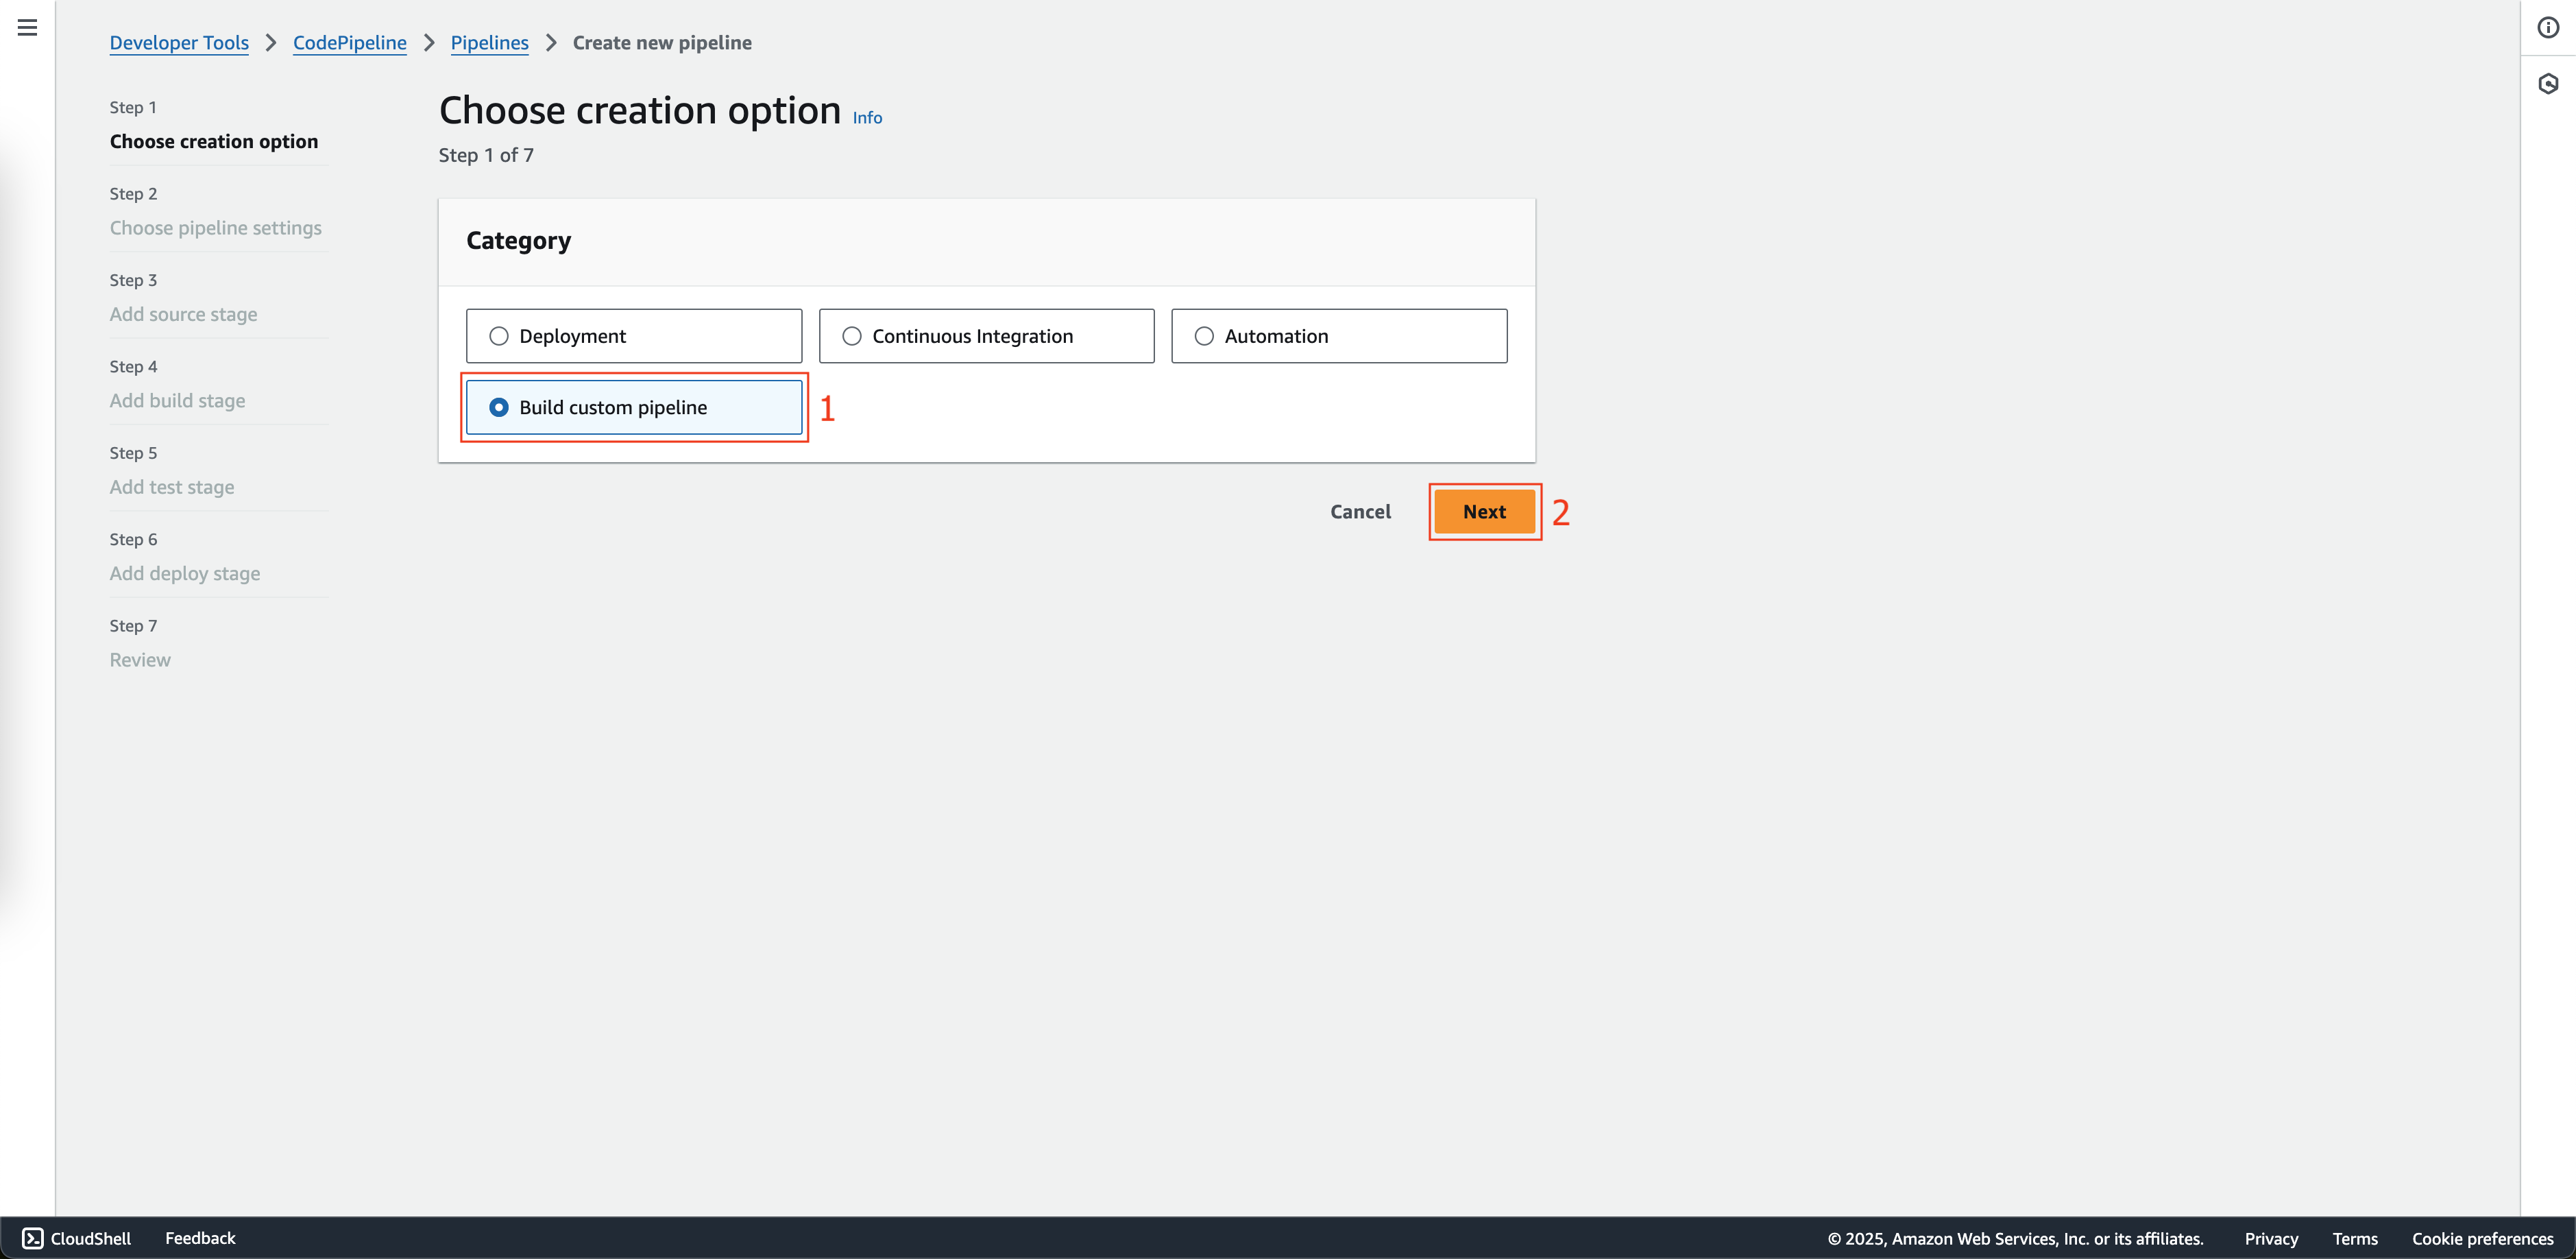
At Step 1: Choose creation option page.
- Choose Build custom pipeline at Creation options.
- Then click Next button.
-
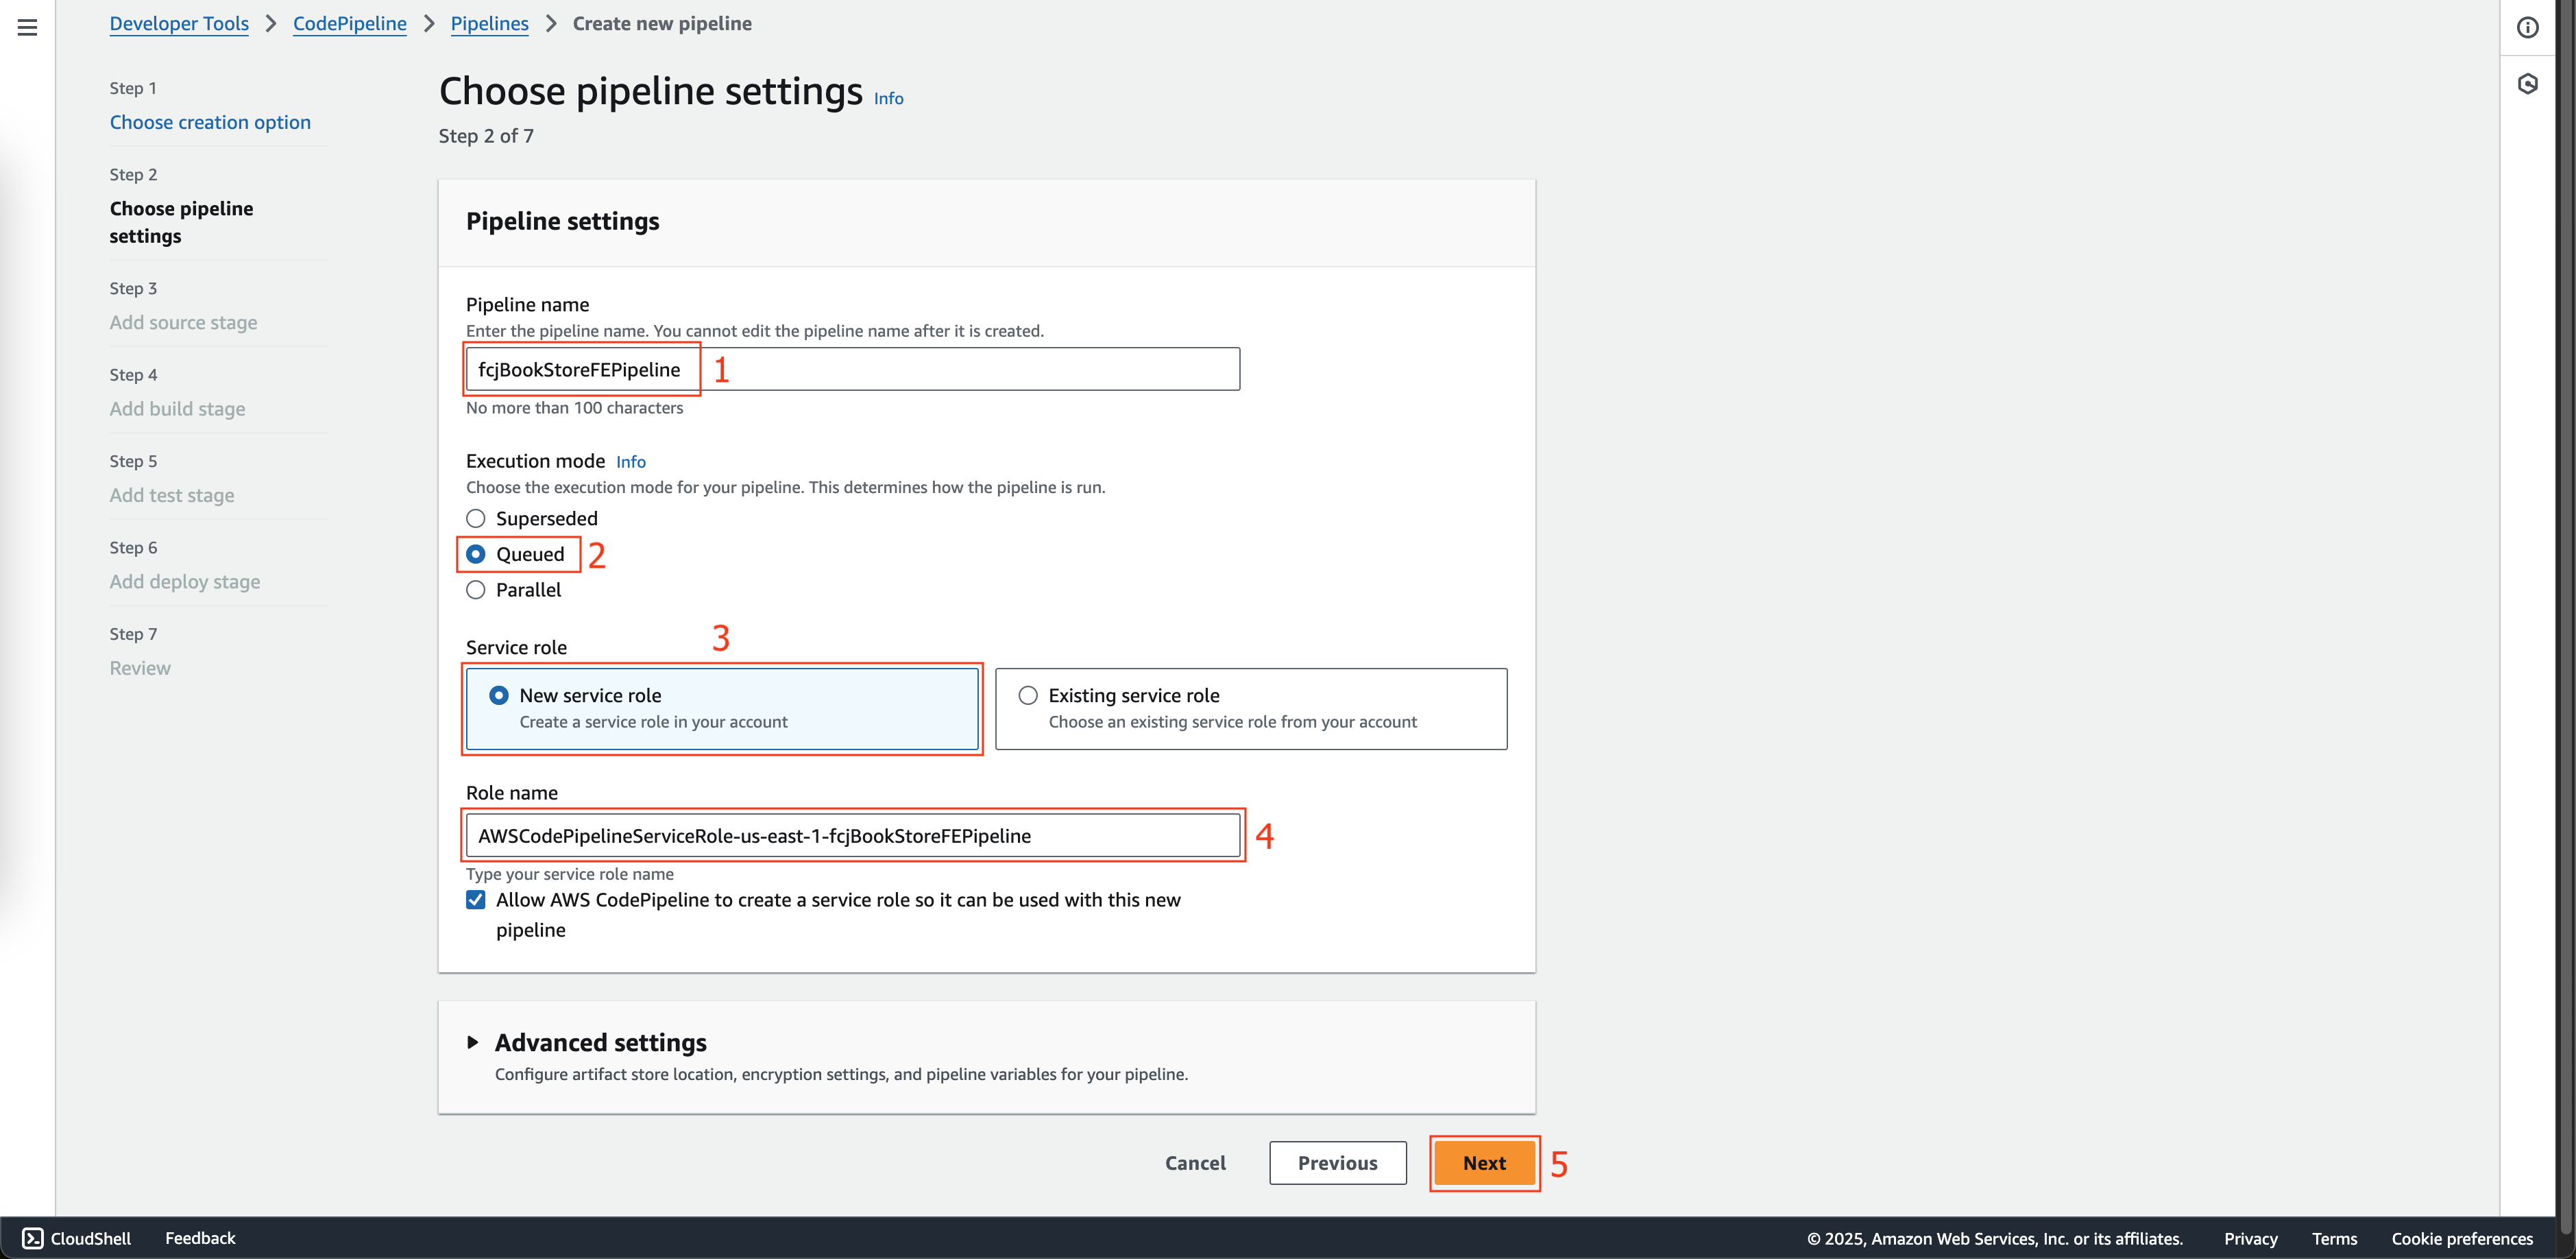
At Step 2: Choose pipeline settings page.
- Enter
fcjBookStoreFEPipelineat Pipeline name. - Choose Queued at Execution mode.
- Choose New service role at Service role.
- Enter
AWSCodePipelineServiceRole-us-east-1-fcjBookStoreFEPipelineat Role name. - Click the Next button.
- Enter
-
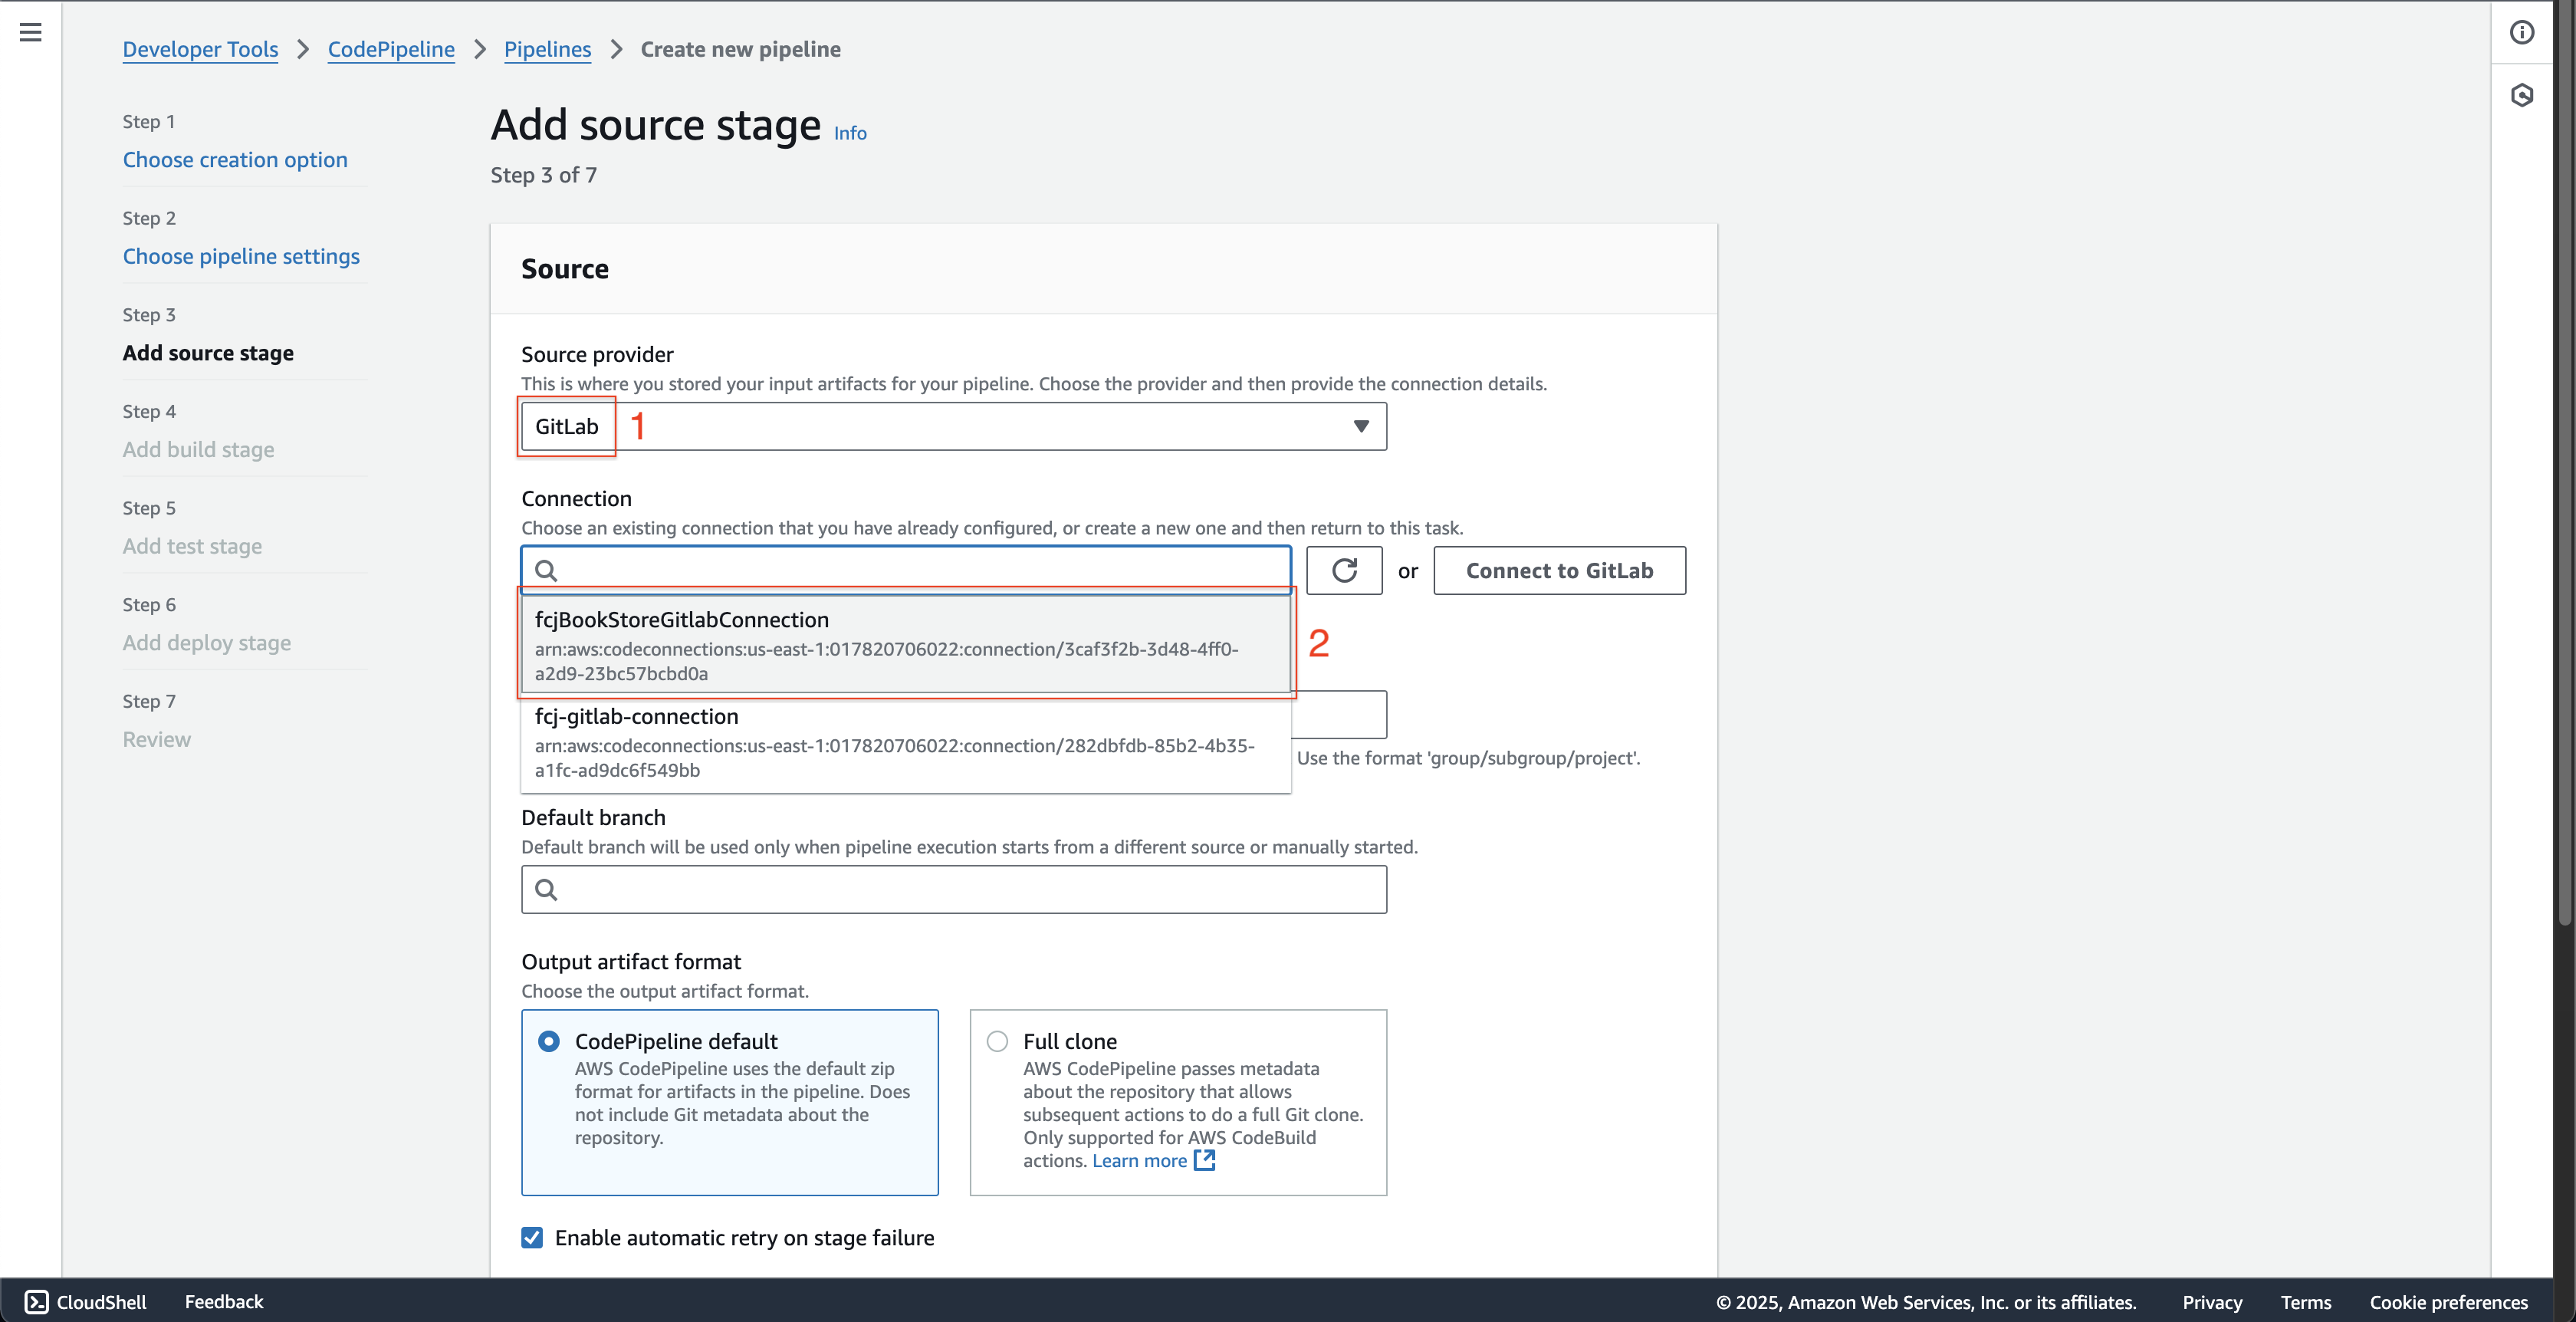
At Step 3: Add source stage page.
- Choose Gitlab at Source provider.
- Choose fcjBookStoreGitlabConnection at Connection.
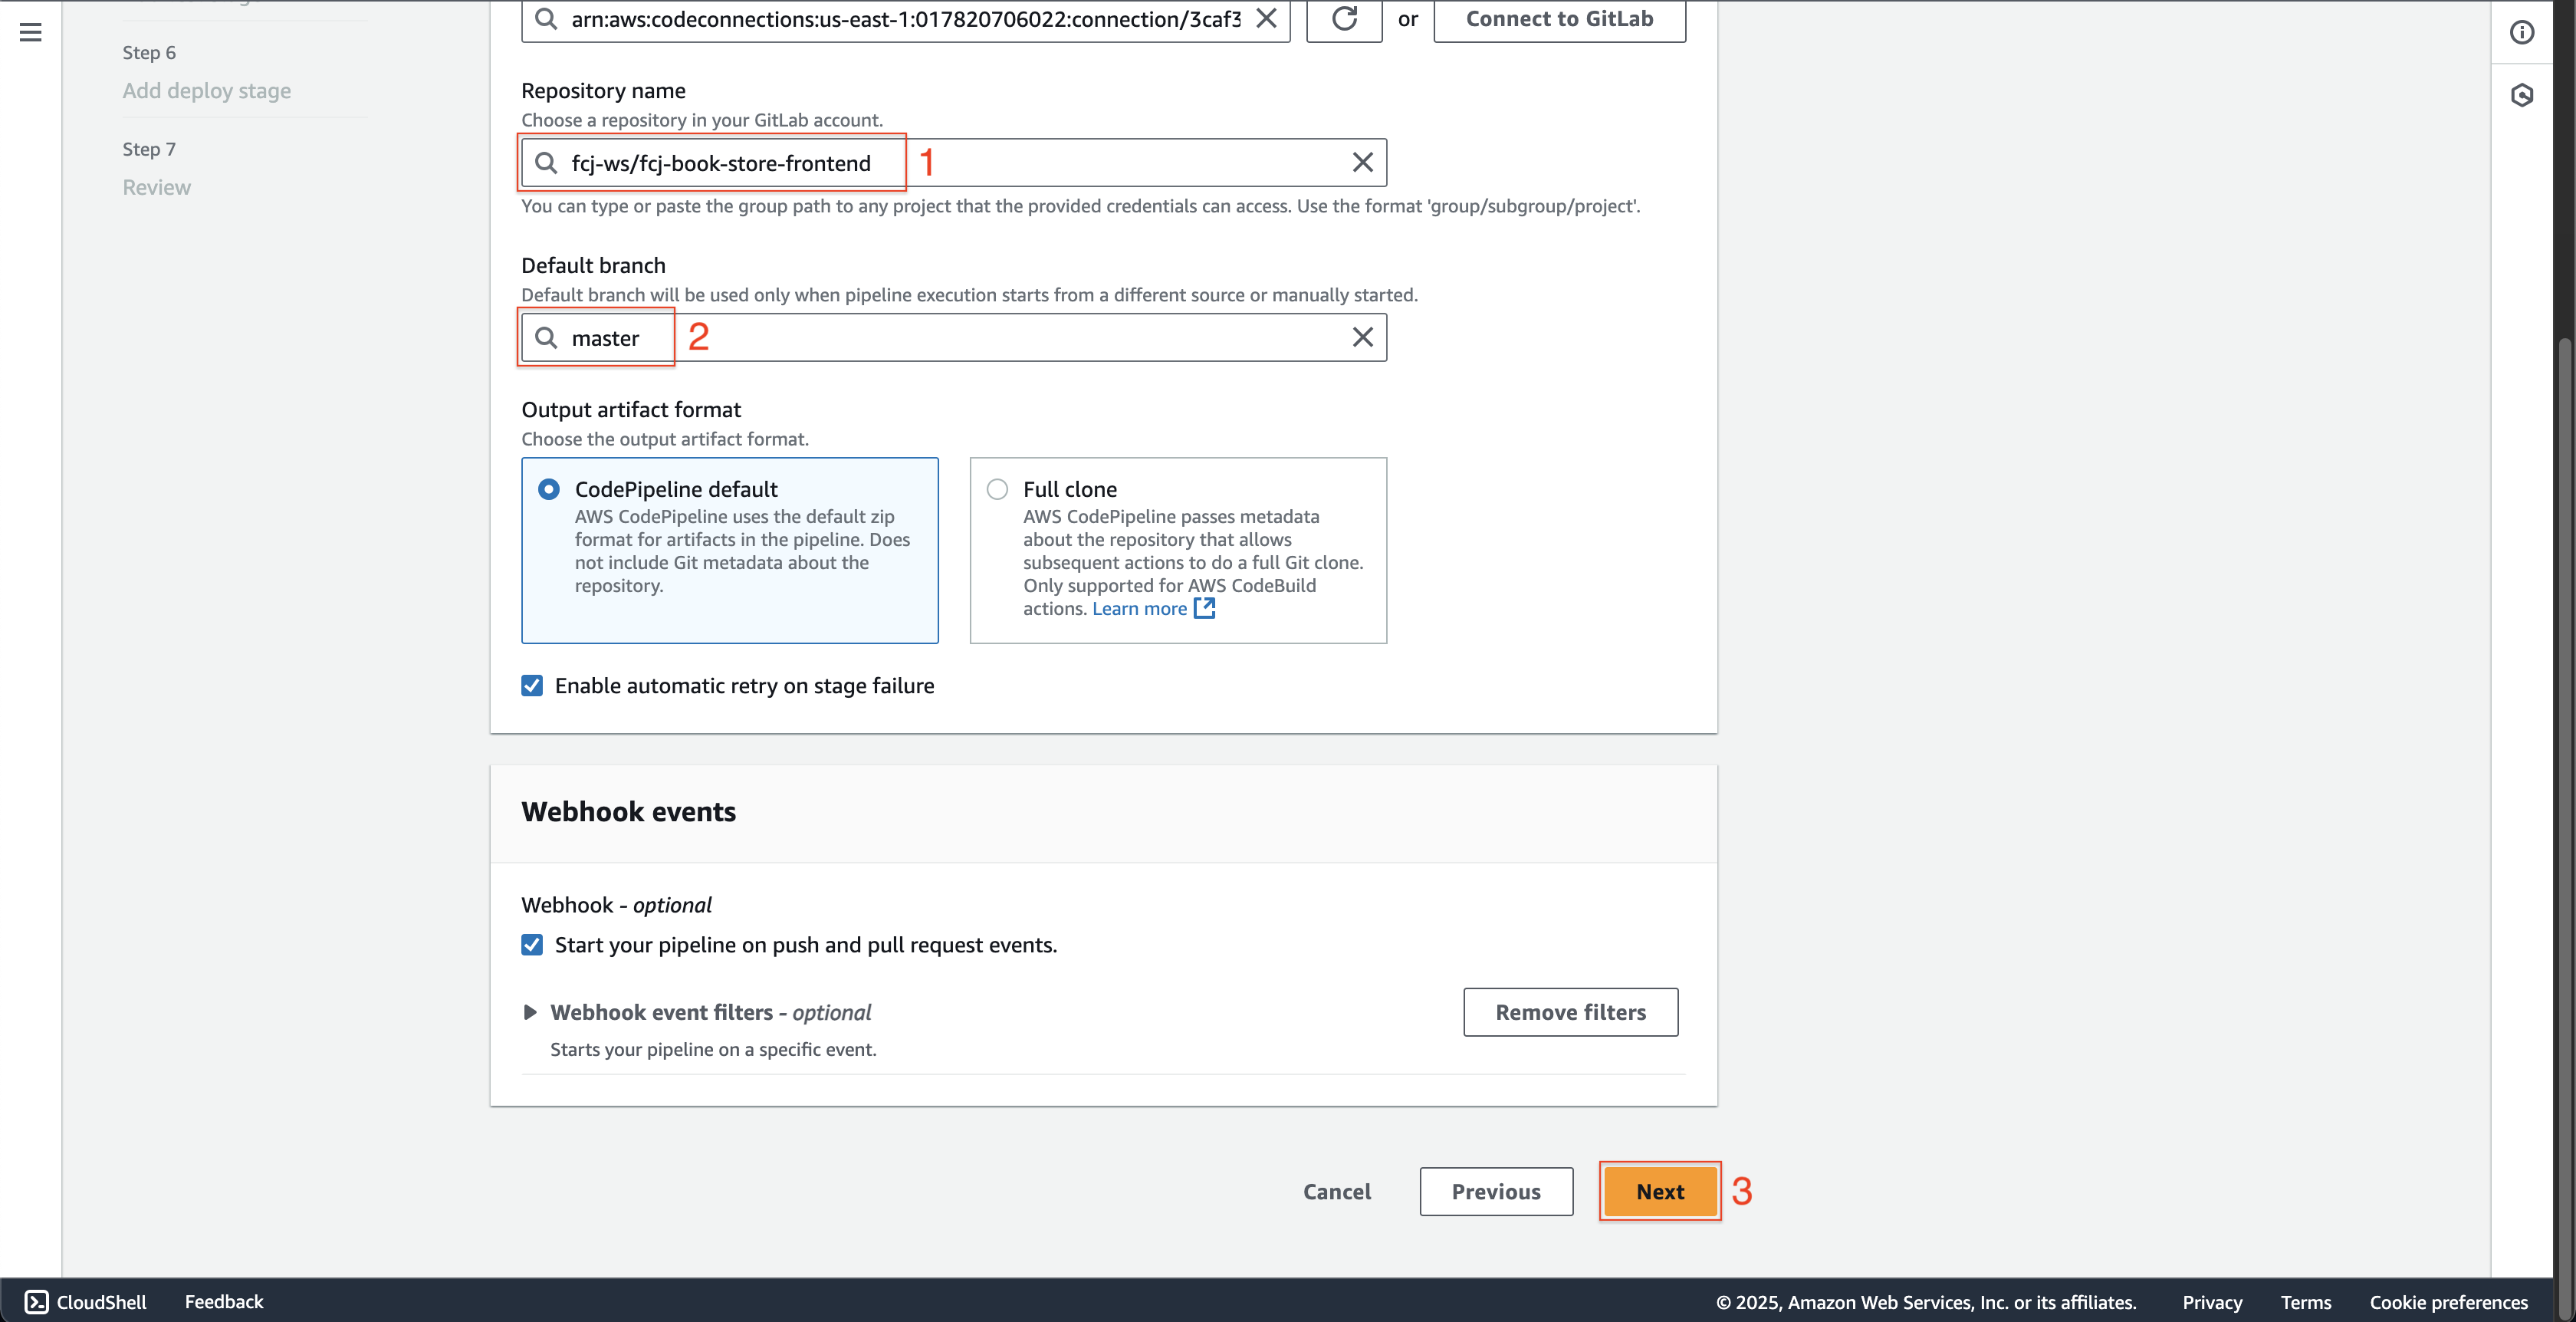
- Scroll down, enter
fcj-ws/fcj-book-store-frontendat Repository name. - Enter
masterat Default branch. - Click the Next button.
-
At Step 4: Add build stage page.
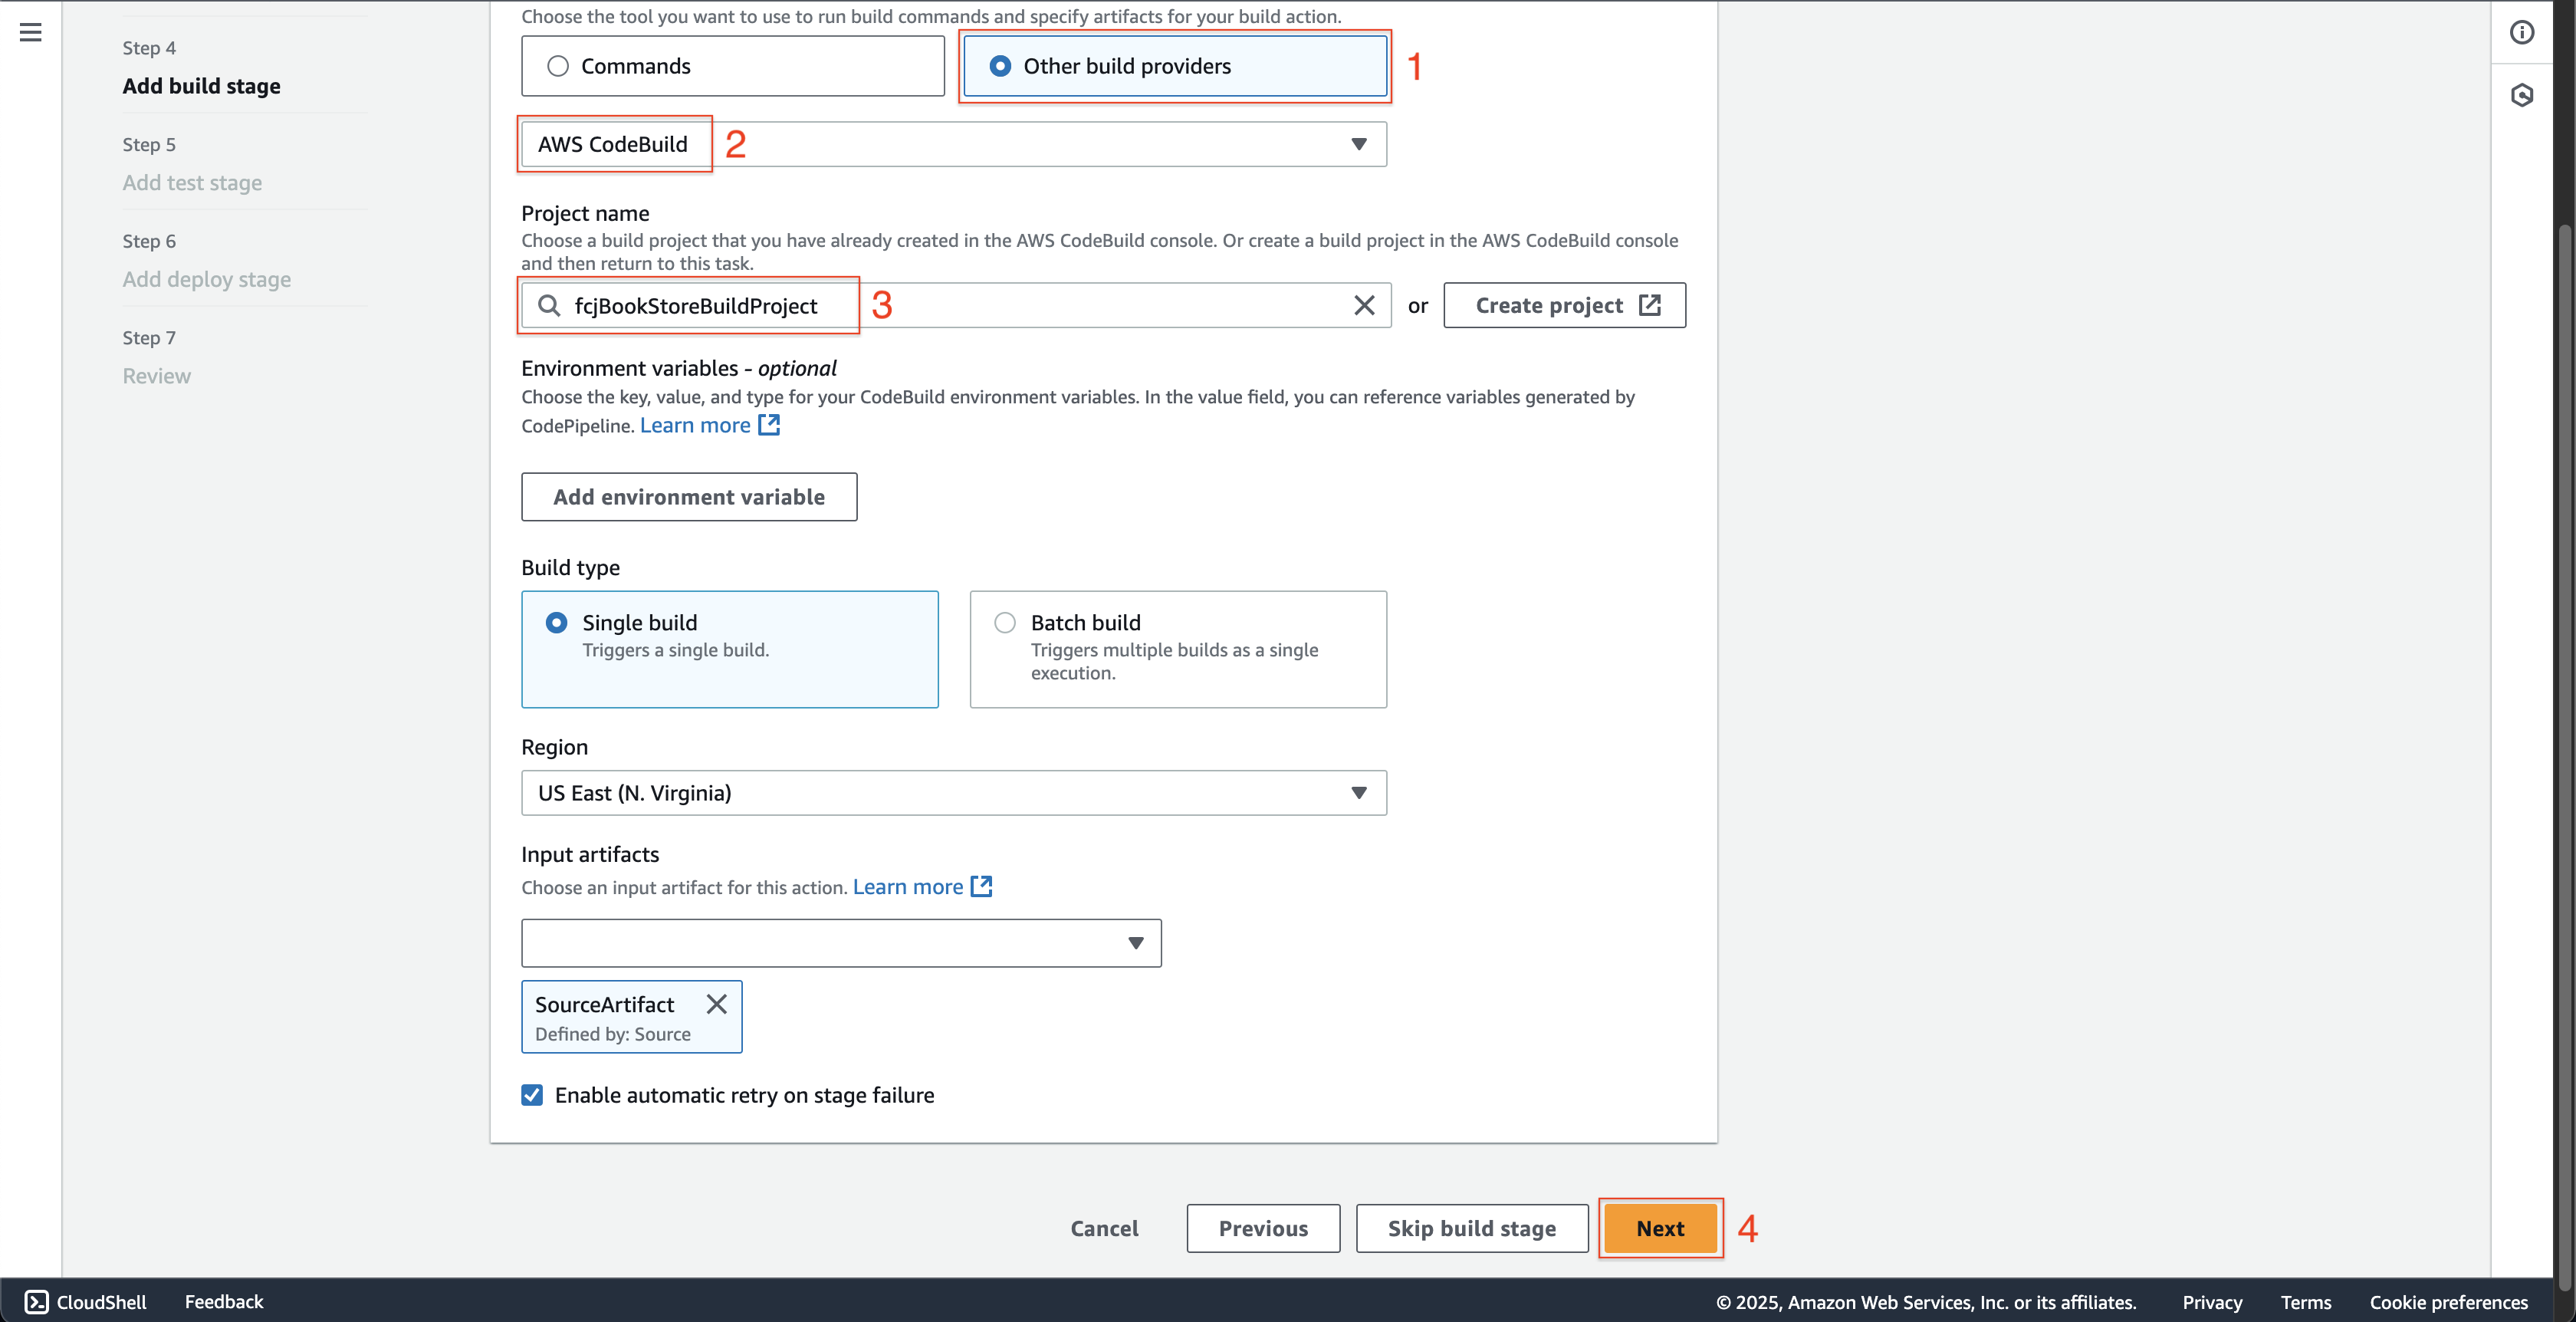
- Choose Other build providers at Build provider.
- Choose the AWS CodeBuild.
- Enter
fcjBookStoreBuildProjectat Project name. - Click the Next button.
-
At Step 5: Add test stage page.
- Click the Skip test stage button.
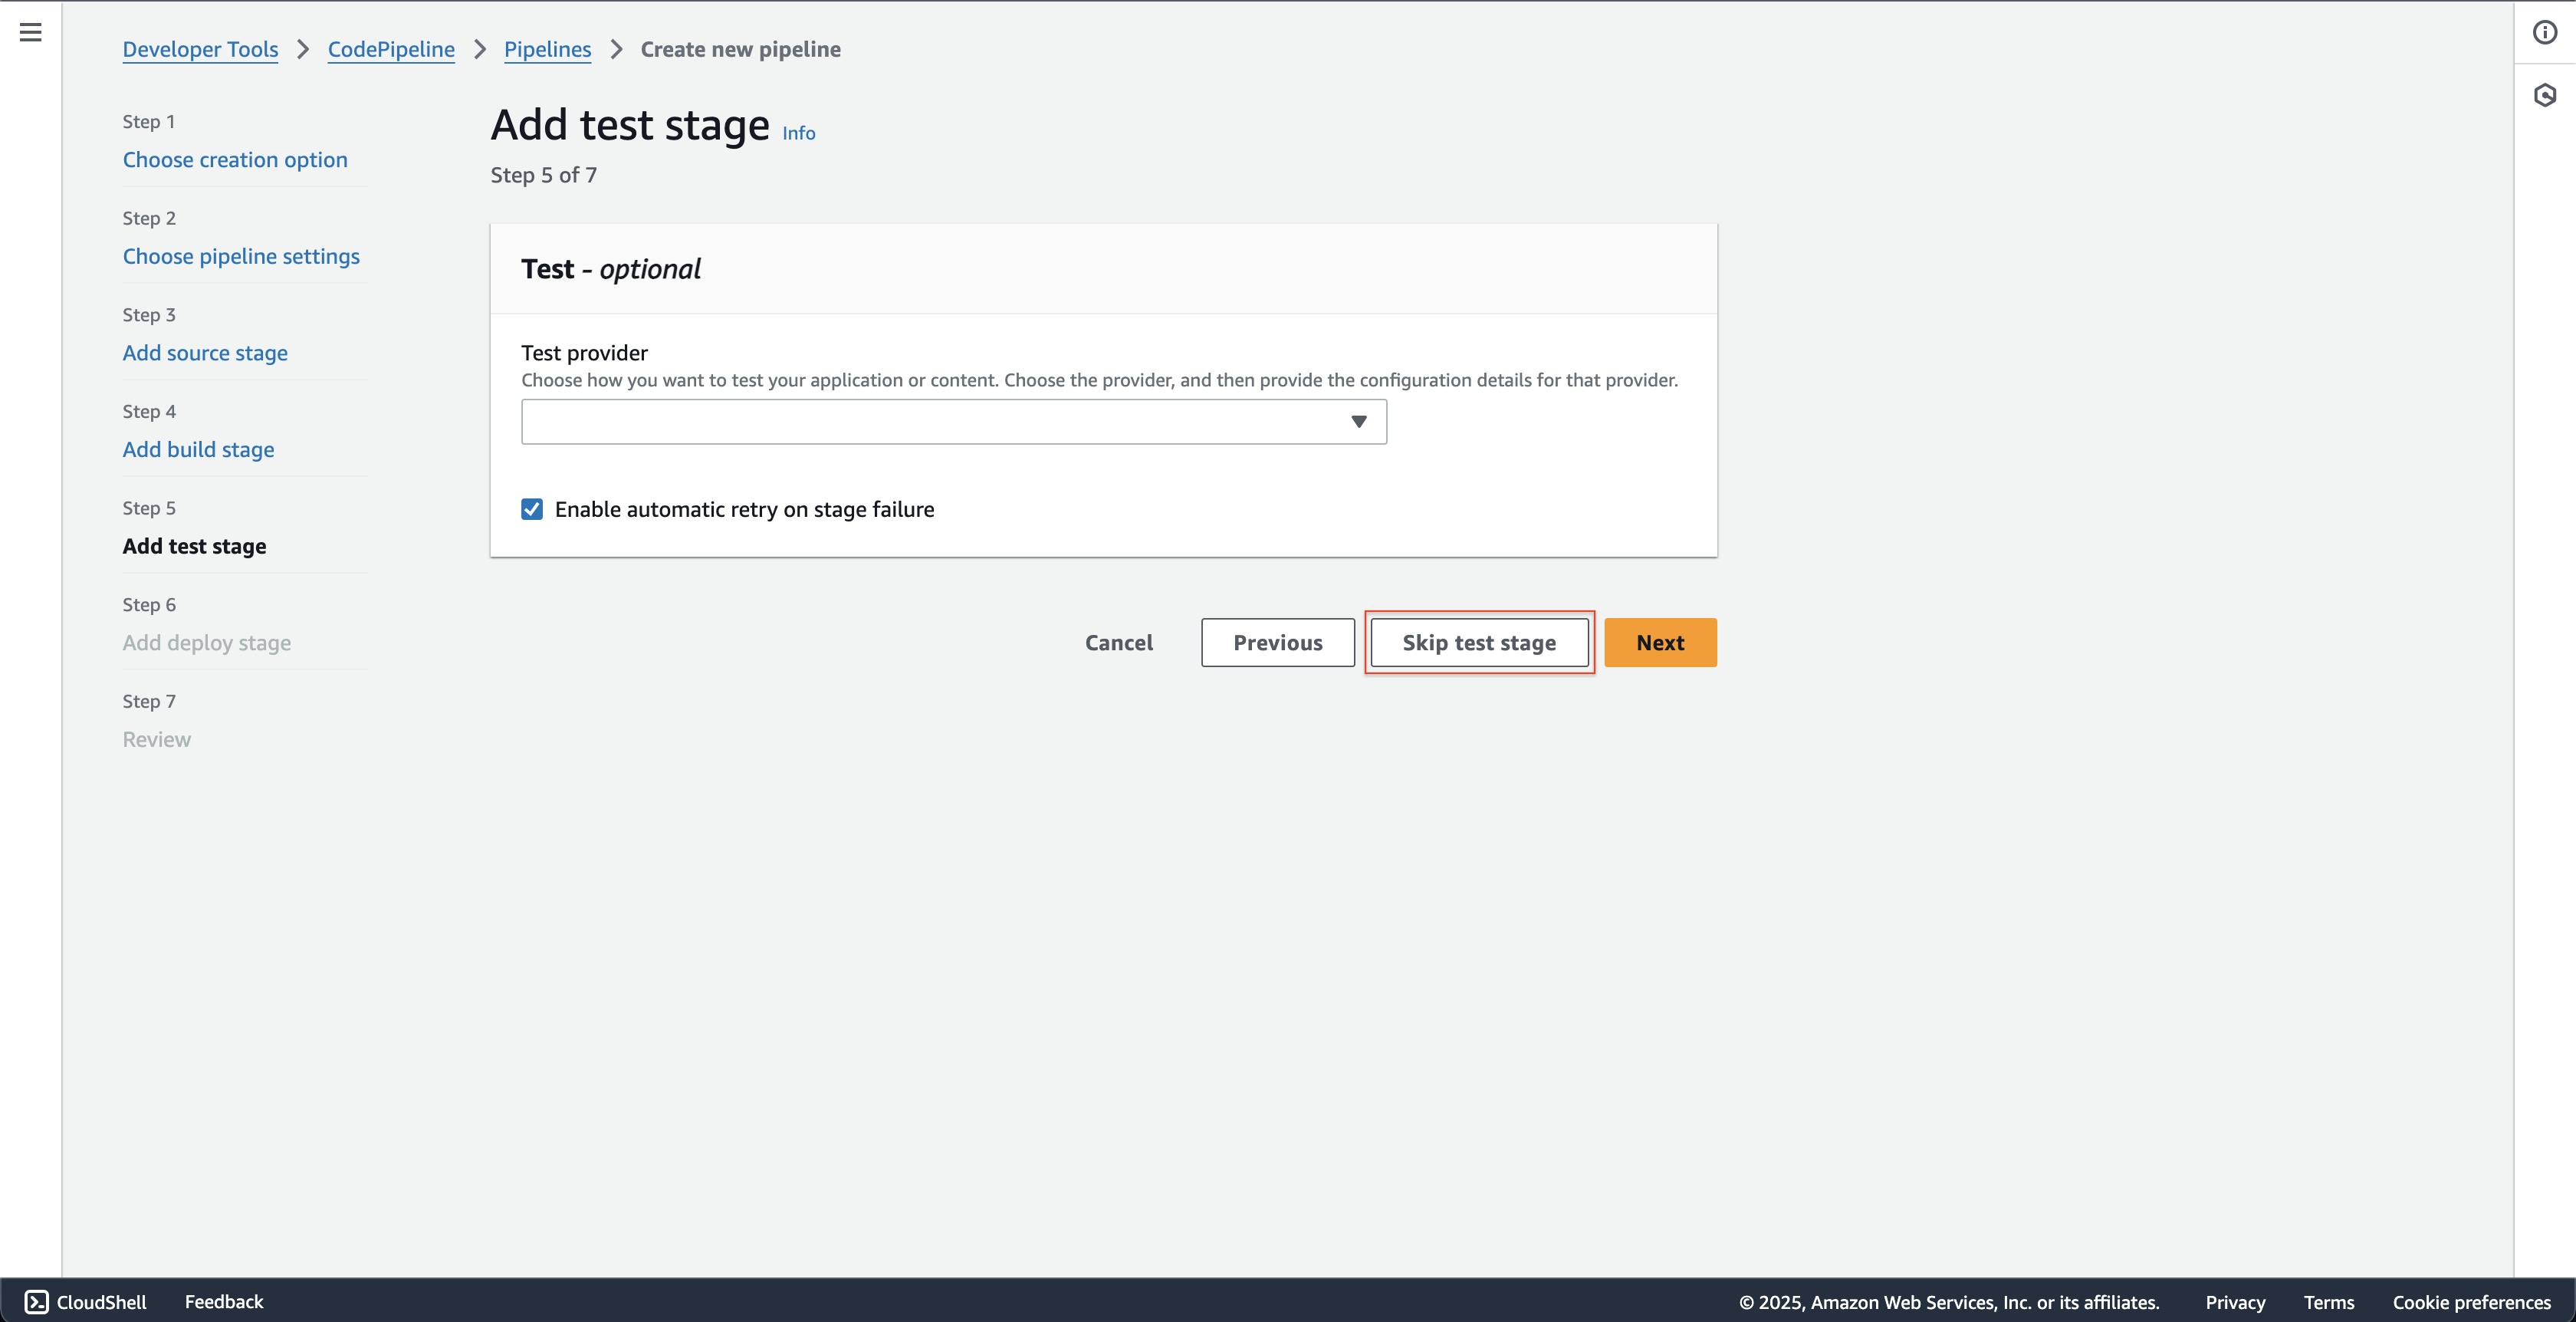
- Click the Skip test stage button.
-
At Step 6: Add deploy stage page.
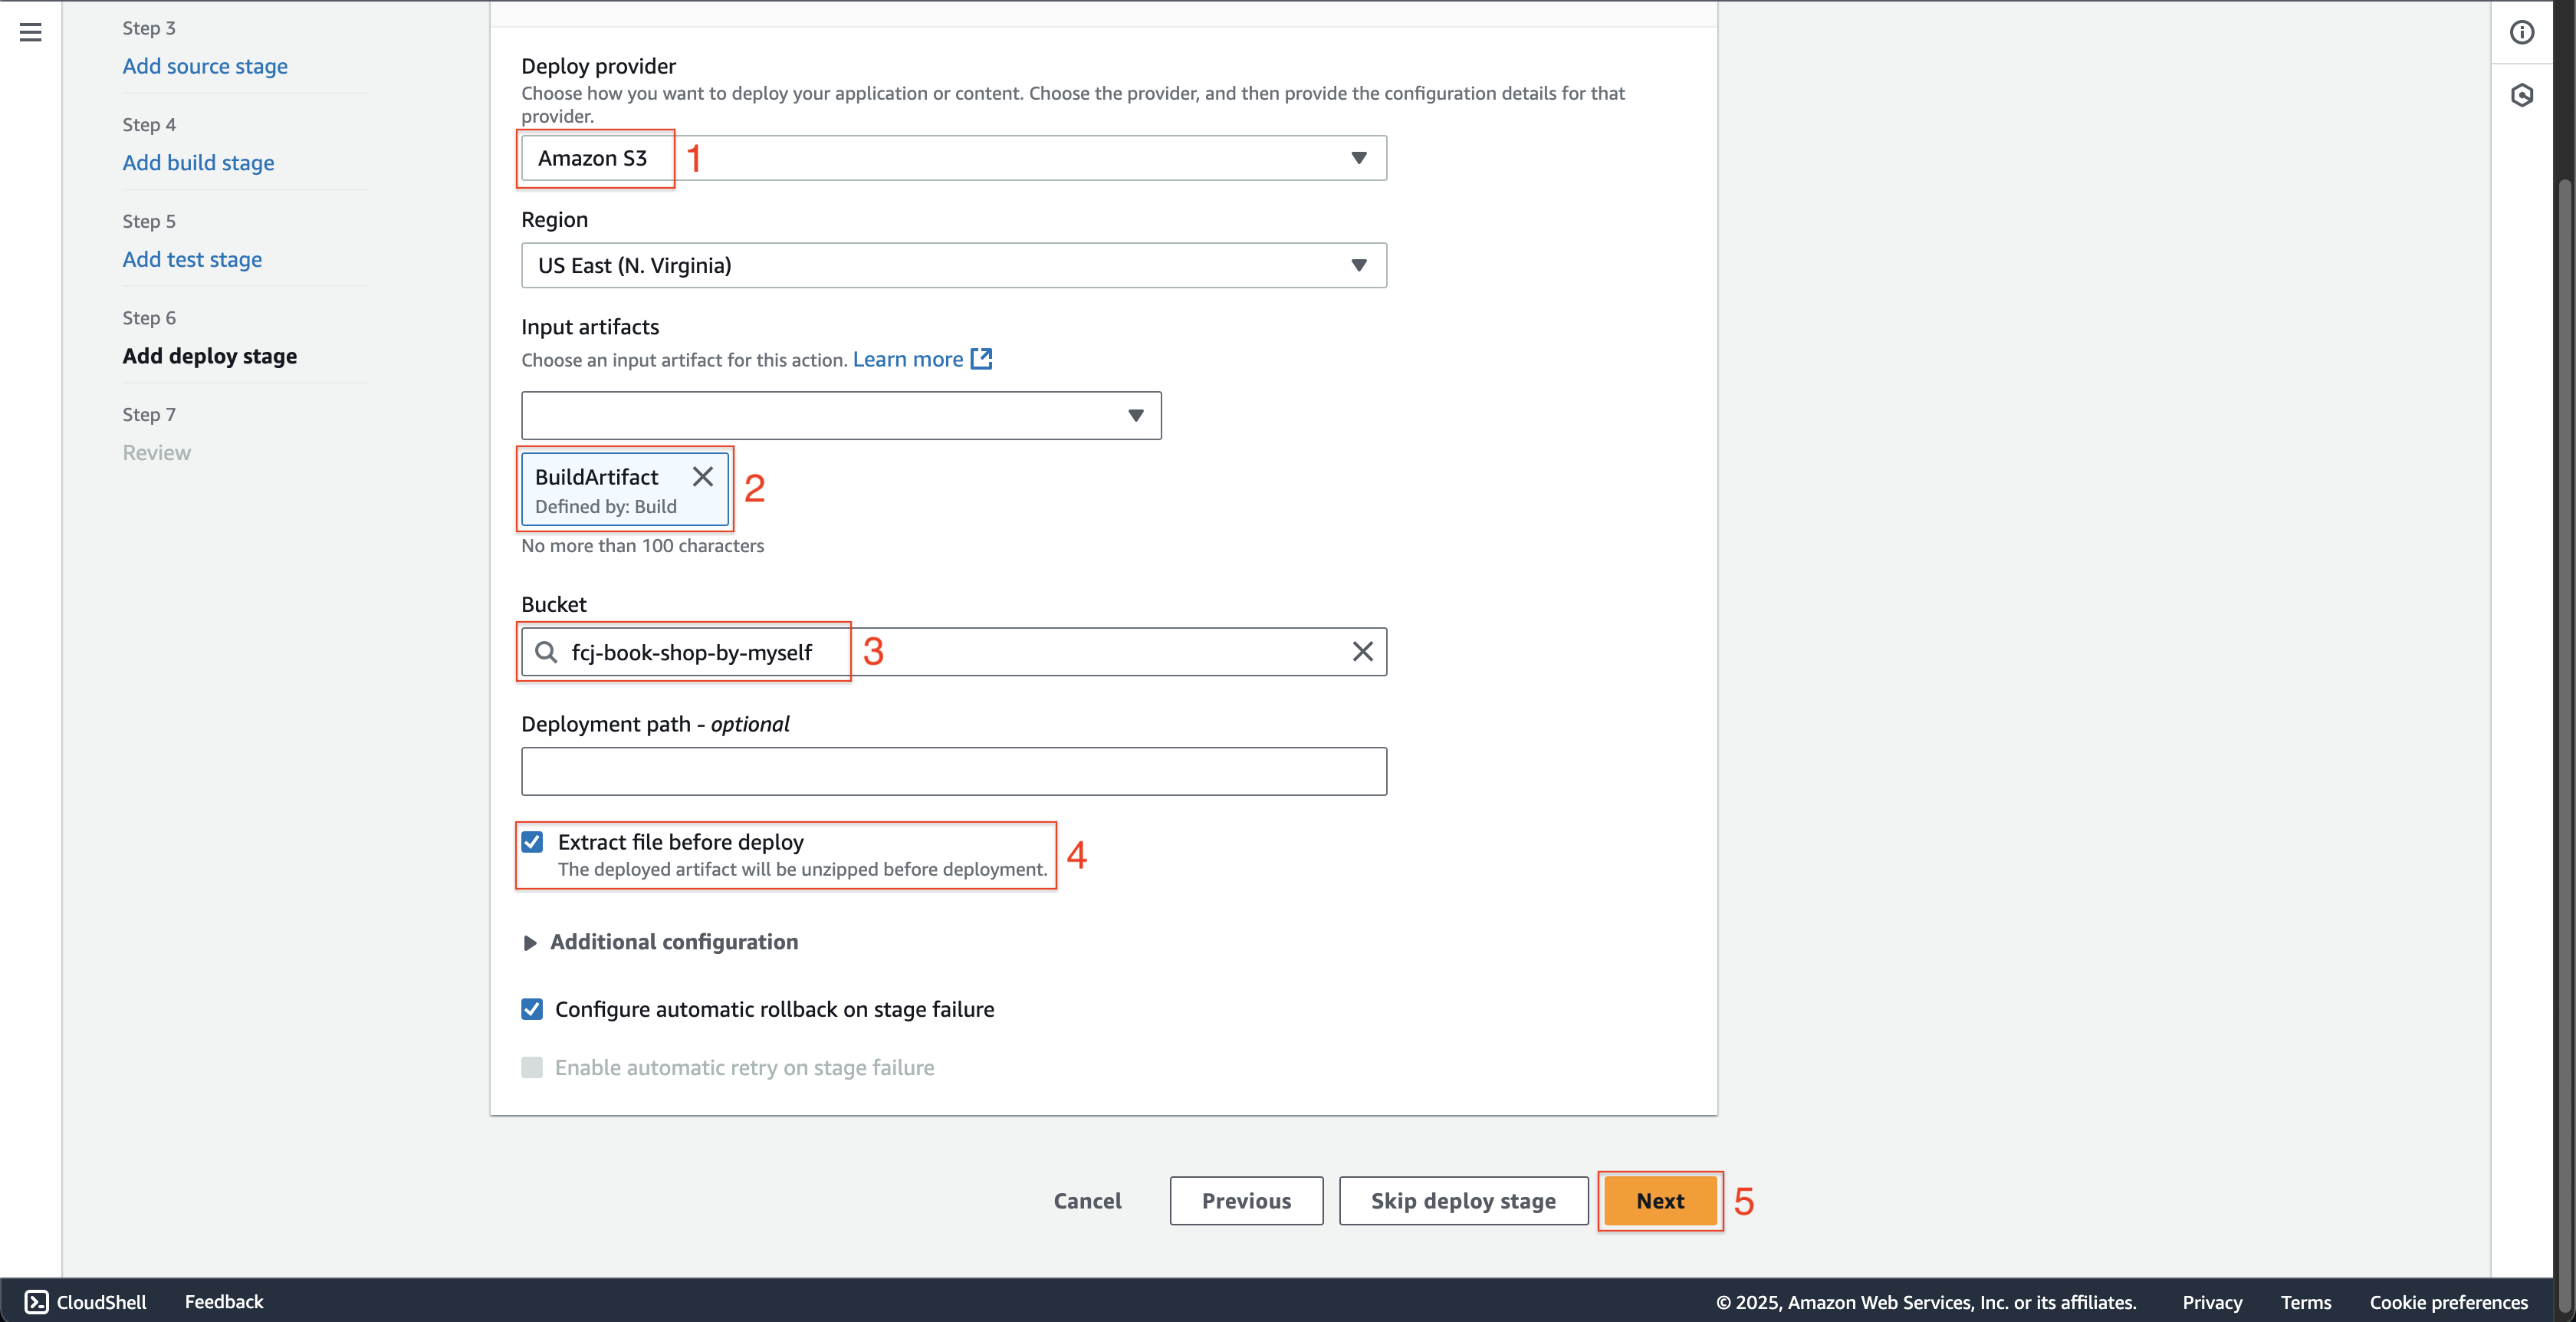
- Choose the Amazon S3 at Deploy provider.
- Choose BuildArtifact at Input artifacts.
- Enter
fcj-book-shop-by-myselfat Bucket. - Check the Extract file before deploy.
- Leave as default and click the Next button.
-
At Step 7: Review page.
- Scroll down and click the Create pipeline button.

- Scroll down and click the Create pipeline button.
Test the pipeline
-
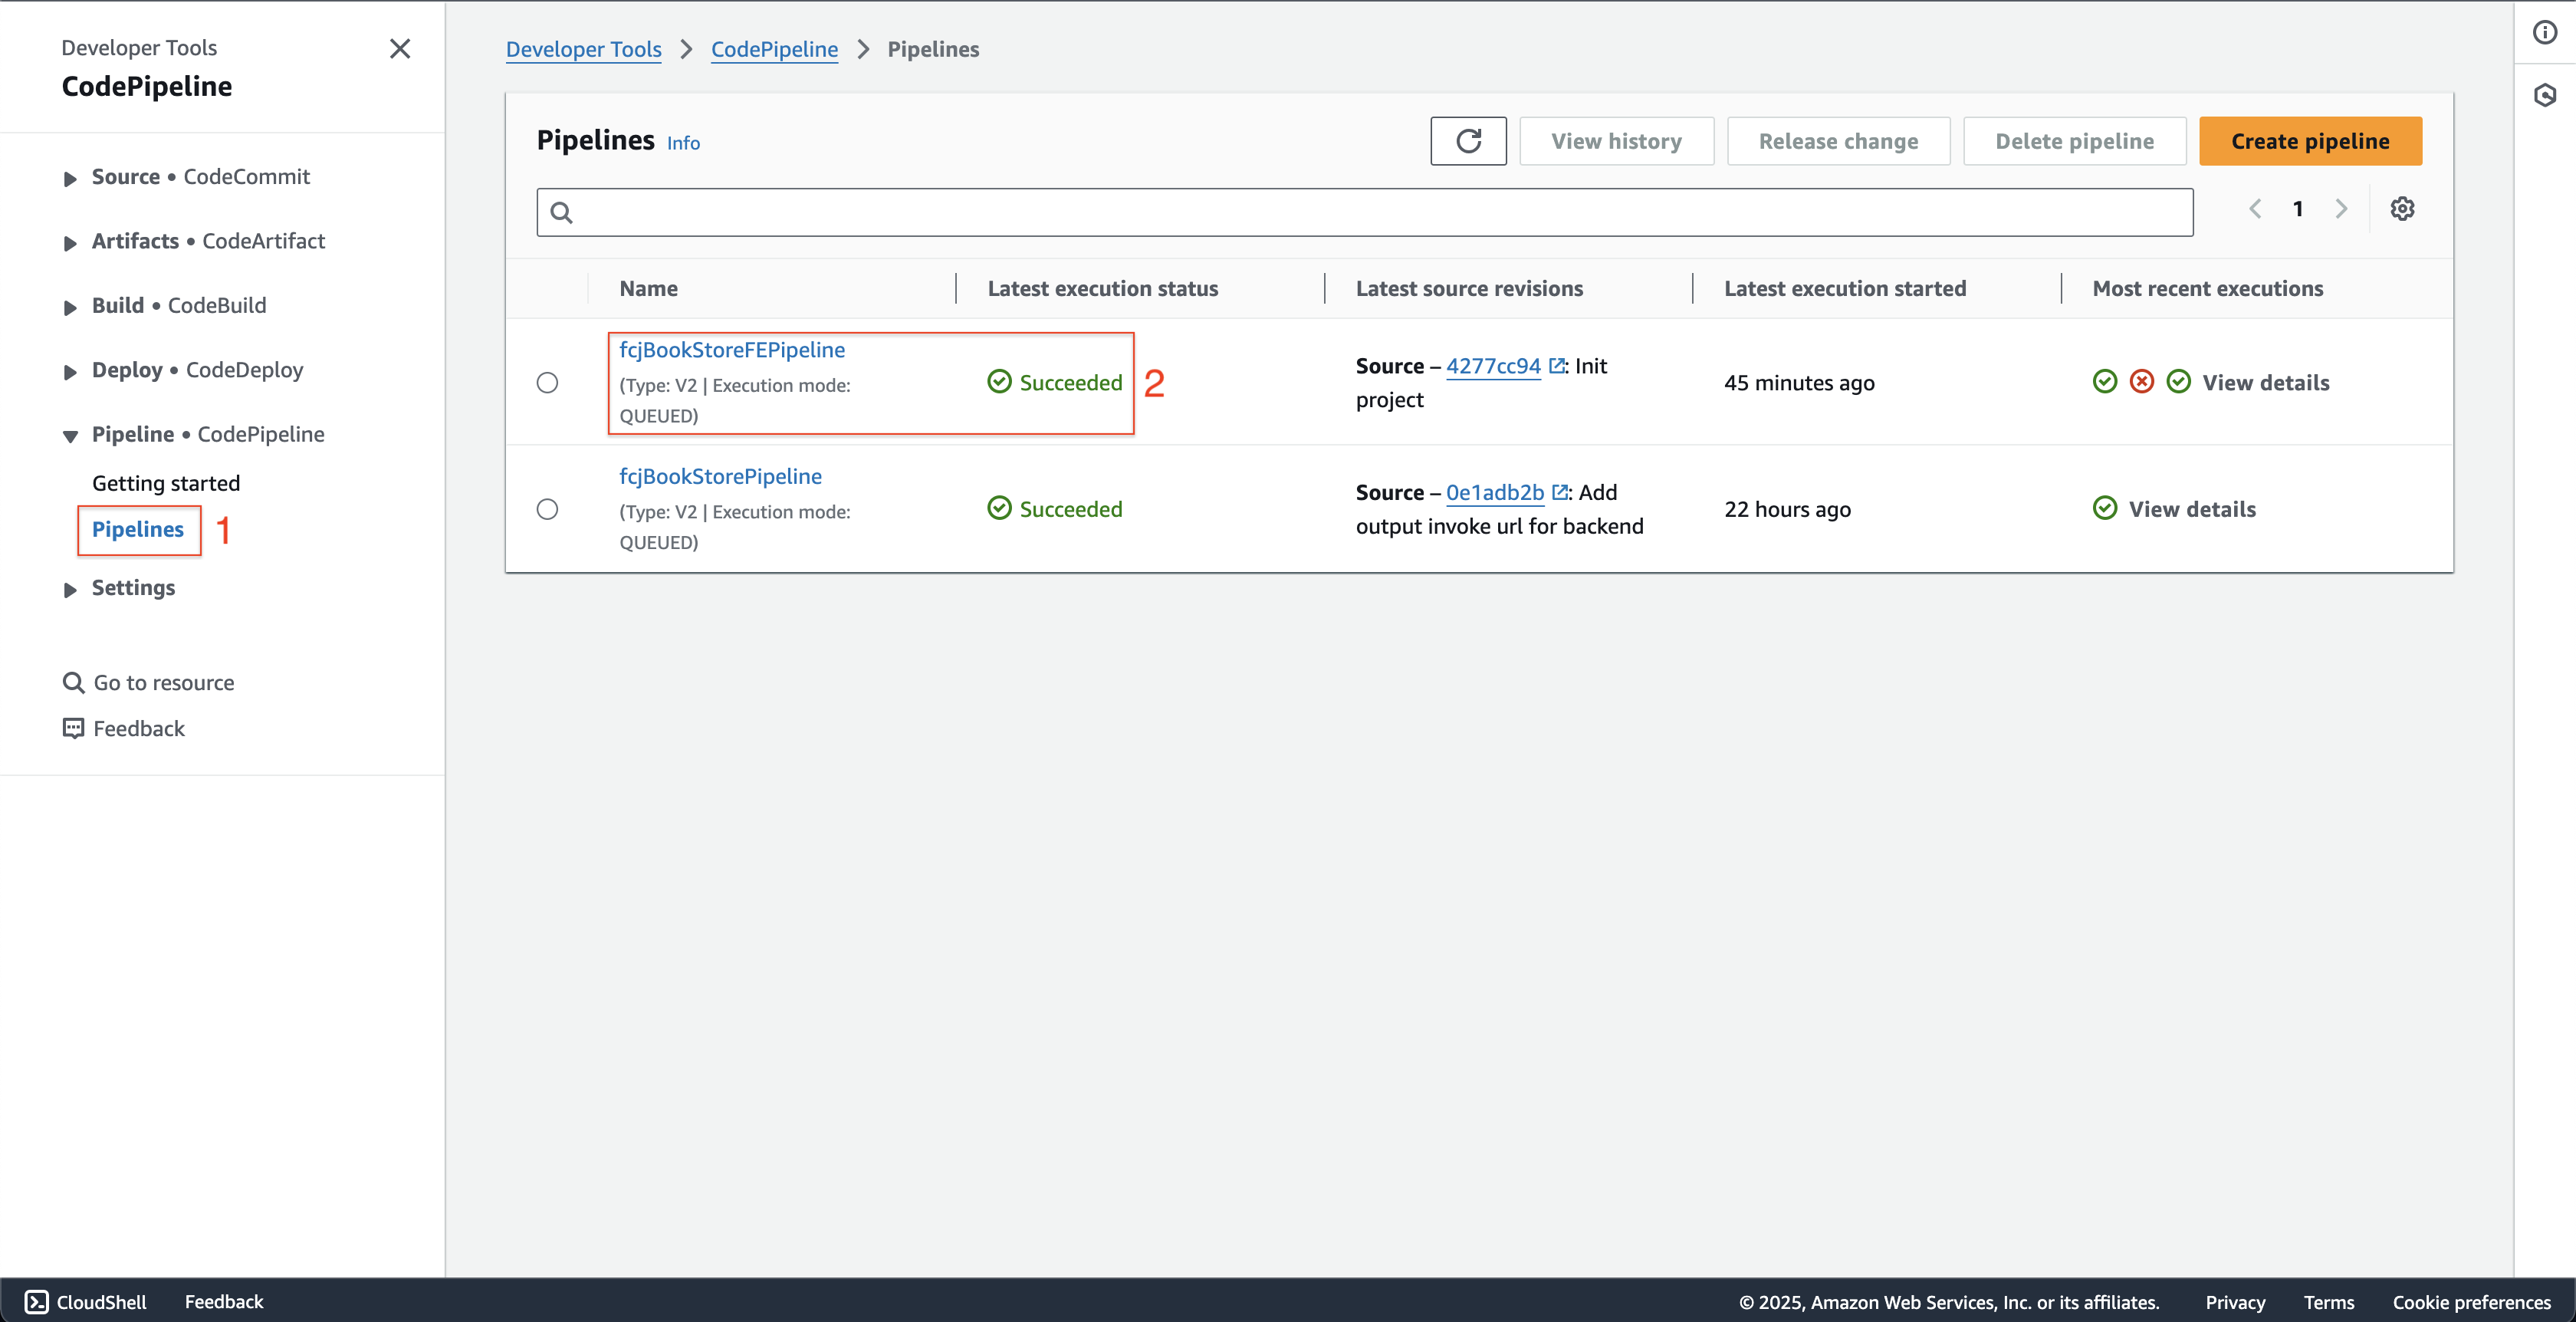
Open AWS CodePipeline console.
- Click Pipelines on the left menu.
- Check if the status of fcjBookStoreFEPipeline is Succeeded.
-
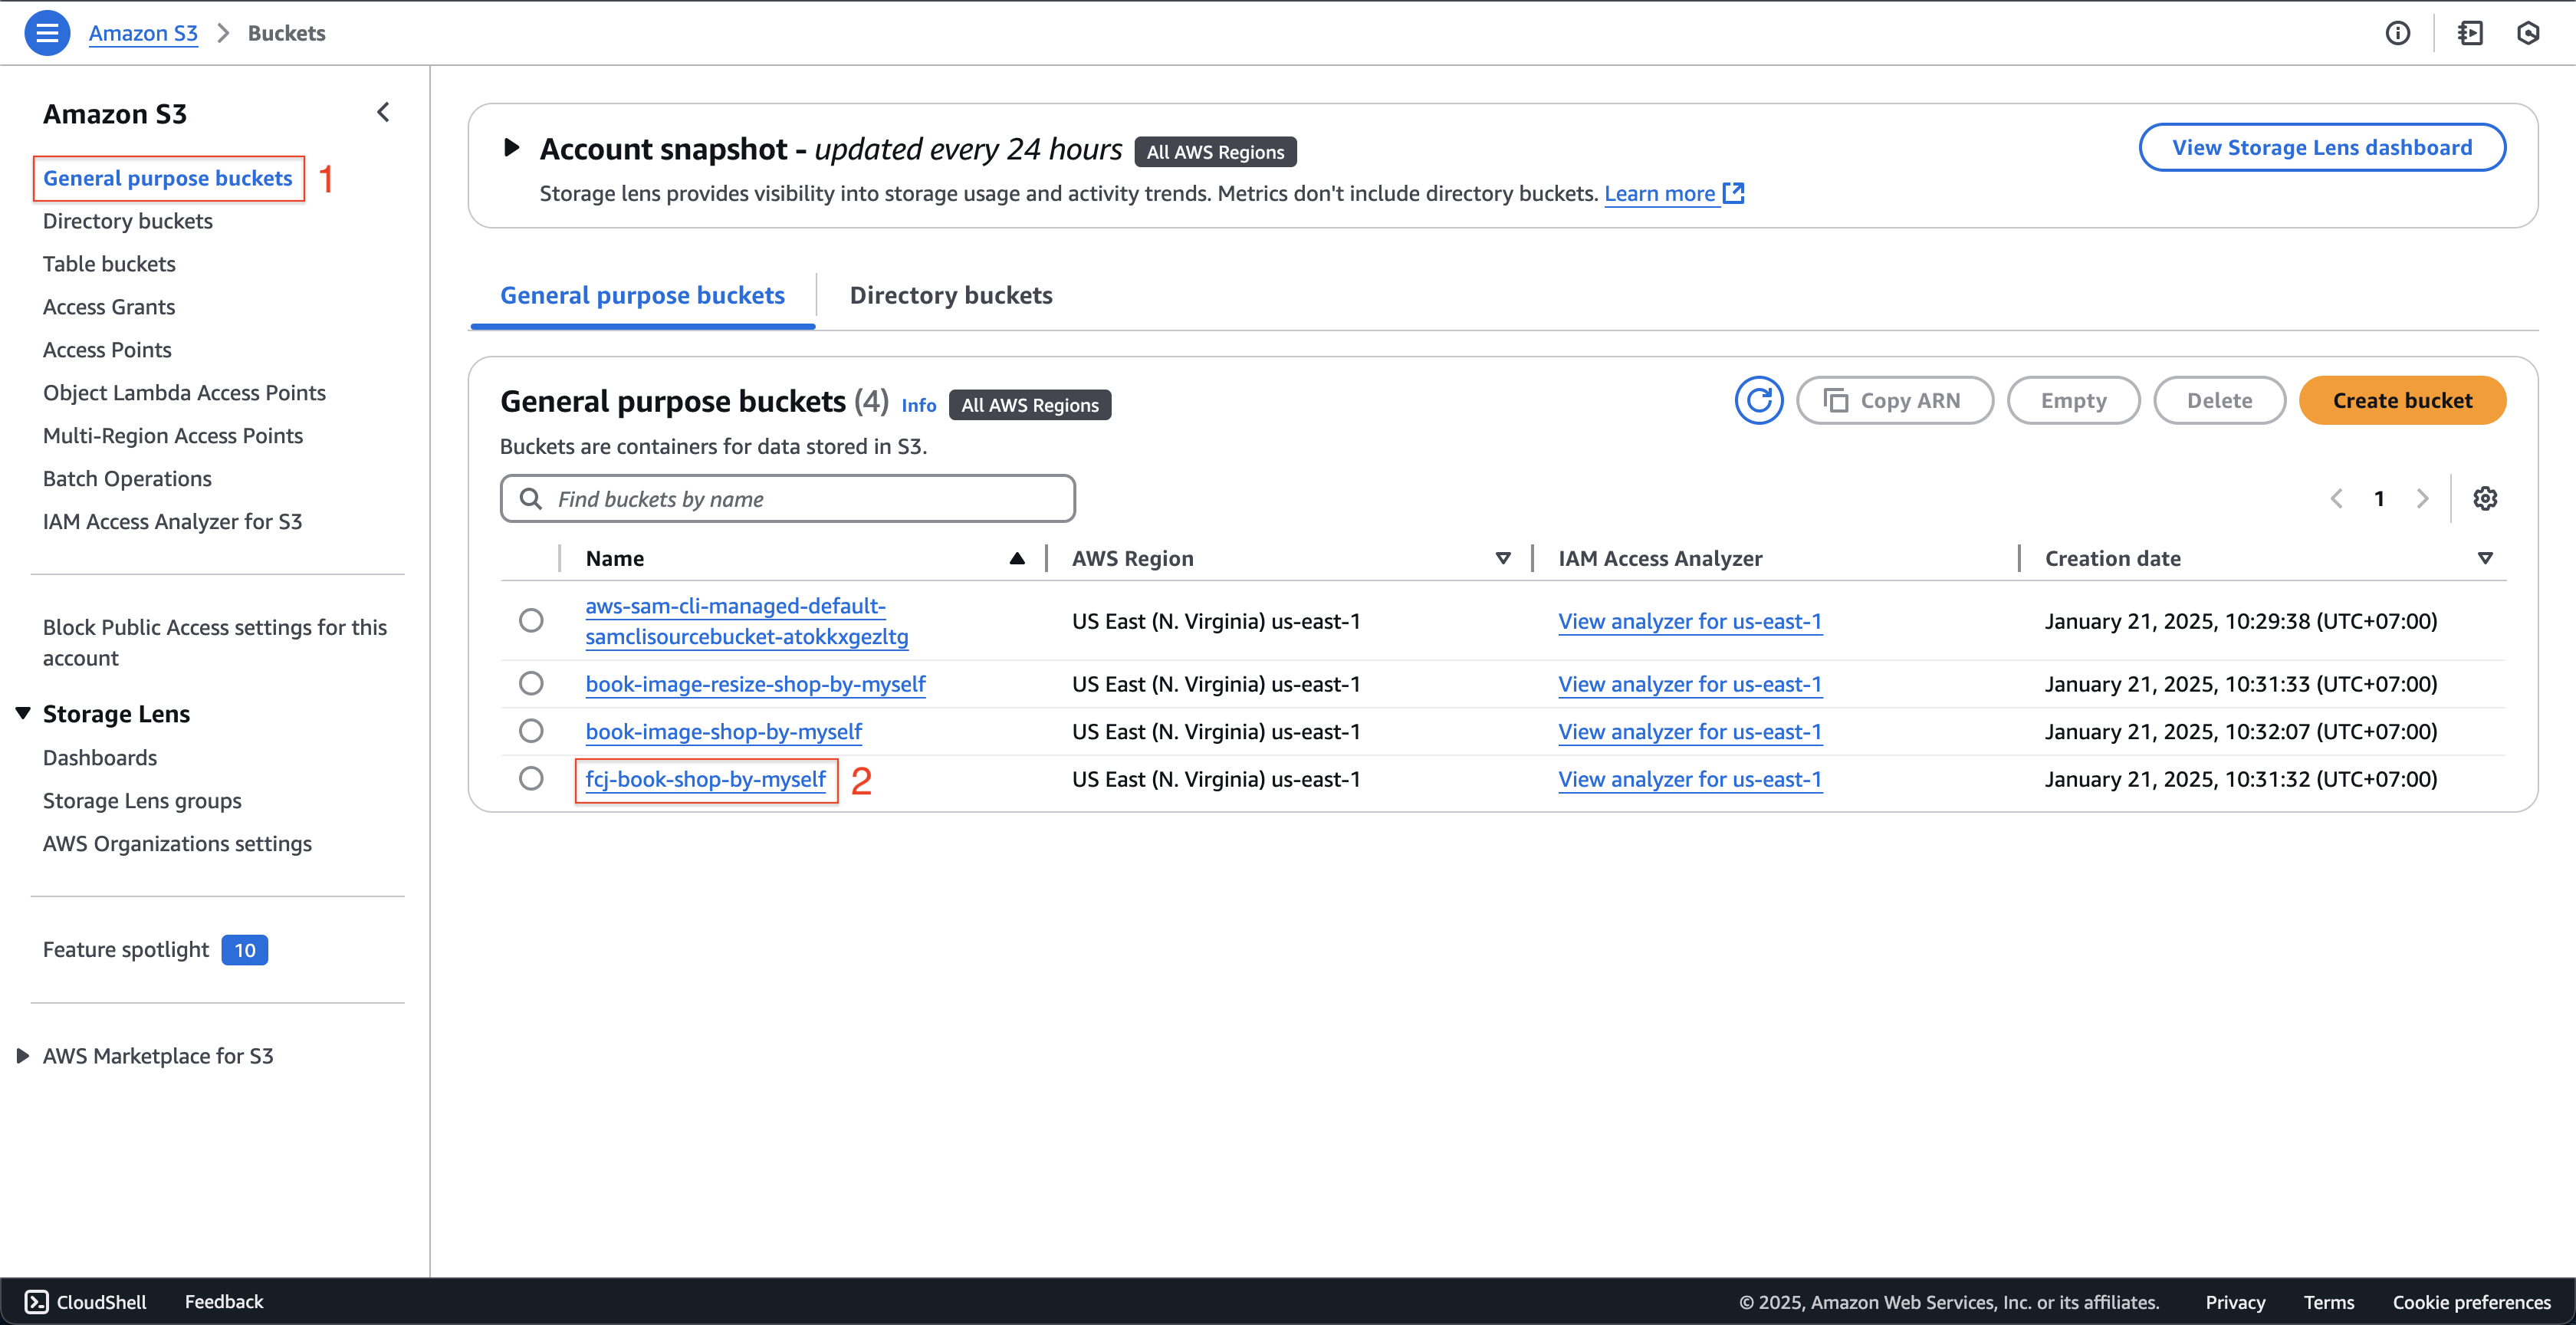
Open Amazon S3 console.
- Click General purpose buckets on the left menu.
- Choose fcj-book-shop-by-myself bucket.
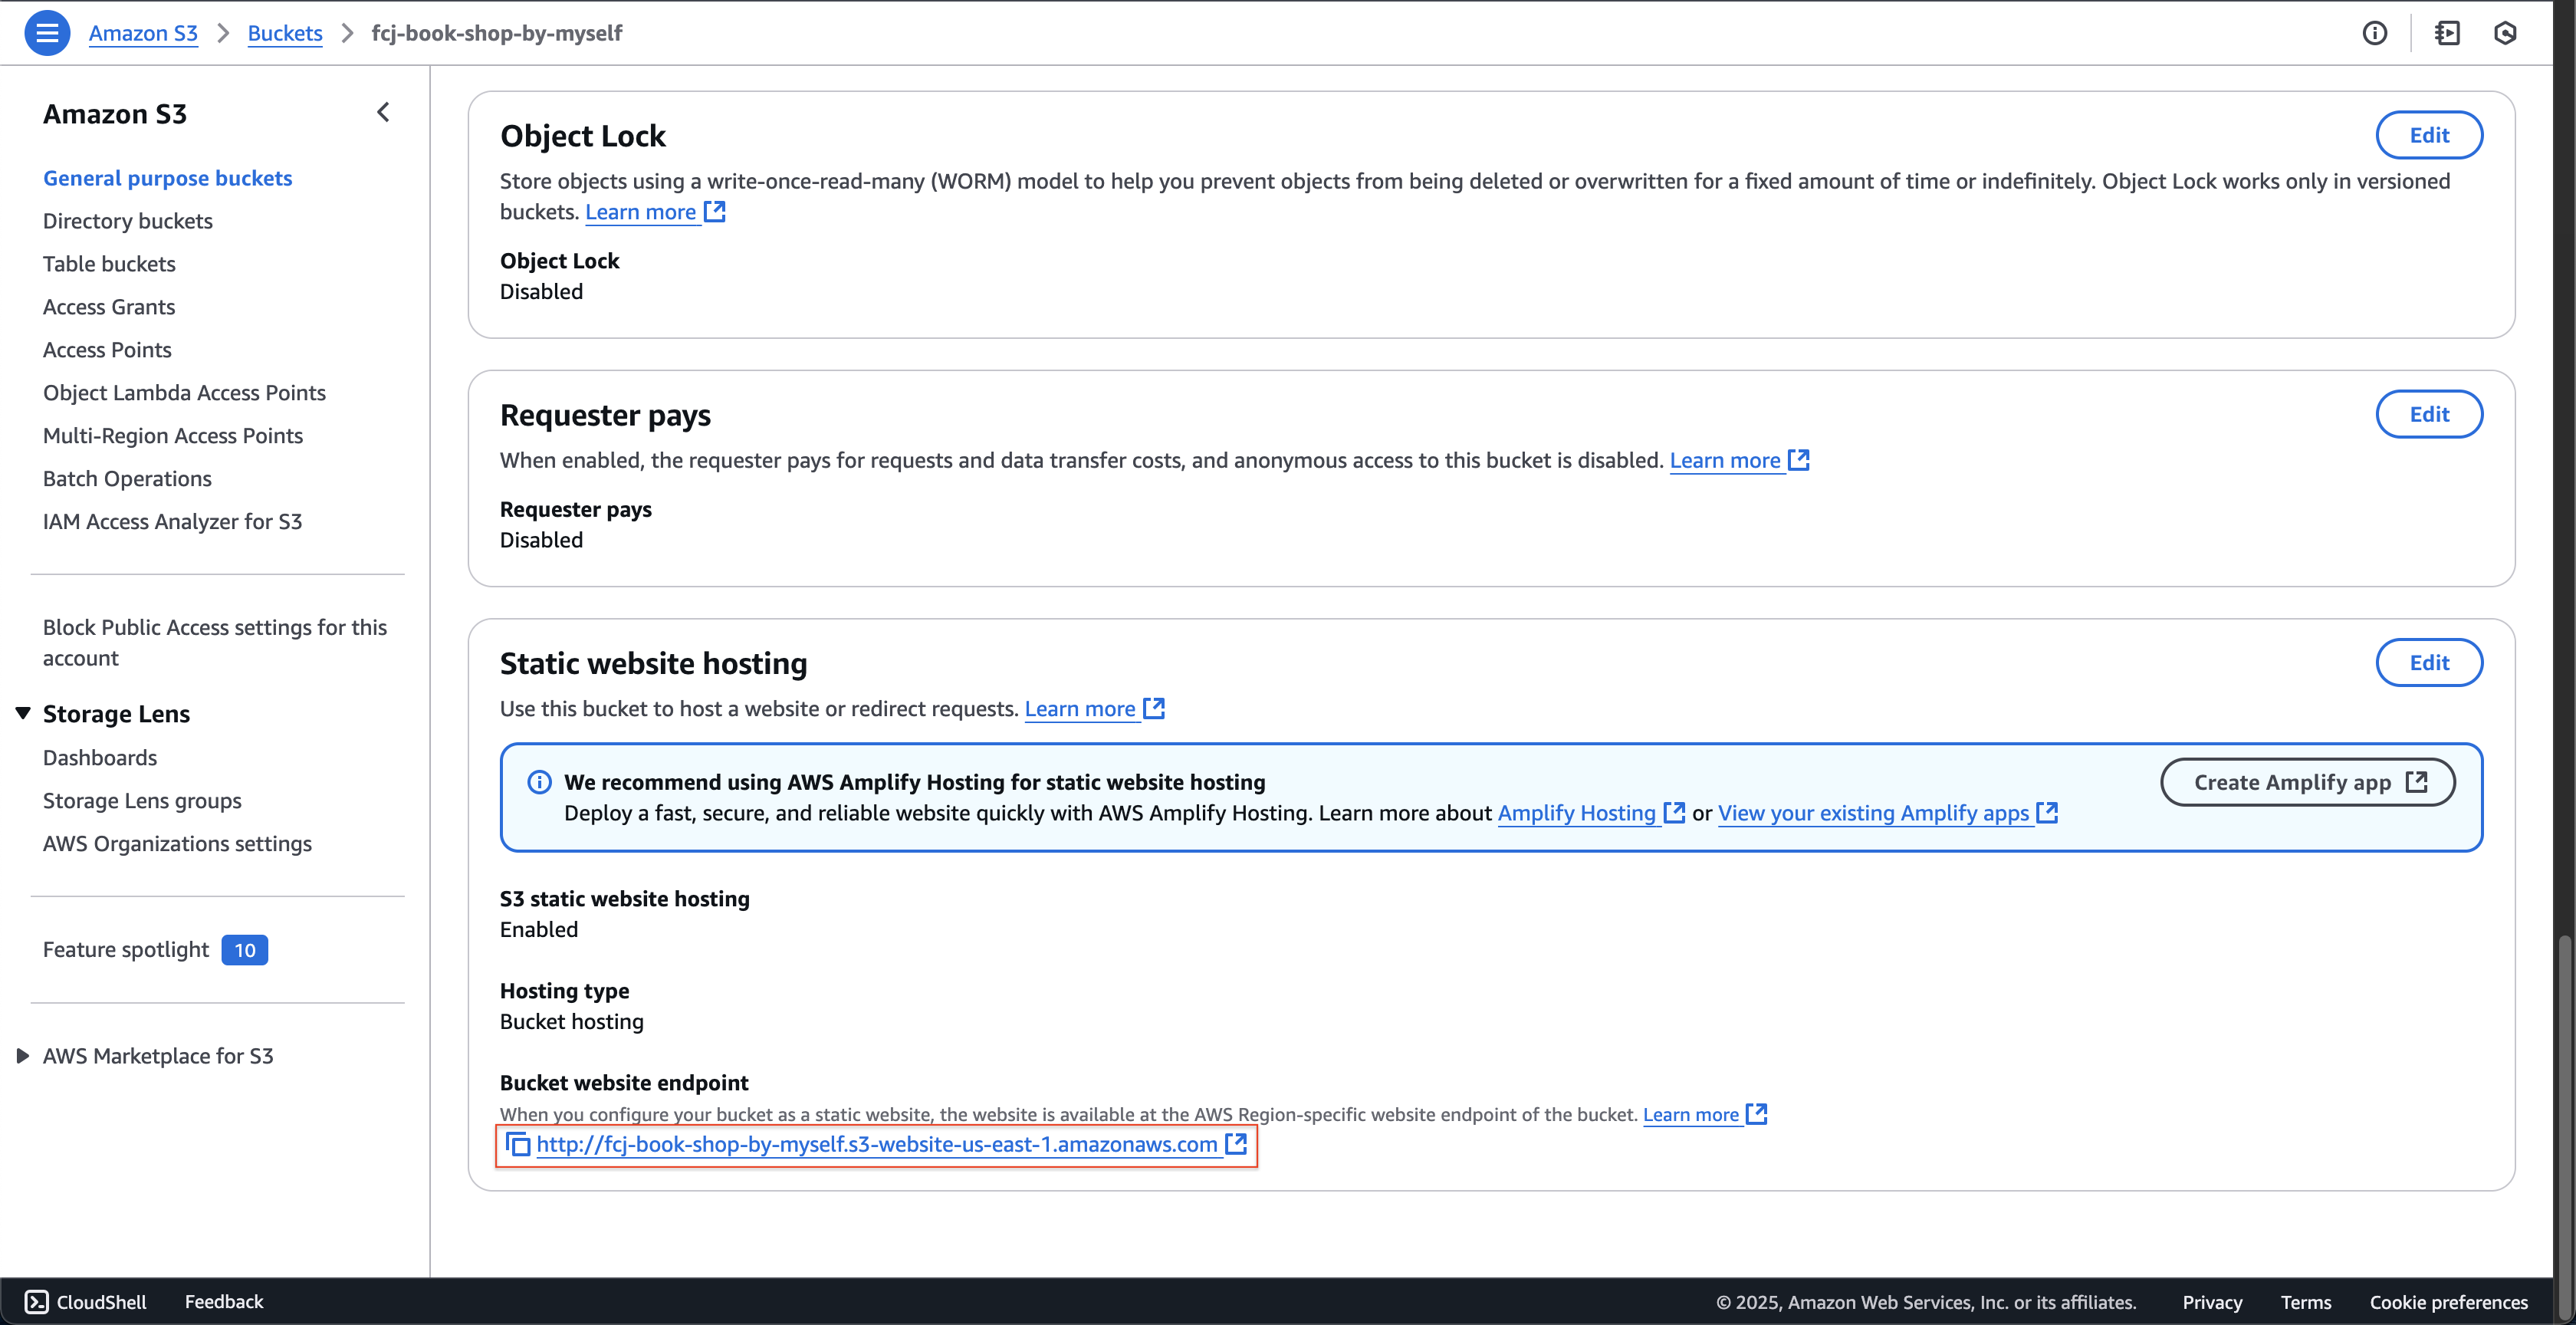
- At fcj-book-shop-by-myself page, scroll down and copy the Bucket website endpoint url.
-
Enter the copied link in a new tab in your web browser.
